"Sweet's" Coffee Crunch Cake-Famous Fridays

Yes, it's that day again!! Time for another round of Famous Fridays! If you're new to the site, Fridays are dedicated to chefs, cookbooks and recipes that deserve to be patted on the back, bowed down to and celebrated! Today, I'm so excited to share one of my favorite new cookbooks with you, Sweet, by Valerie Gordon. If you like "sweet" things, you will swoon over this book!! It's filled with so many wonderful offerings that I was overwhelmed the first time I leafed through it--seriously, I wanted to make everything in the book all at the same time!! So to calm things down, I did the only sensible thing that could be done--I made the very first recipe in the book and as expected, it turned out fantastic. The only glitch is that it was so good that I now want to make everything else in the book even more!!

Valerie, is the Valerie of LA's Valerie Confections (co-owned with her partner Stan), the award-winning, amazing chocolatier shop that sells not only the most amazing toffee and chocolates but an array of gorgeous baked goods as well. The next time I'm in LA, I will definitely be making a stop there!!
There's an interesting story behind the Coffee Crunch Cake too. Apparently, Blum's Bakery in LA was well known for this festive cake and when it went out of business in the late 1970's, the recipe was lost forever. Or so many sad customers thought. Along came Valerie (a Blum bakery fan herself) who researched and tested and finally recreated the cake to the delight of former Blum Bakery customers and now regularly makes it in her bakery and has generously printed the recipe in her book so that all of us can recreate it in our own homes.
The cake is not hard to make, nor is the coffee crunch, but you need to plan it out and make it in stages. You start by making the coffee crunch which you can conveniently make even up to 2 weeks ahead of time. Basically you boil a mixture of sugar, corn syrup and brewed coffee together and then add baking soda so that the whole thing froths up wildly before you set it up in a sheet pan to become the addictive coffee-flavored honeycomb crunch that gives this cake its name and amazing texture!


Then you whip up the cake batter which is filled with all sorts of good things like lemon rind, egg yolks, sugar and whipped egg whites, which help make it extremely flavorful and somehow rich yet light and airy at the same time.


Truly, this cake is so wonderful, it almost doesn't need any accoutrements but how can you say no to coffee enhanced whipped cream and subtly coffee-flavored crunchy melt-in-your-mouth candy?!
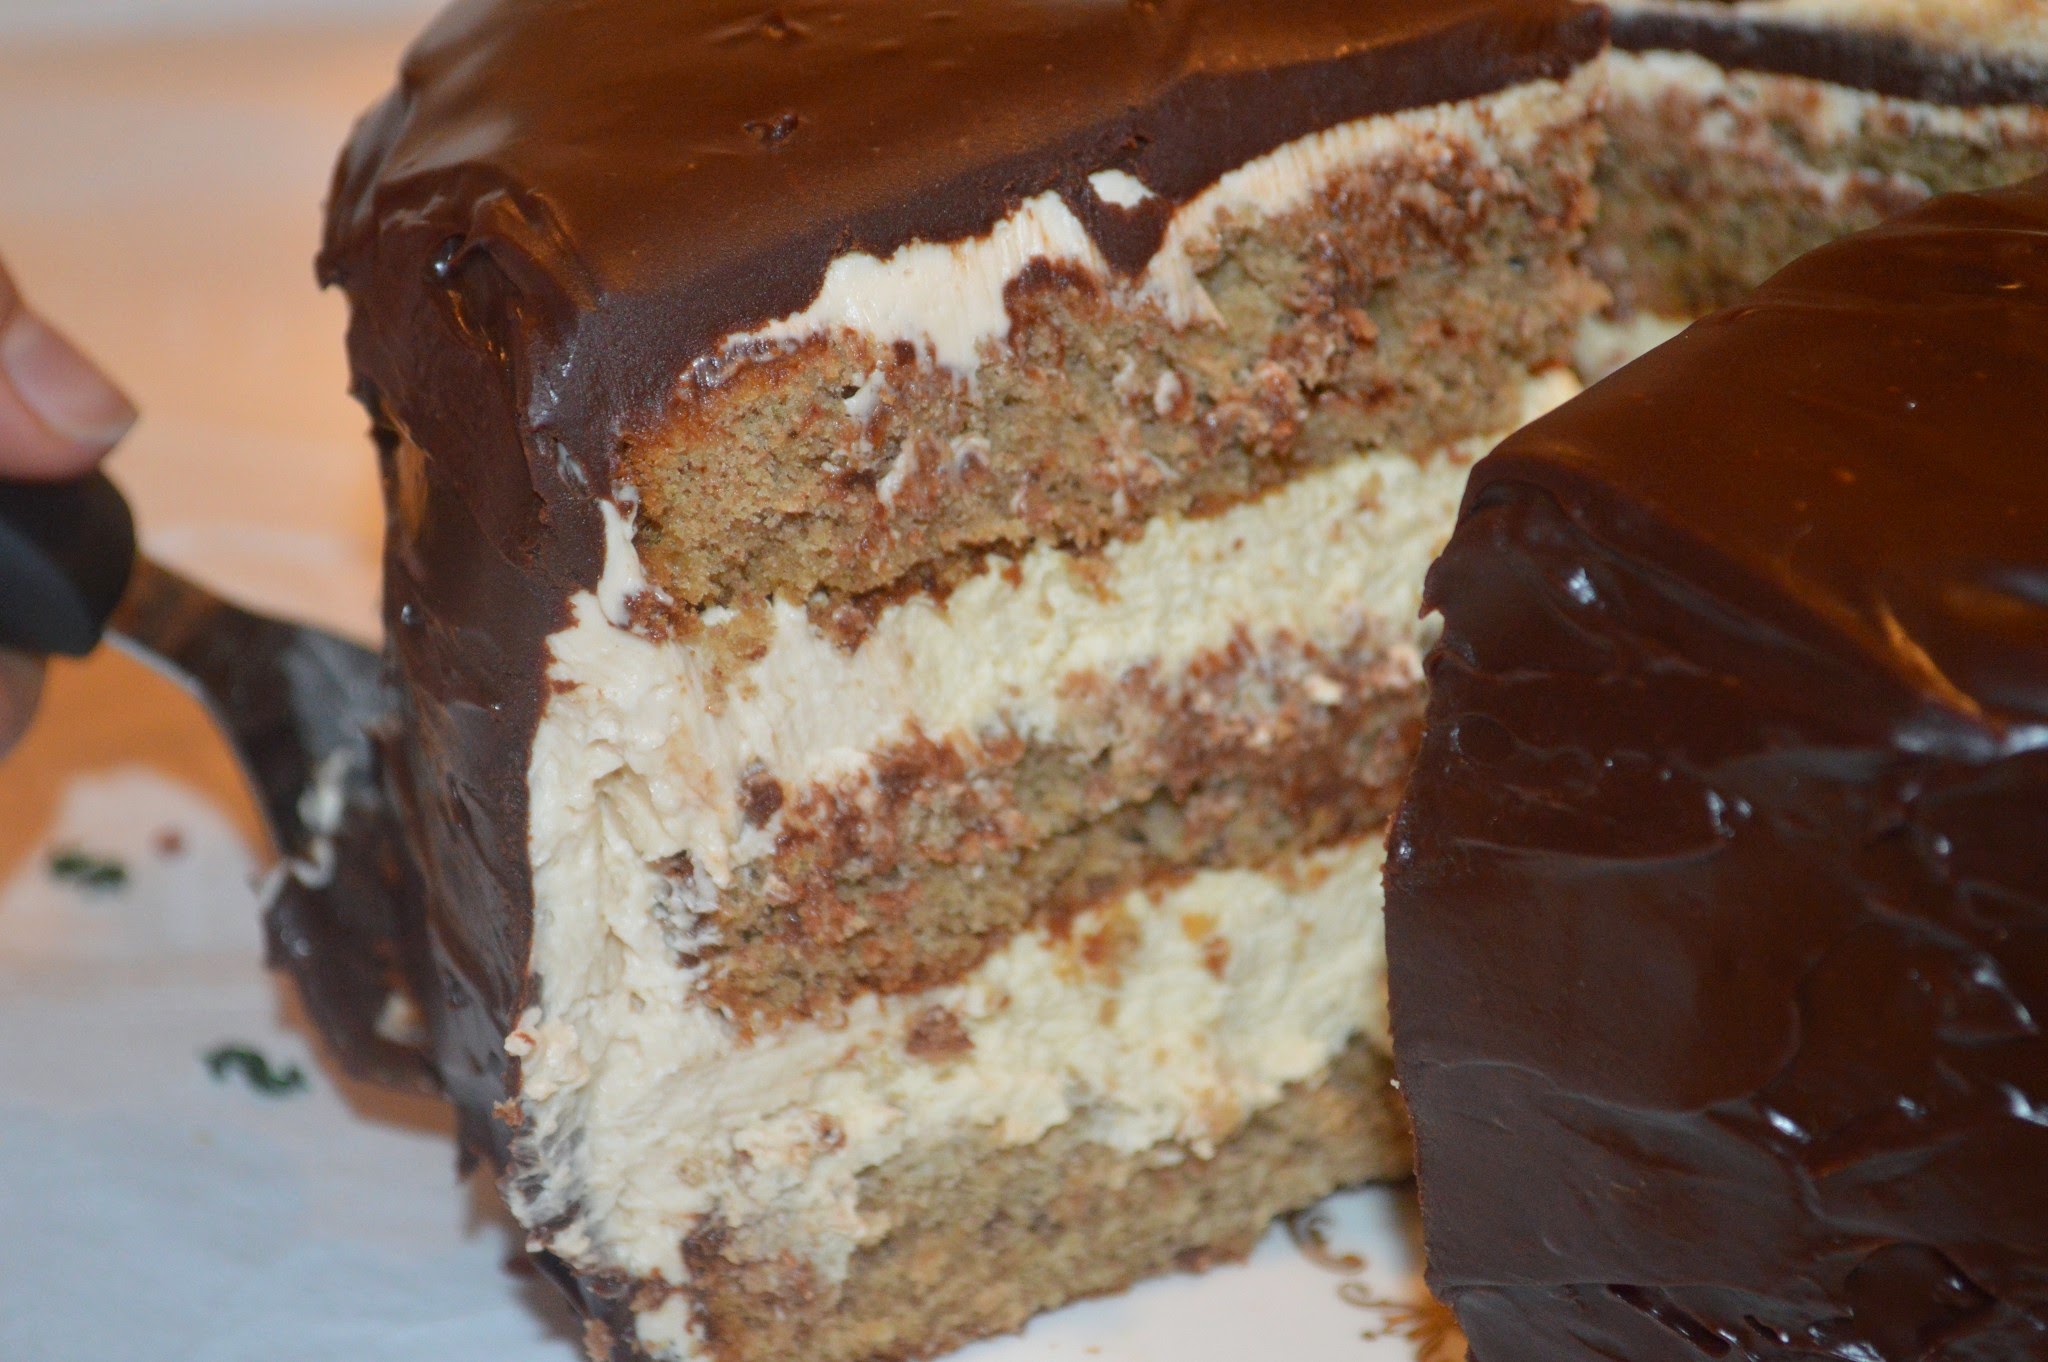
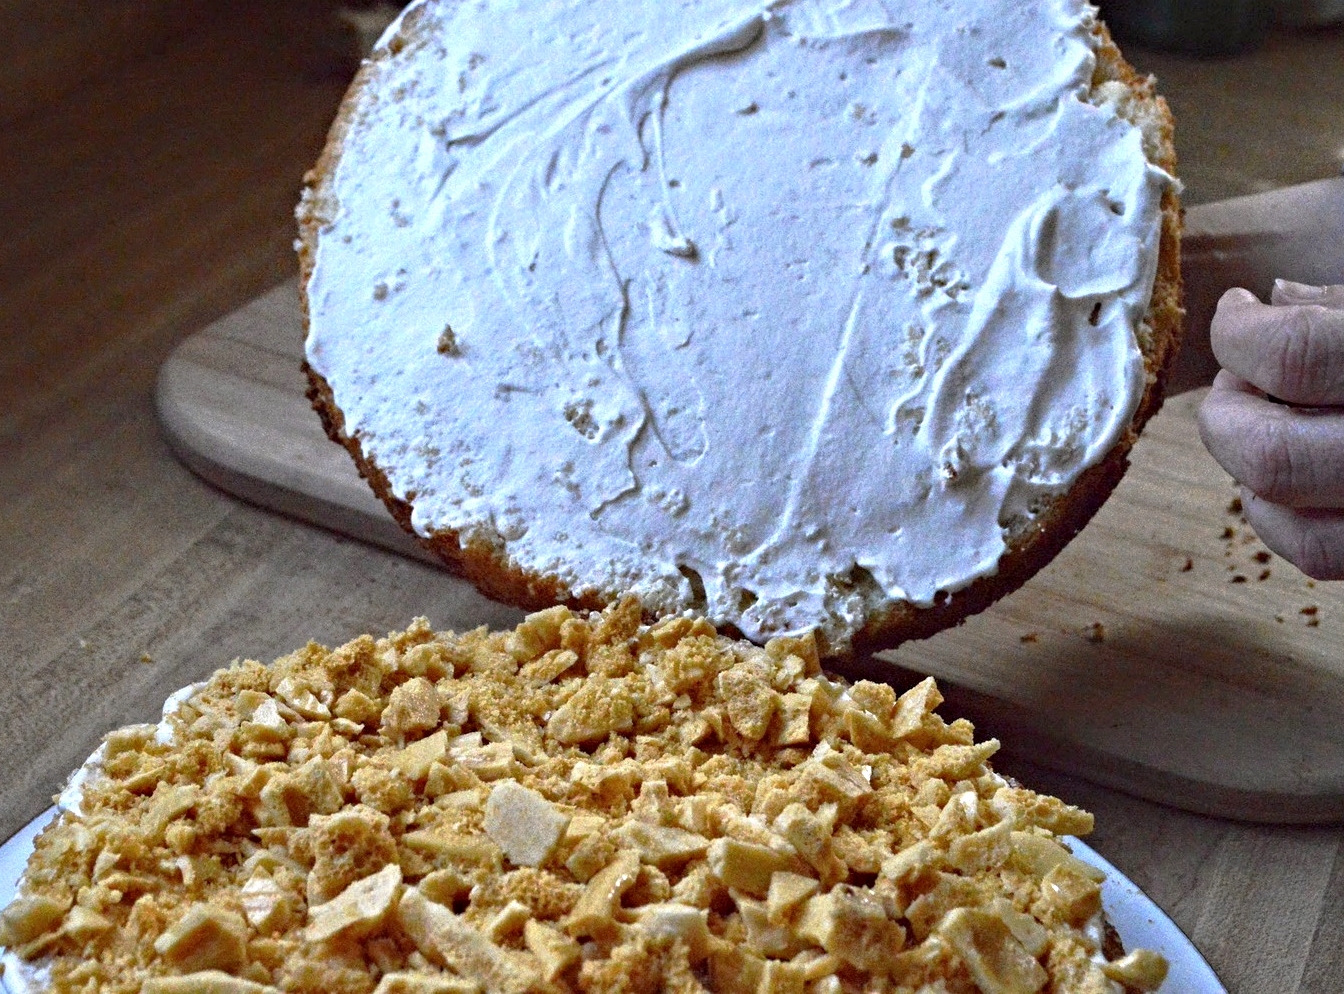
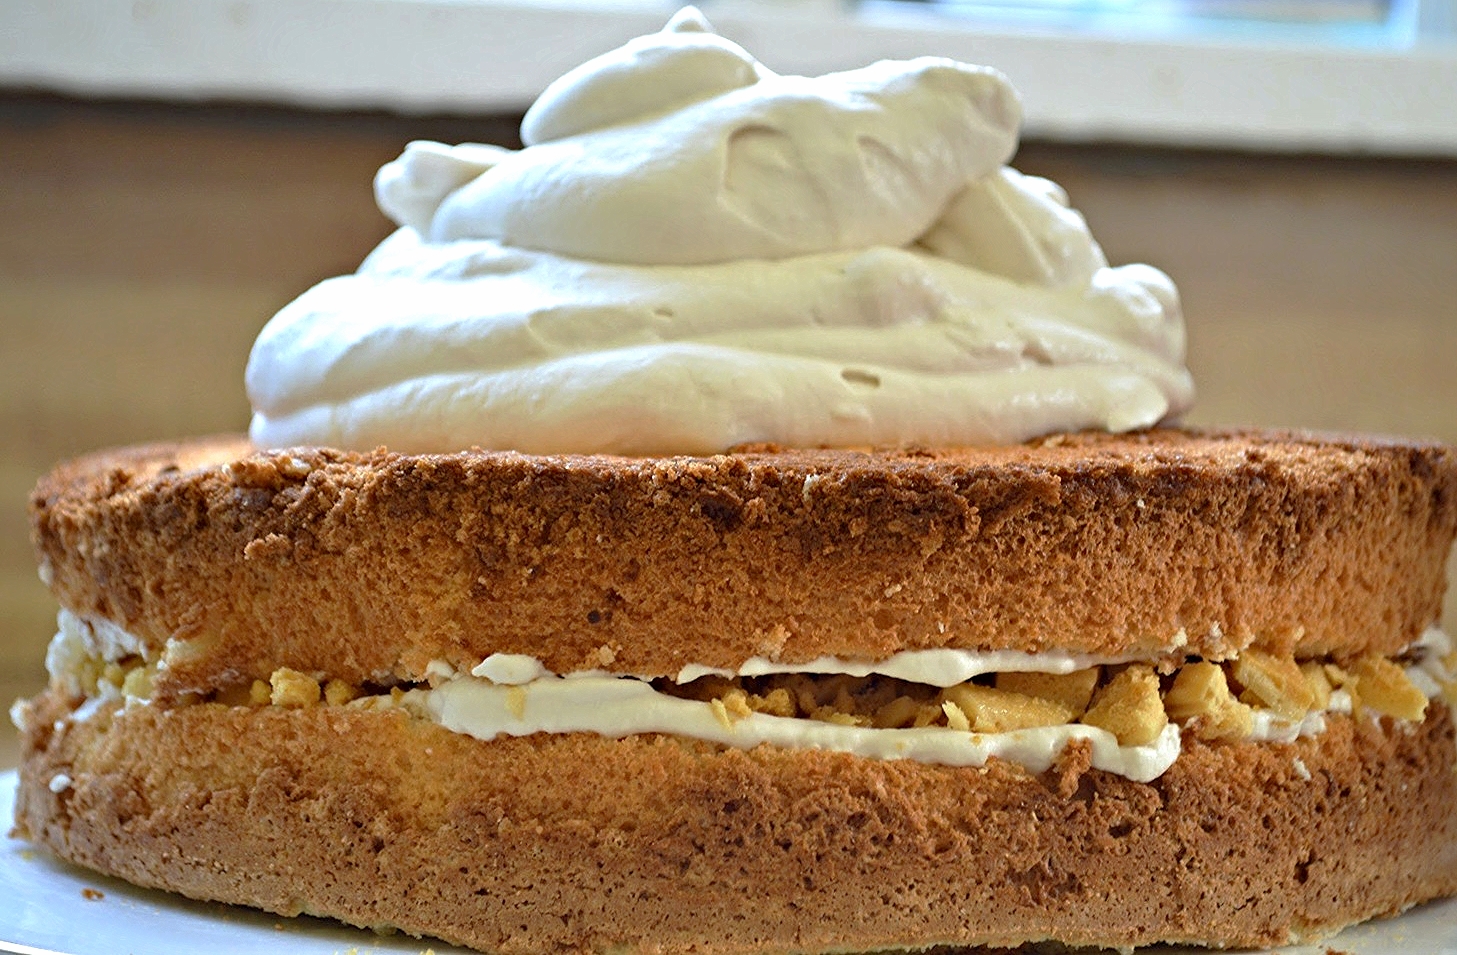
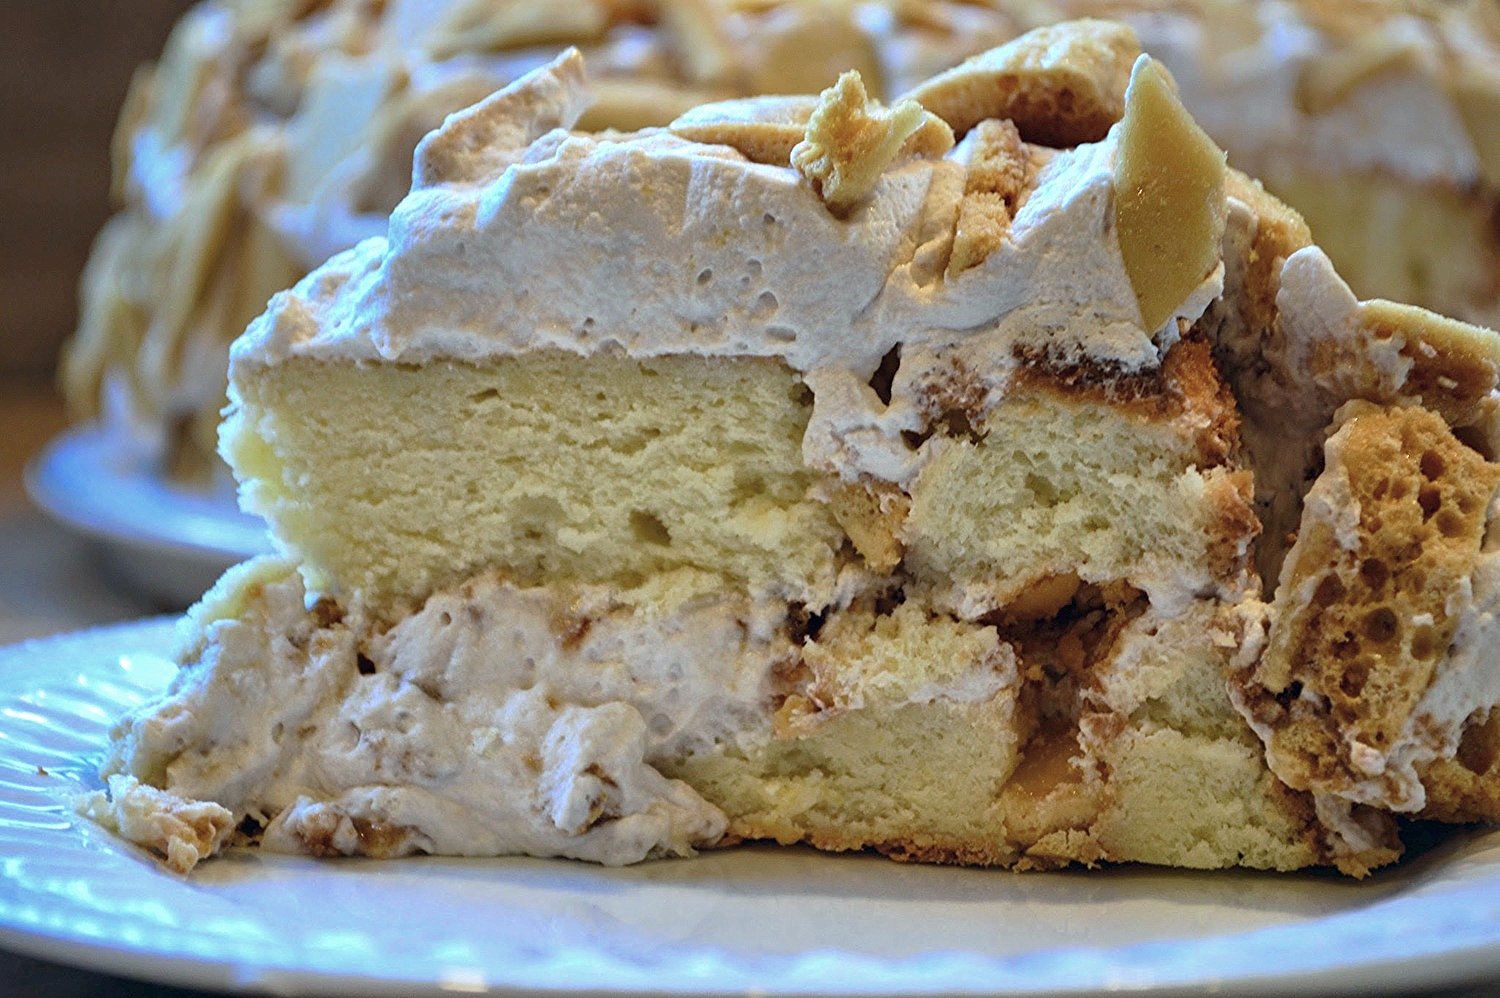
Once the cake has fully baked and chilled, you cut it in half horizontally and cover each half with some of the coffee whipped cream.

Then you top one of the halves with some of the crunch and cover with the other cake half--
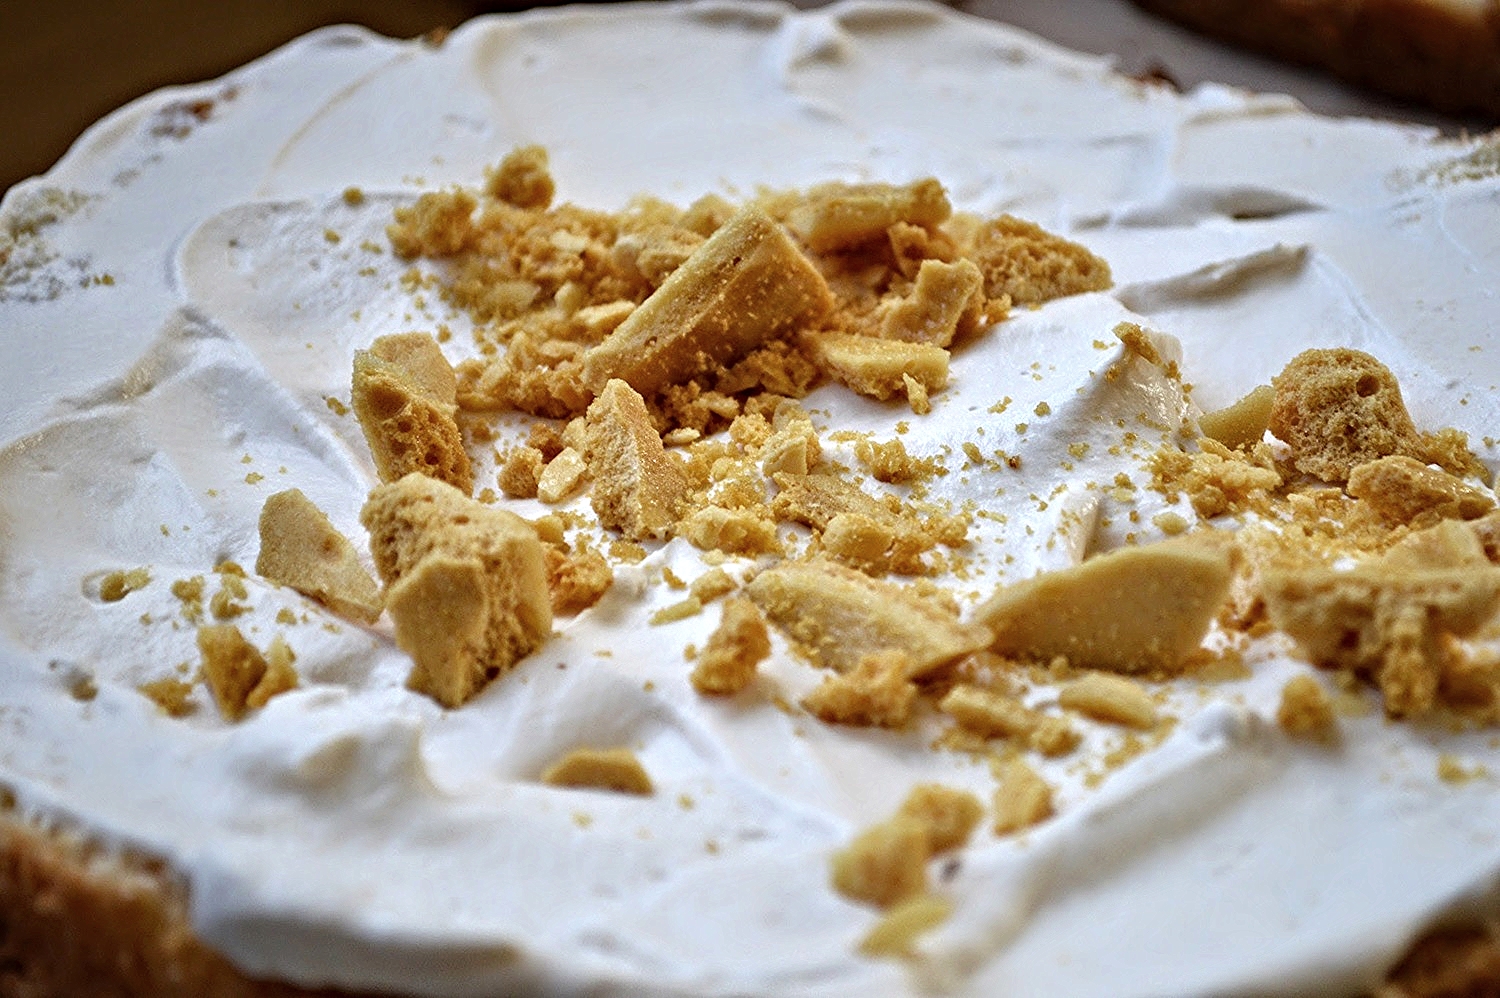
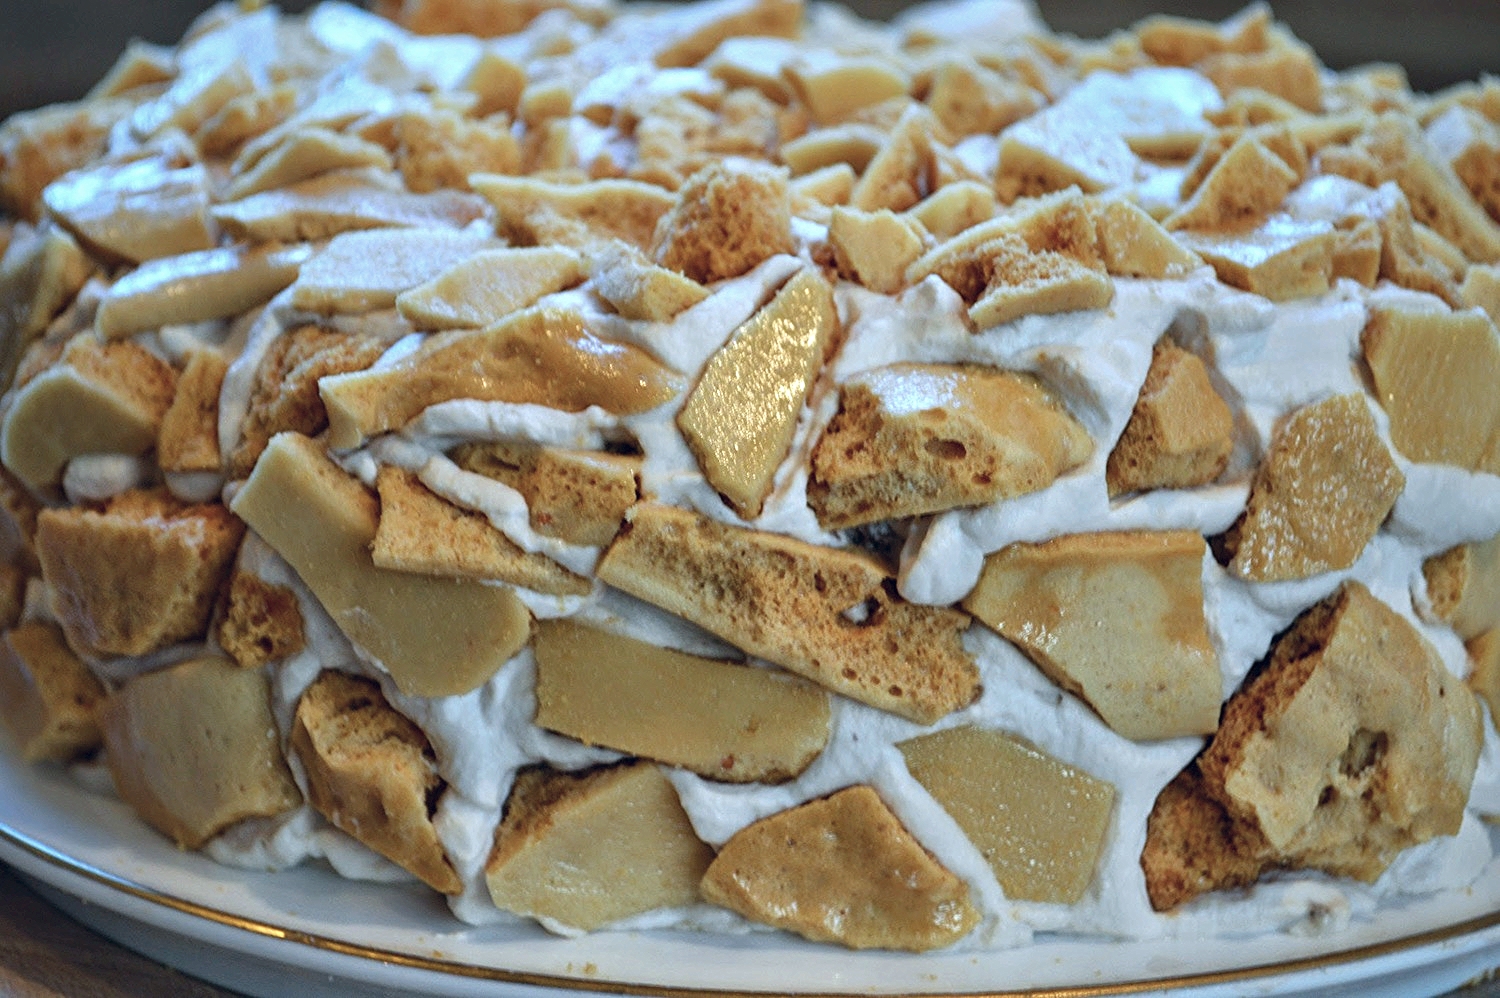
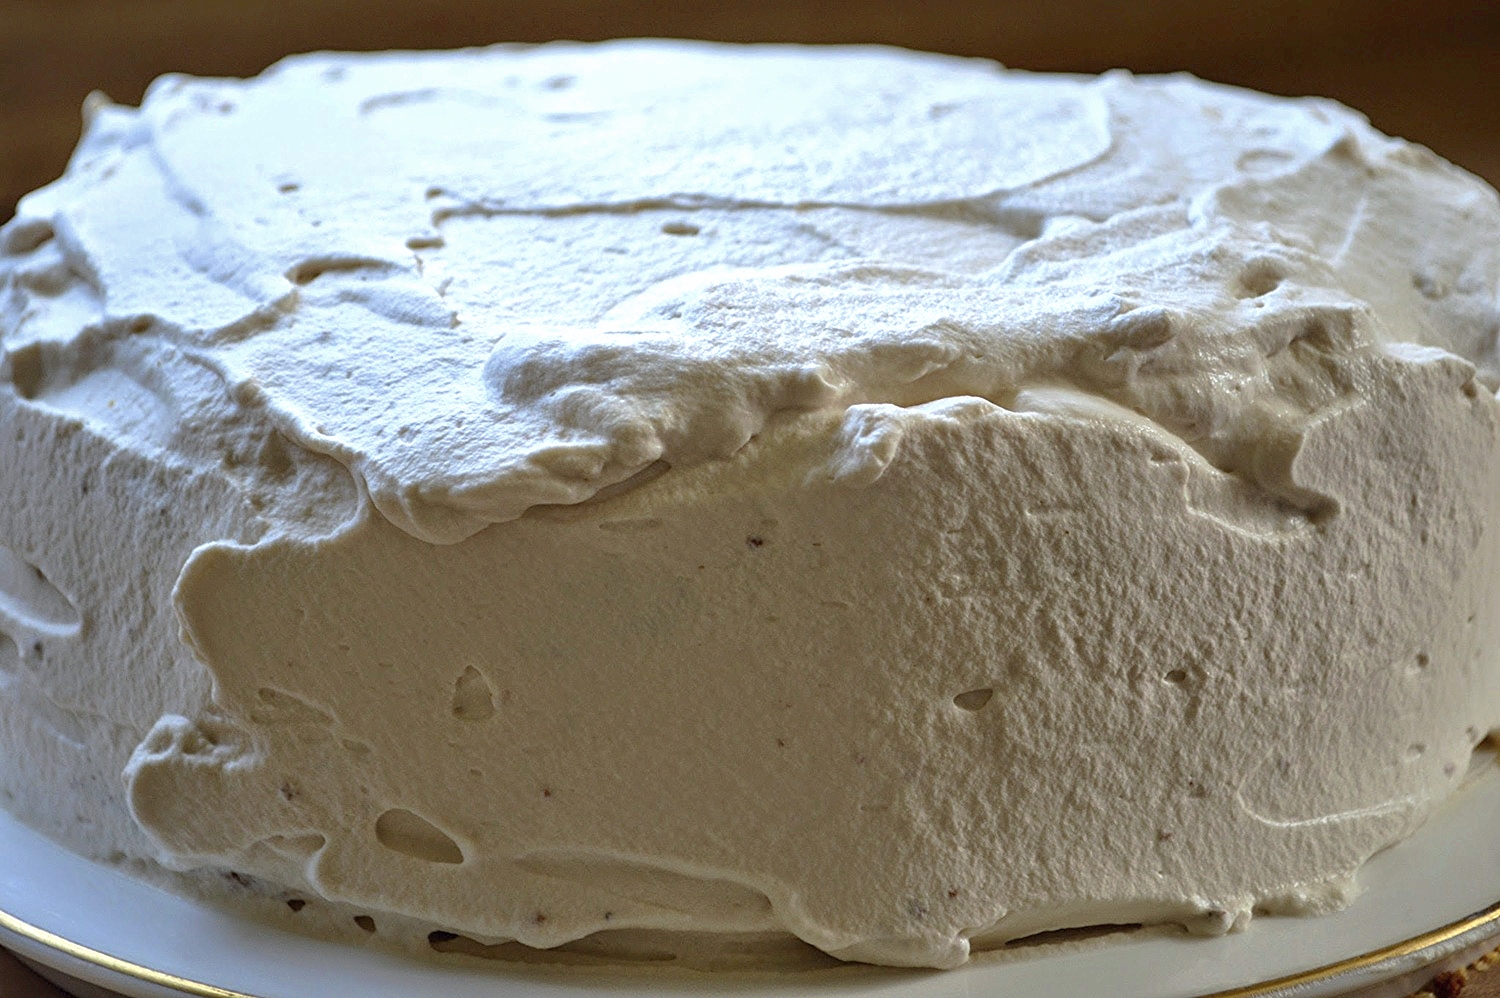
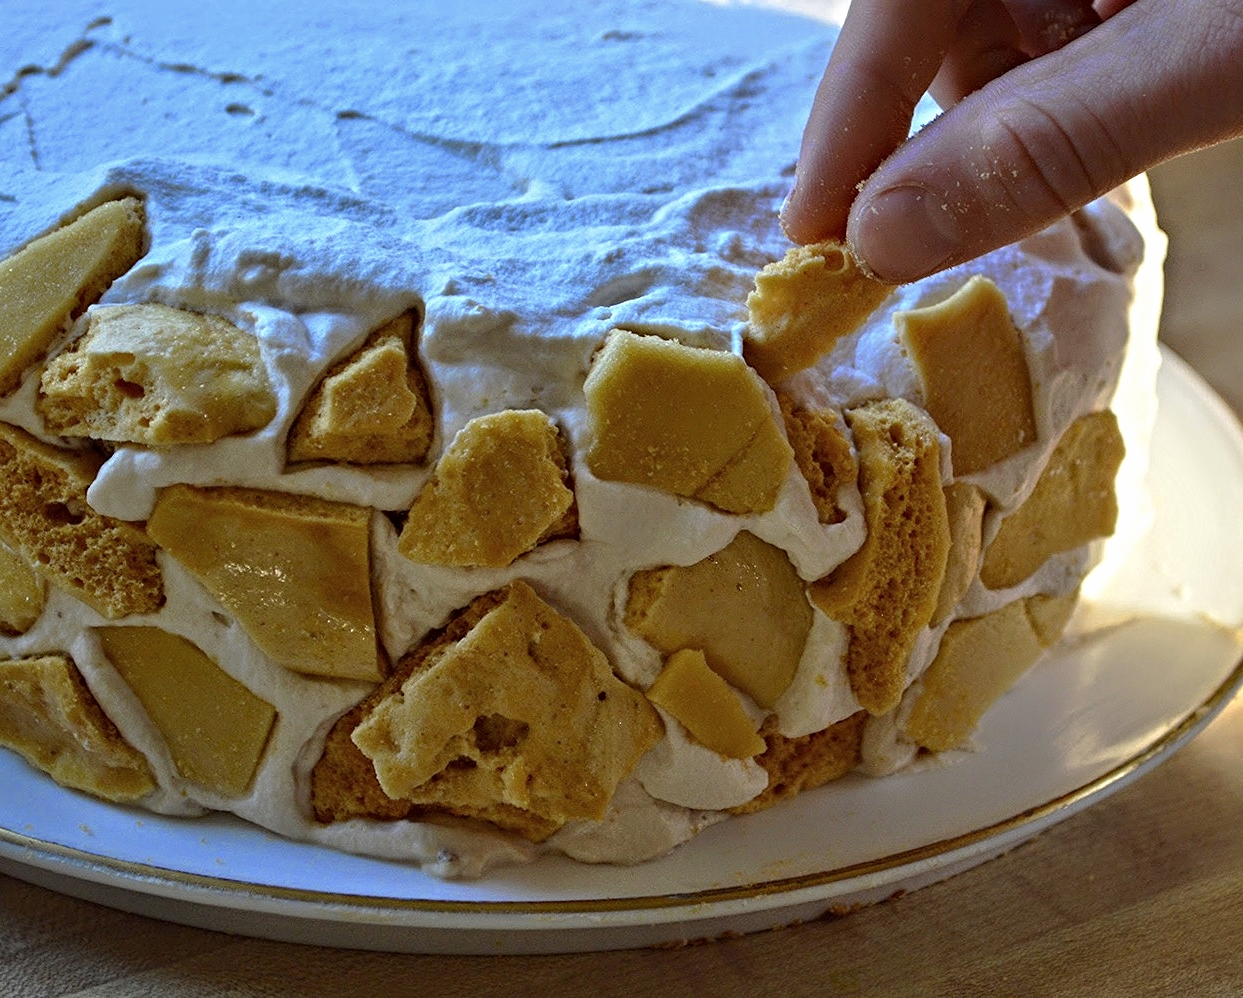
Now you slather on the rest of the whipped cream and chill it again, waiting till right before serving to place the outer layer of crunchies on the cake to prevent them from getting soggy when they come into contact with the whipped cream. After all it is coffee crunch cake!
Putting the outer layer on crunch on is a bit like doing a puzzle--my daughter had fun with this!

The cake is light and lemony and each bite is an amazing flavor and texture combination with the pillowy softness of the coffee whipped cream, providing the perfect foil to the sugary bitter/crispness of the coffee crunch, all sandwiched together by the lemony angel-food like molst cake. Perfection!! This is truly a special occasion dessert, figure out what you have to celebrate and treat yourself to Sweet this weekend!
"Sweet's" Coffee Crunch Cake-Famous Fridays
Serves 10-12
Prep Time for Coffee Crunch: 15 minutes (plus at least 30 minutes to harden); Prep Time for Cake: 20 minutes; Bake Time: About 1 hour; Chill Time for Cake: At least 3-4 hours and preferably overnight; Assembly Time: 25 minutes
You will need a candy thermometer for this. Also, you can make this all in one day, but I highly recommend making the crunch and cake at least one day ahead and then assembling it all shortly before you're ready to serve it.
Ingredients
For the Coffee Crunch
- 2 1/4 cups sugar
- 1/3 cup strong brewed coffee
- 1/3 cup light corn syrup
- 1 1/2 tablespoons baking soda
For the Cake
- 1 1/4 cups unbleached all-purpose flour
- 1 1/2 cups sugar
- 1/2 teaspoon kosher salt
- 5 large eggs, separated, plus 2 large egg whites
- 2 tablespoons water
- 1/4 cup canola oil
- 1 teaspoon vanilla extract
- 1 teaspoon cream of tartar
- 1 teaspoon lemon zest
- 1 tablespoon lemon juice
For the Coffee Whipped Cream
- 2 1/2 cups cold heavy cream
- 2 1/2 tablespoons sugar
- 2 1/2 teaspoons vanilla extract
- 2 teaspoons instant coffee
The Recipe
1. To make the coffee crunch: Heavily coat a large rimmed baking sheet with nonstick cooking spray. Measure the baking soda out and set it near the stove, along with a large whisk.
2. Put the sugar, coffee and corn syrup in a 3 or 4 quart heavy-bottomed pot and cook over medium-high heat, stirring occasionally with a heatproof spoon or spatula for about 10 minutes or until the mixture reaches 270ºF on a candy thermometer. Then increase the heat to high and stir the mixture constantly until the temperature reaches 305ºF. Remove from the heat and quickly whisk the baking soda into the mixture; it will expand and bubble up right away. As soon as you can, pour the mixture into the prepared baking sheet and smooth it out immediately. Now let the crunch cool and set without touching it for about an hour.
3. When the crunch is completely hardened, use a large knife and chop it into quarter-sized pieces (it's ok if some of it crumbles into smaller pieces and crumbs) and store it in an airtight container at room temperature for up to 2 weeks.
4. To make the cake: Make sure the oven rack is in the center of the oven and preheat to 350ºF. If you have a 9-inch cake pan with a removable bottom spray it with nonstick baking spray, otherwise, use a 9-inch springform pan (that's what I did). Also remember if you are using a dark coated pan, reduce the oven temperature by 25 degrees. Set the prepared pan aside.
5. In a medium bowl, sift together the flour, 3/4 cup of the sugar and the salt. Set aside.
6. If you have a handheld mixer and a stand mixer, place the egg yolks and 1/4 cup of the sugar into a large bowl and use the handheld mixer--that way you won't have to wash out beaters and bowls. If you only have one mixer, no problem, you will just have to wash the beaters when you're done with this step. In any case, beat the yolks and sugar on medium speed for about 4 minutes, until they are thick and pale yellow. Slowly add the water, oil and vanilla and mix well. If you only have a stand mixer, you will have to transfer the mixture to another large bowl and wash and dry the beater and bowl. If using a handheld mixer and you don't have a stand mixer, wash the beaters. If you're lucky enough to have both, simply proceed to the next step!!
7. Add the egg whites to the large bowl and use the whisk attachment if using a stand mixer. Beat until frothy. Add the cream of tartar and continue beating until there are soft peaks. Add the remaining 1/2 cup sugar and beat until there are stiff, glossy peaks. Add the lemon zest and juice and beat just for 15 seconds, until barely incorporated.
8. Using a rubber spatula, fold the yolk mixture into the egg whites. Gradually fold in the dry ingredients, about 1 cup at a time, making sure all of the flour mixture is incorporated from the bottom of the bowl.
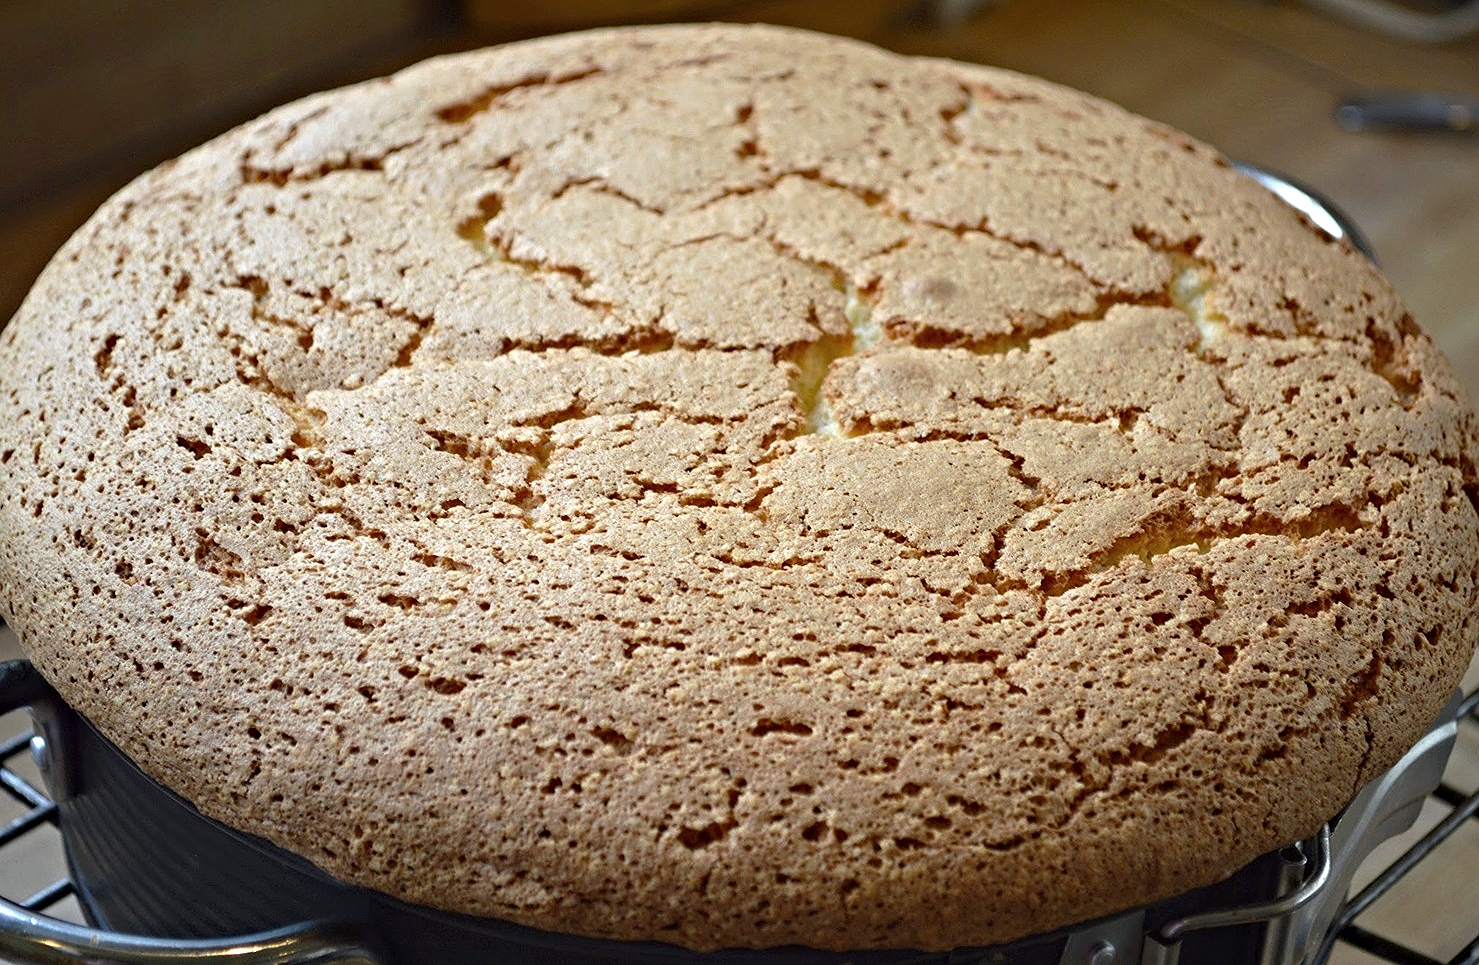
9. Pour the batter into the prepared pan, smooth the top and bake for about 55 minutes to 1 hour until a cake tester inserted into the center comes out clean and the top looks golden brown.
10. Let the cake cool completely on a cooling rack in the pan, at least 1 hour. Don't worry if the center looks a bit sunken. You can level it out later. If you've used a springform pan, simply remove the sides and carefully separate the bottom of the cake from the pan. Run a butter knife around the edges if the cake seems stuck to the sides. If you've used a round pan with a removable bottom, press the bottom of the pan up and out and then carefully remove the bottom of the pan. In either case, wrap the cake well in plastic wrap and refrigerate for several hours until firm enough to cut and optimally, overnight.
11. To make the coffee whipped cream: Chill the large bowl of the mixer and the whisk attachment or beaters in the freezer for 30 minutes. Pour the cream, sugar, vanilla and coffee into the bowl and beat until medium peaks form. Set aside.
12. Using a serrated knife, level the top of the cake if necessary and then carefully cut the cake in half horizontally. Remove the top half and place it cut side up on a plate or board. Place the bottom half on a cake plate. Cover each half with about 1/2 cup of the whipped cream. Sprinkle about 1 cup of the crunch on the bottom half evenly (try to use the smaller crumbs here if you have a lot of them) and top with the top half, cream side down, pressing gently to even the layers. Frost the rest of the cake and sides with the whipped cream. Cover carefully and refrigerate until almost ready to serve.
13. When ready to serve, cover the sides and top of the cake with the rest of the crunch. This cake is best eaten the day it's made, but the leftovers are pretty fantastic too! Store them in the refrigerator in an airtight container.
Enjoy!
Note: Recipe adapted from Sweet by Valerie Gordon. I used a springform pan instead of a 9-inch pan with a removable bottom and cut the coffee in the whipped cream slightly.