Sables

I totally don't mean to be bossy, but you have to make these! I say this, after just taking a bite out of one of these delectable creations and already picking up another one before I've even finished the first! They look sort of fancy, but in reality are pretty easy to make. They're the kind of cookie you would expect to find in a French patisserie, but luckily you can now make them at home!

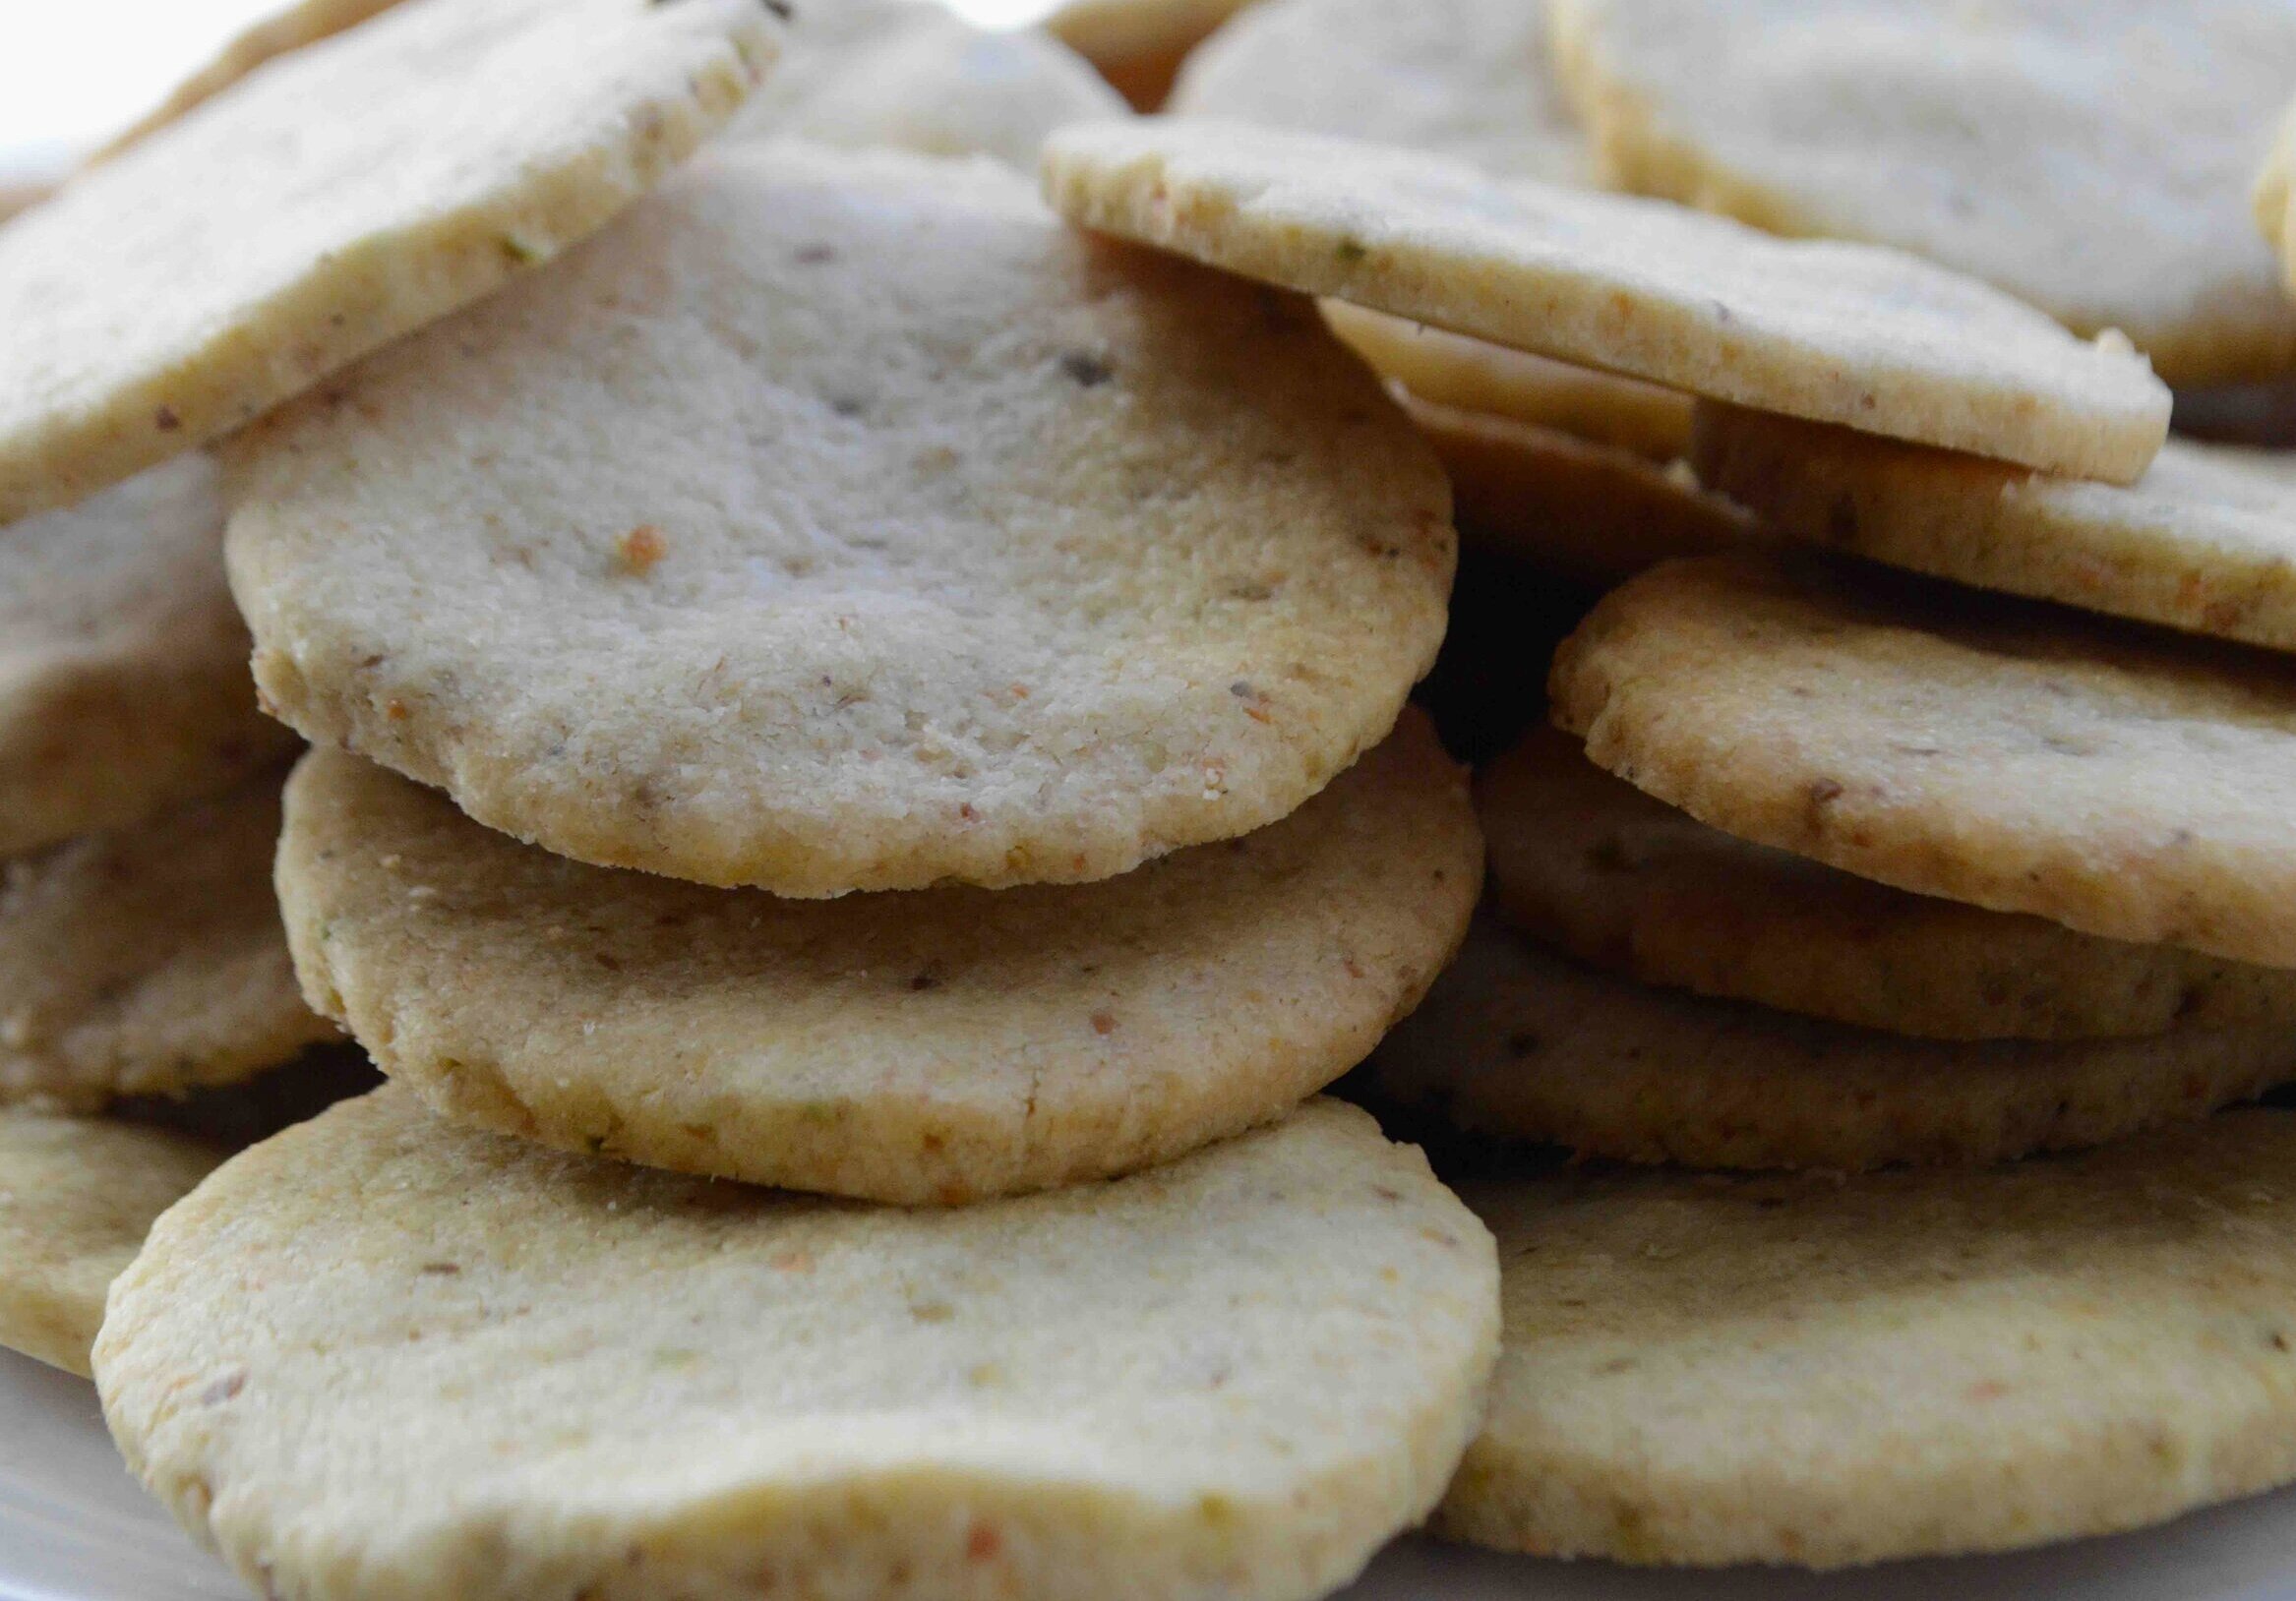
Sables are cookie classics, buttery, simple and melt-in-your mouth. Plus they have the added colorfulness, sweetness and crunch of the sanding sugar. I thought I had a bottle of white coarse sugar in my cabinet, but lo and behold, I could only find the red/green/white combo (where did that white sugar go?!!)--so you're getting a little christmas preview here. These would be great to include in any holiday gift tin! Plus, they're extremely versatile. They are great by themselves, terrific accompanying a bowl of ice cream and in my humble opinion, perfect with a cup of tea in the afternoon or at the end of a long day. True comfort food!

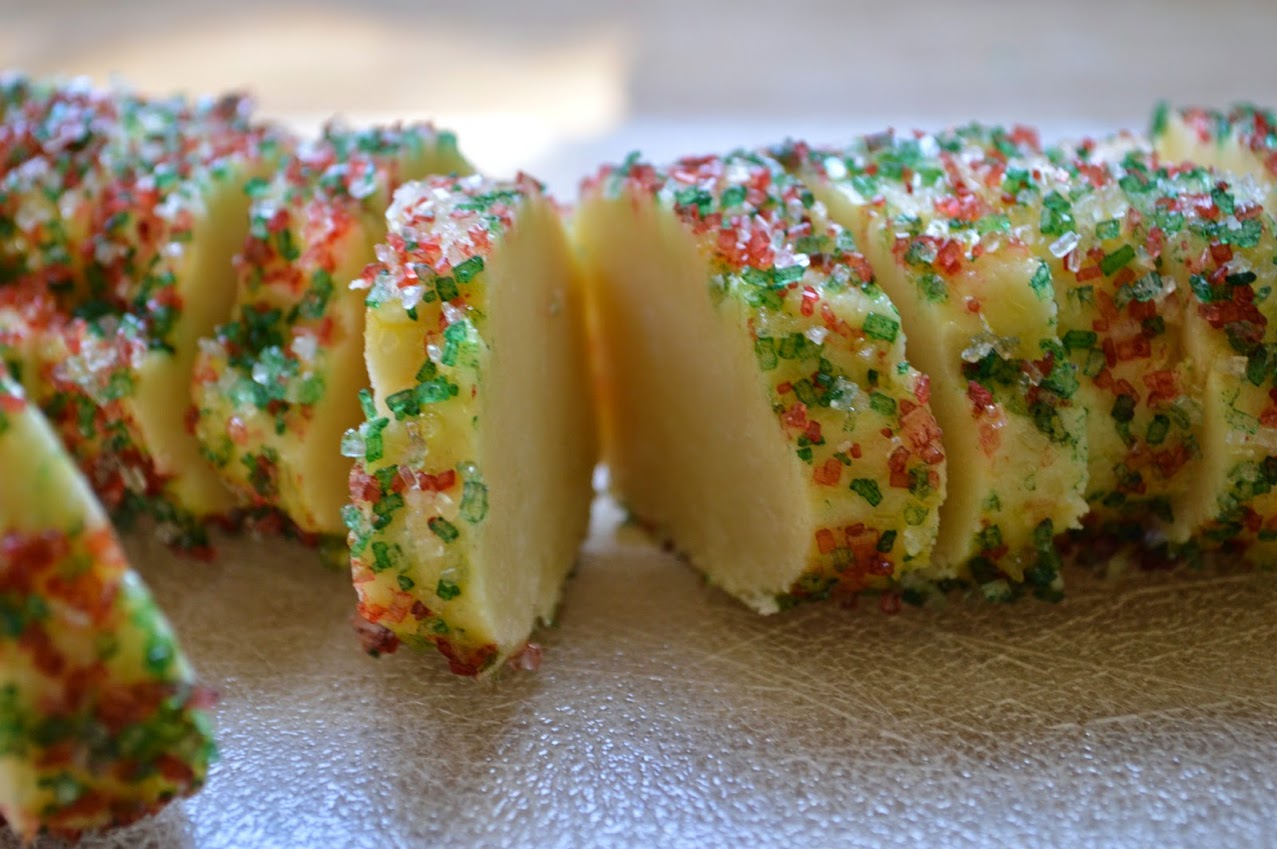
You start by making a simple batter of butter, sugar, salt, egg yolks and flour. Then you roll the dough into two logs and chill them till you're ready to bake. That's when the real fun starts. You brush the log with extra egg yolk--

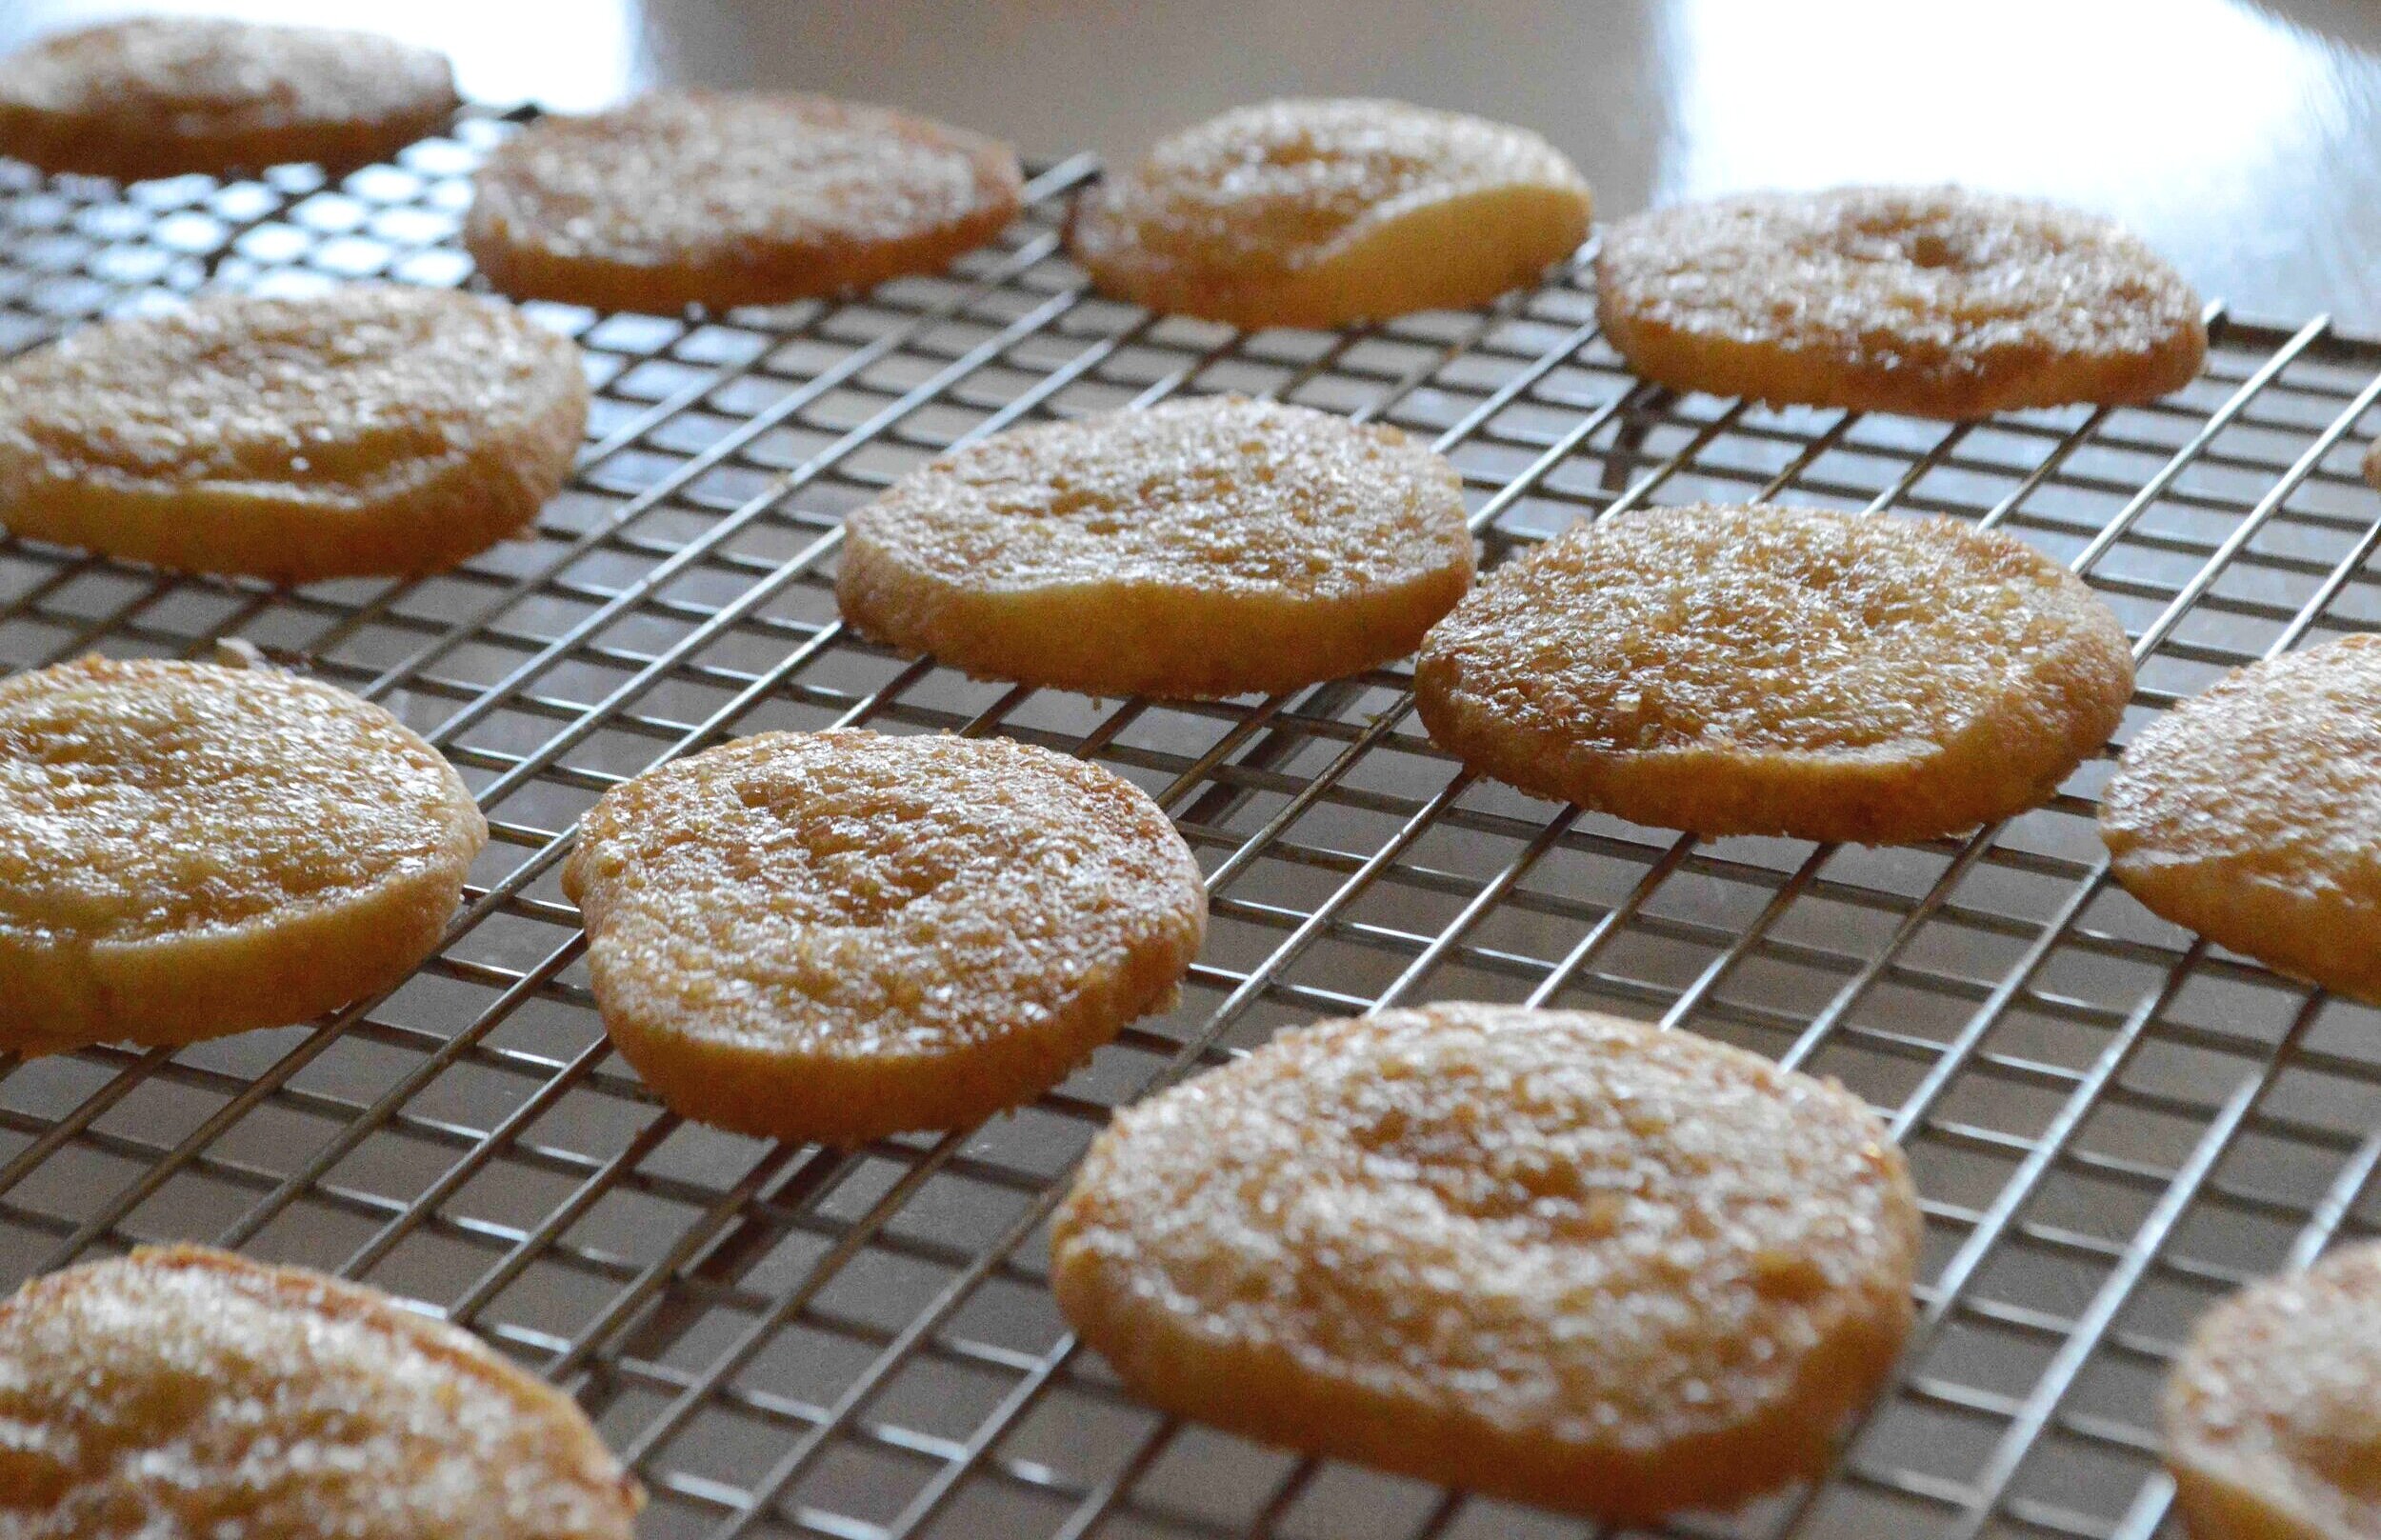
Then roll them in the sanding sugar, slice and bake--
Soon after, you wind up with this--

Look at that nice bite mark--thousands of dollars worth of orthodonture--all worth it, kids! So get yourself into the kitchen and whip up a batch of these wonderful cookies--I promise I won't tell the dentist!!
Sables
Makes 40-50 cookies, depending on how thickly you slice them
Prep Time: 10-15 minutes; Chill Time: At least 3 hours and preferably longer;
Bake Time: 17-20 minutes
Ingredients
- 2 sticks unsalted butter, at room temperature (use the best you can)
- 1/2 cup sugar
- 1/4 cup confectioners' sugar, sifted
- 1/2 teaspoon salt, (sea salt if you have it, otherwise regular old salt is fine)
- 2 large egg yolks, room temperature
- 2 cups unbleached all-purpose flour
- Decorating (sanding/coarse) sugar
- 1 additional egg yolk to brush on log before baking
The Recipe
1. Using a stand mixer, beat the butter at medium speed until smooth and creamy. Add both sugars and beat for about 1 minute, until well blended. The mixture will look smooth and velvety, not fluffy. On low speed, beat in the yolks till well mixed.
2. Turn off the mixer. Pour in the flour and if using a stand mixer, drape a kitchen towel over the mixer (to cover the bowl) so that no flour will fly around and cover you or your kitchen. On lowest speed, pulse the mixer about 5 times, for a second or two and then take a peek beneath the towel. If there is still a lot of flour, pulse a couple more times-- if not remove the towel. On low speed mix for about 30 seconds more, just until all the flour is incorporated and the dough looks moist. With a rubber spatula, mix a few times, scraping the bottom, just in case any flour is still not incorporated. The dough should not clump into a ball or leave the sides of the bowl--what you want is a soft, moist clumpy dough, sort of like Play-Doh. Just try not to work it too much.
3. Scrape the dough out of the bowl onto a smooth work surface and gather it into a ball. Divide it in half. On a piece of plastic wrap, shape each half into a log about 9 inches long. Wrap the logs well and chill them for at least 3 hours or overnight. (the logs can actually be chilled for 3 days or frozen for 2 months.)
4. When ready to bake, preheat oven to 350ºF. and line two cookie sheets with parchment paper.
5. Remove one log from fridge, unwrap it and place it on a piece of parchment or wax paper. Whisk the egg yolk until smooth. Using a pastry brush, brush egg yolk all over the sides of the log and then sprinkle the entire log with the decorating sugar. If using second log, repeat.
6. Slice the log into 1/3 inch cookies (or a bit thinner) and place them on the cookie sheets, leaving about an inch between the cookies.
7. Bake one sheet at a time for about 17-20 minutes, rotating the sheet halfway through the baking. The cookies are done when they are lightly golden around the edges, pale on top and light brown on the bottom. It's ok if they feel sort of soft on top as long as they look fully baked. Remove from the oven, place the cookie sheet on a cooling rack and let the cookies sit for a couple of minutes until firm enough to transfer them to the rack with a wide metal spatula. Cool completely. If using the same sheet to bake the second batch, let it come back to room temperature before placing any cookies on it.
8. Store in an airtight container for 4-5 days.
Enjoy!
Note: This recipe is another of Dorie Greenspan's from Baking, From my Home to Yours.