Maple Pecan Tart

Every single year, for I can't remember how long, I have been making some version of pecan pie for Thanksgiving. My current favorite is this one and I justify eating quite a lot of it, because #1, I LOVE IT!!! and #2, I only make it once a year and figure I can juggle around the calories during the year in clever enough ways to convince myself that I've made up for my pecan pie consumption (not to mention all of the other goodies I just "taste"). So when I came across this recipe for Maple Pecan Tart, I wasn't all that excited about it and filed it away with the rest of the other recipes for "someday". But recently I came across it again and since I had some maple syrup that had to be used up, thought I'd give it a try, and...I will be making this tart for Thanksgiving this year and most probably many years to come. Need I say more?
This tart is everything you want pecan pie to be, rich, gooey, nutty filling and flaky pastry, but because you're not dealing with pie dough there's no worry or fuss about crimping or blind baking the dough and the end result is nearly identical to a pecan pie, so the whole thing just seems loads easier, which when you're juggling all the other dishes of Thanksgiving is not something to take lightly!!
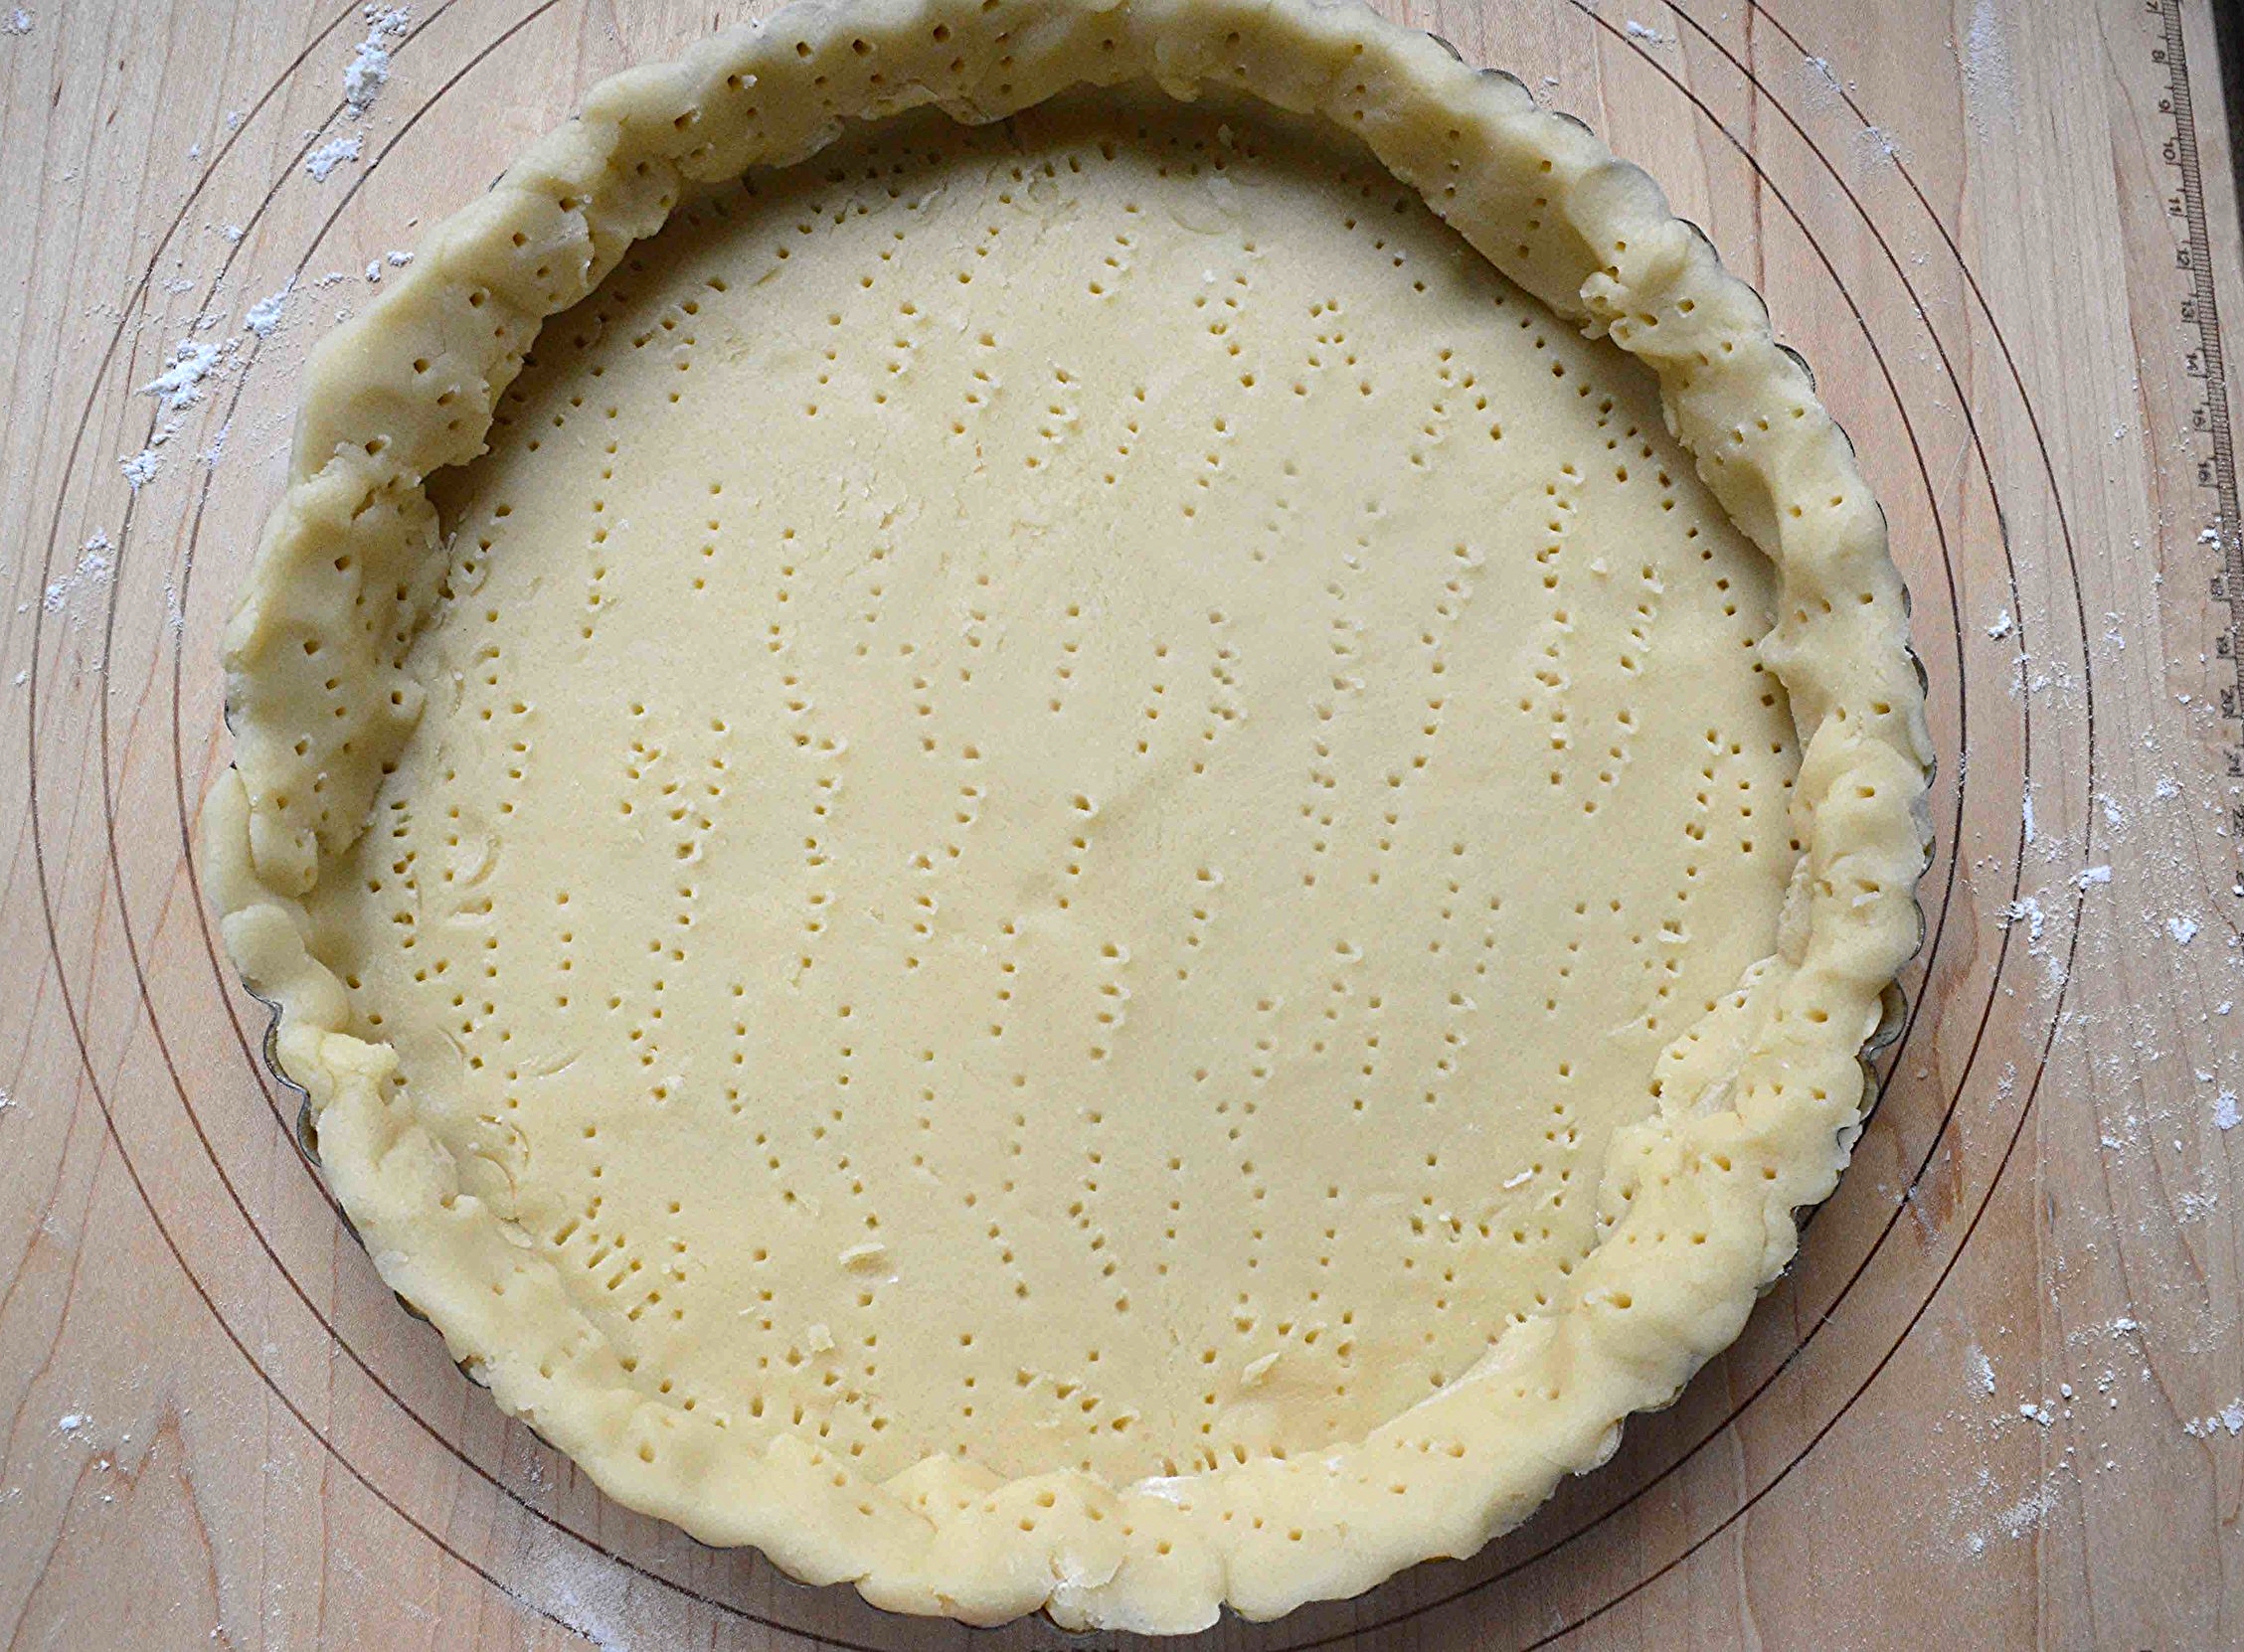
You start by making a simple tart dough and lining a tart pan with it. Then the whole thing gets chilled in the freezer for 30 minutes which leaves you ample time to sip your coffee, toss in a laundry, pay some bills and still make the filling!

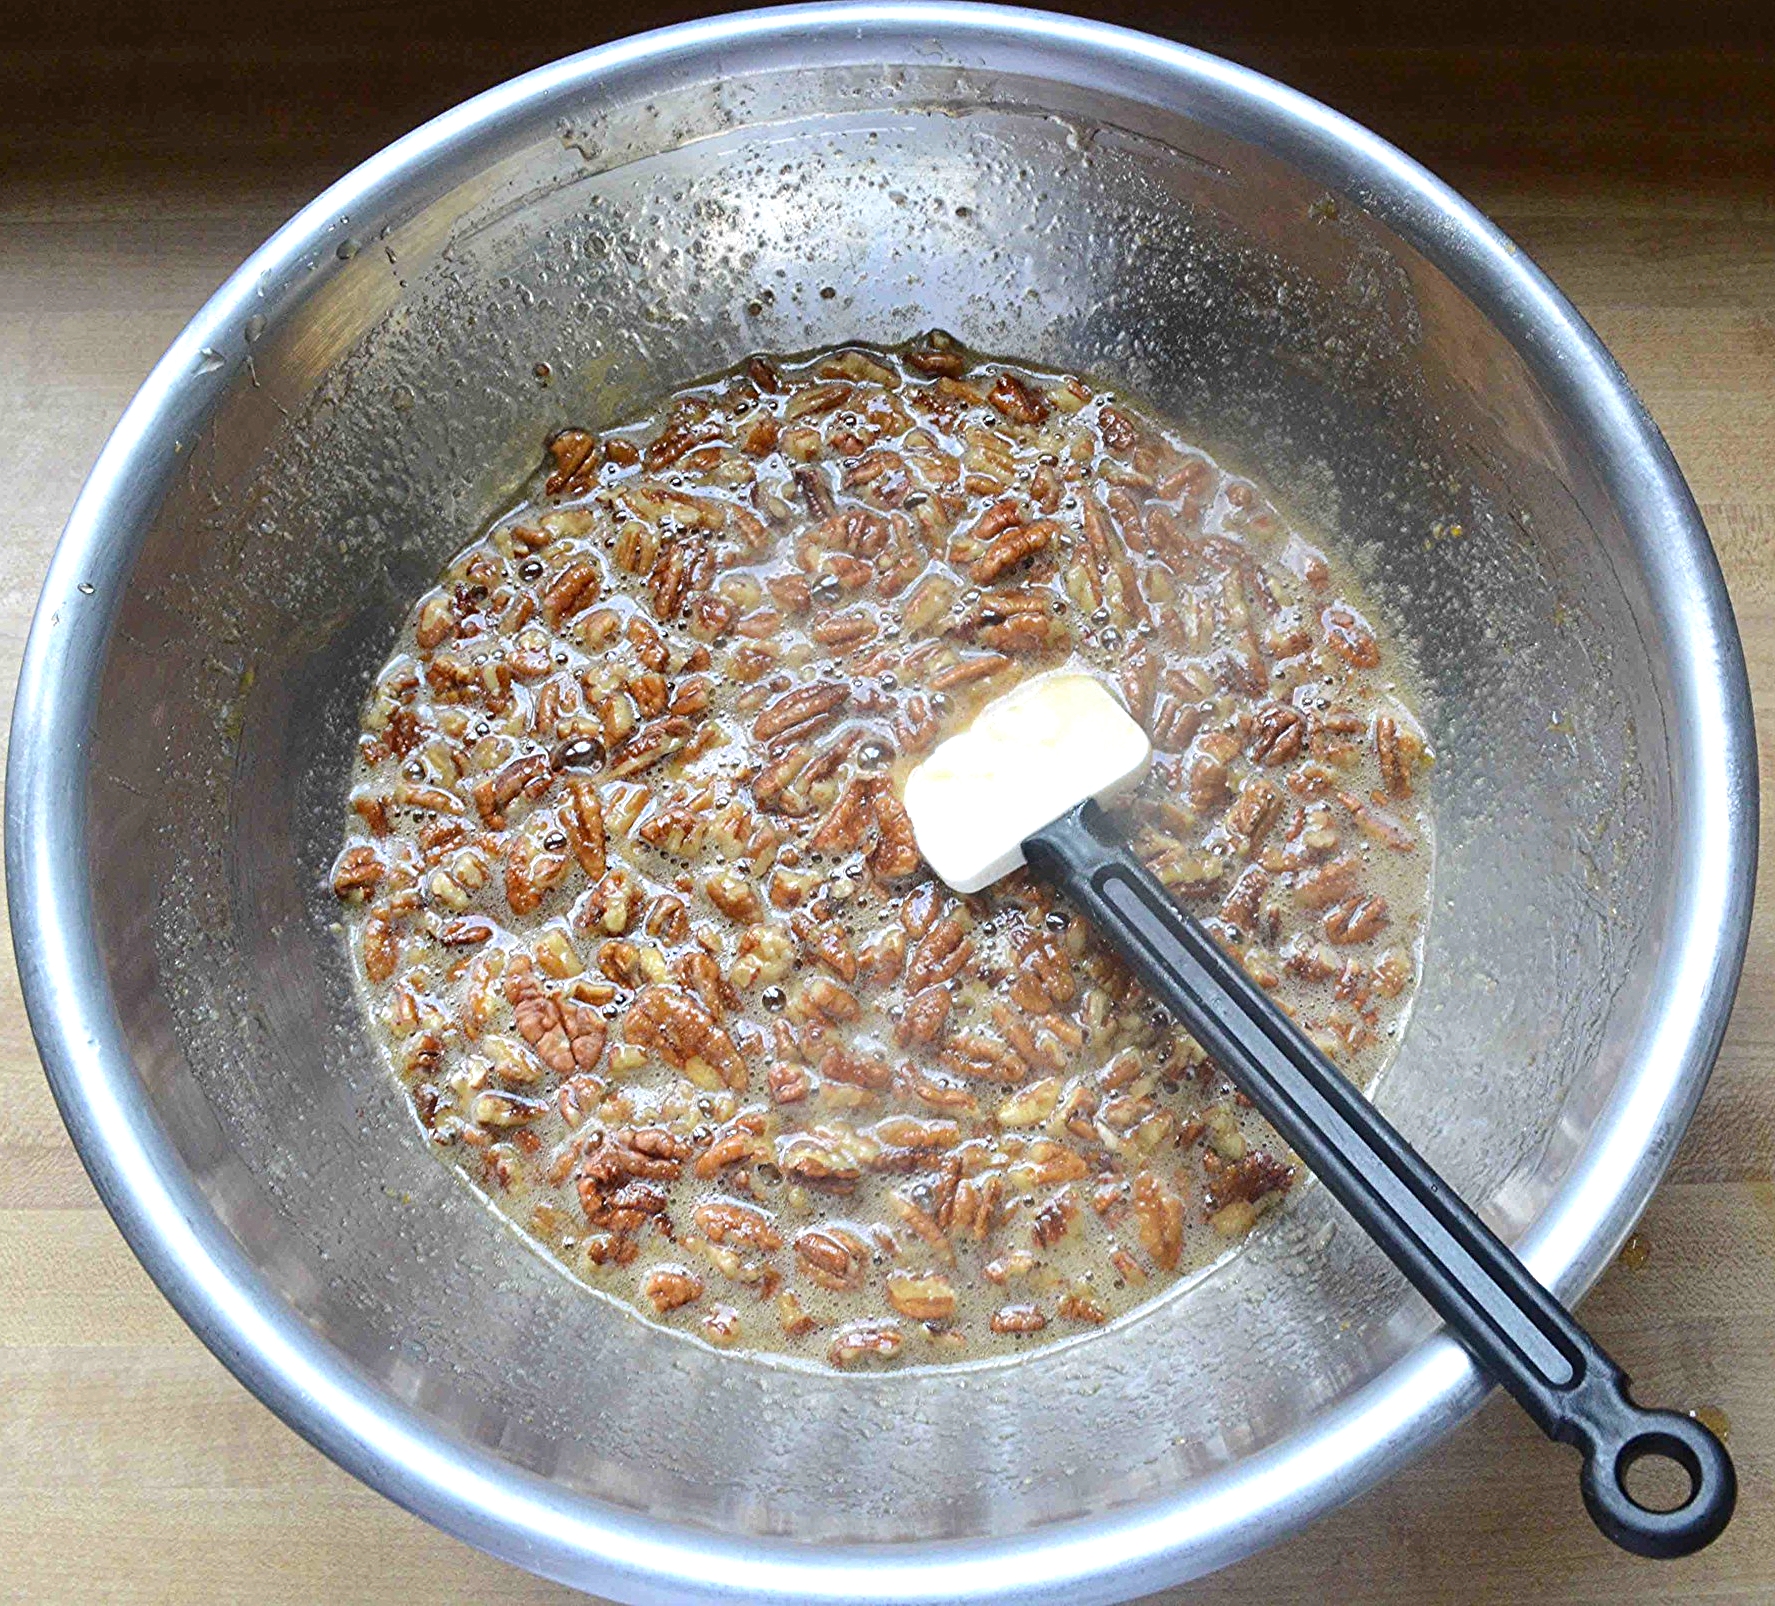
The maple-y pecan filling gets mixed by hand and comes together in a snap--look at all those nuts!!
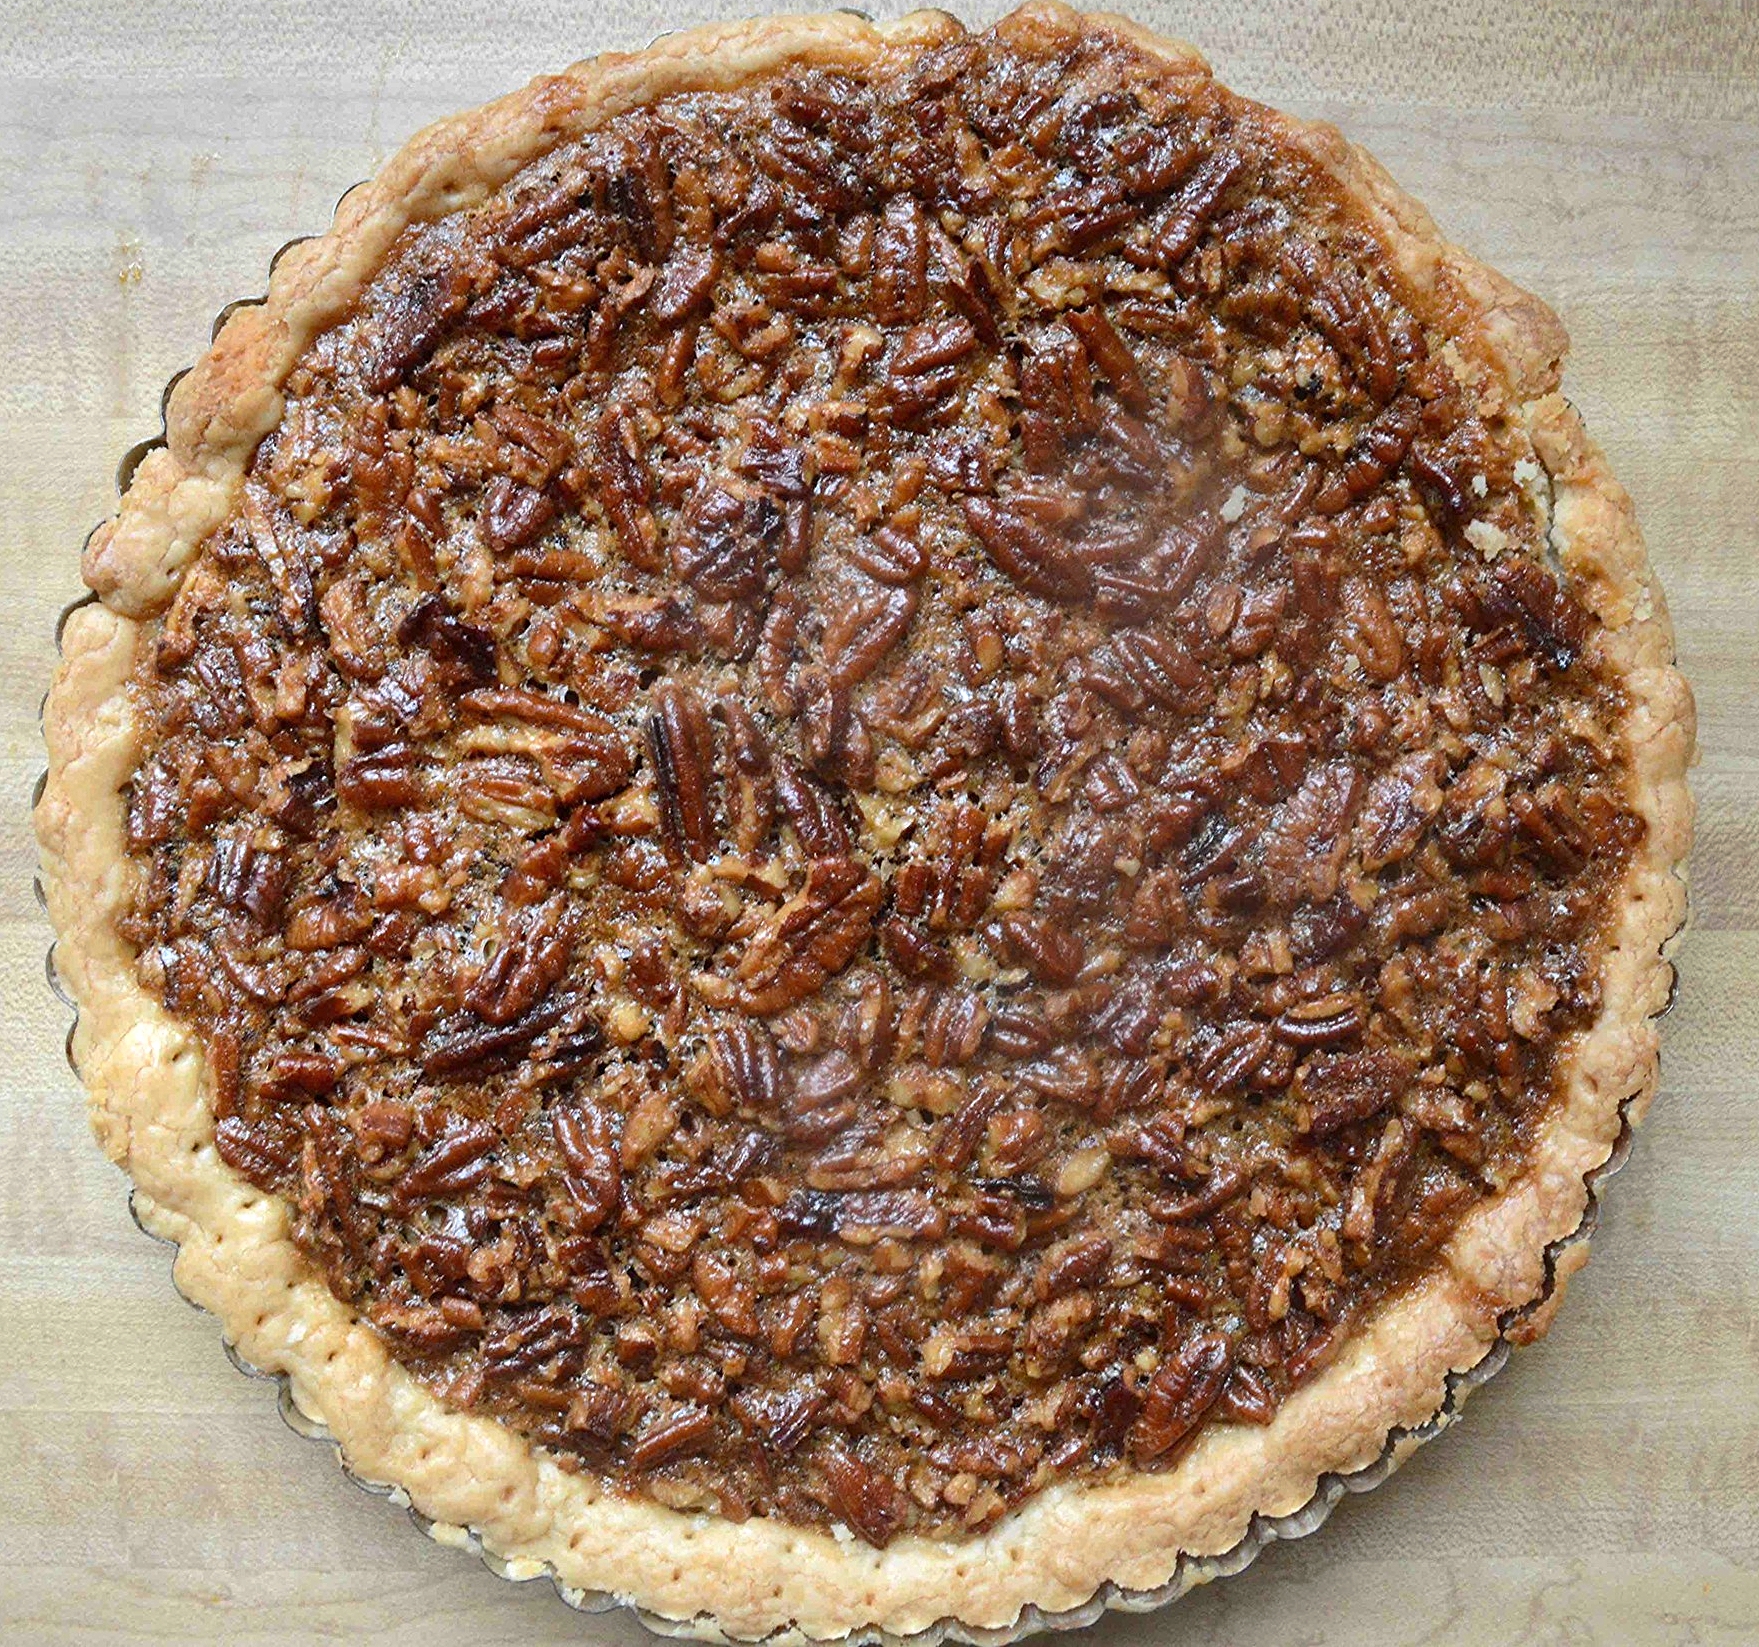
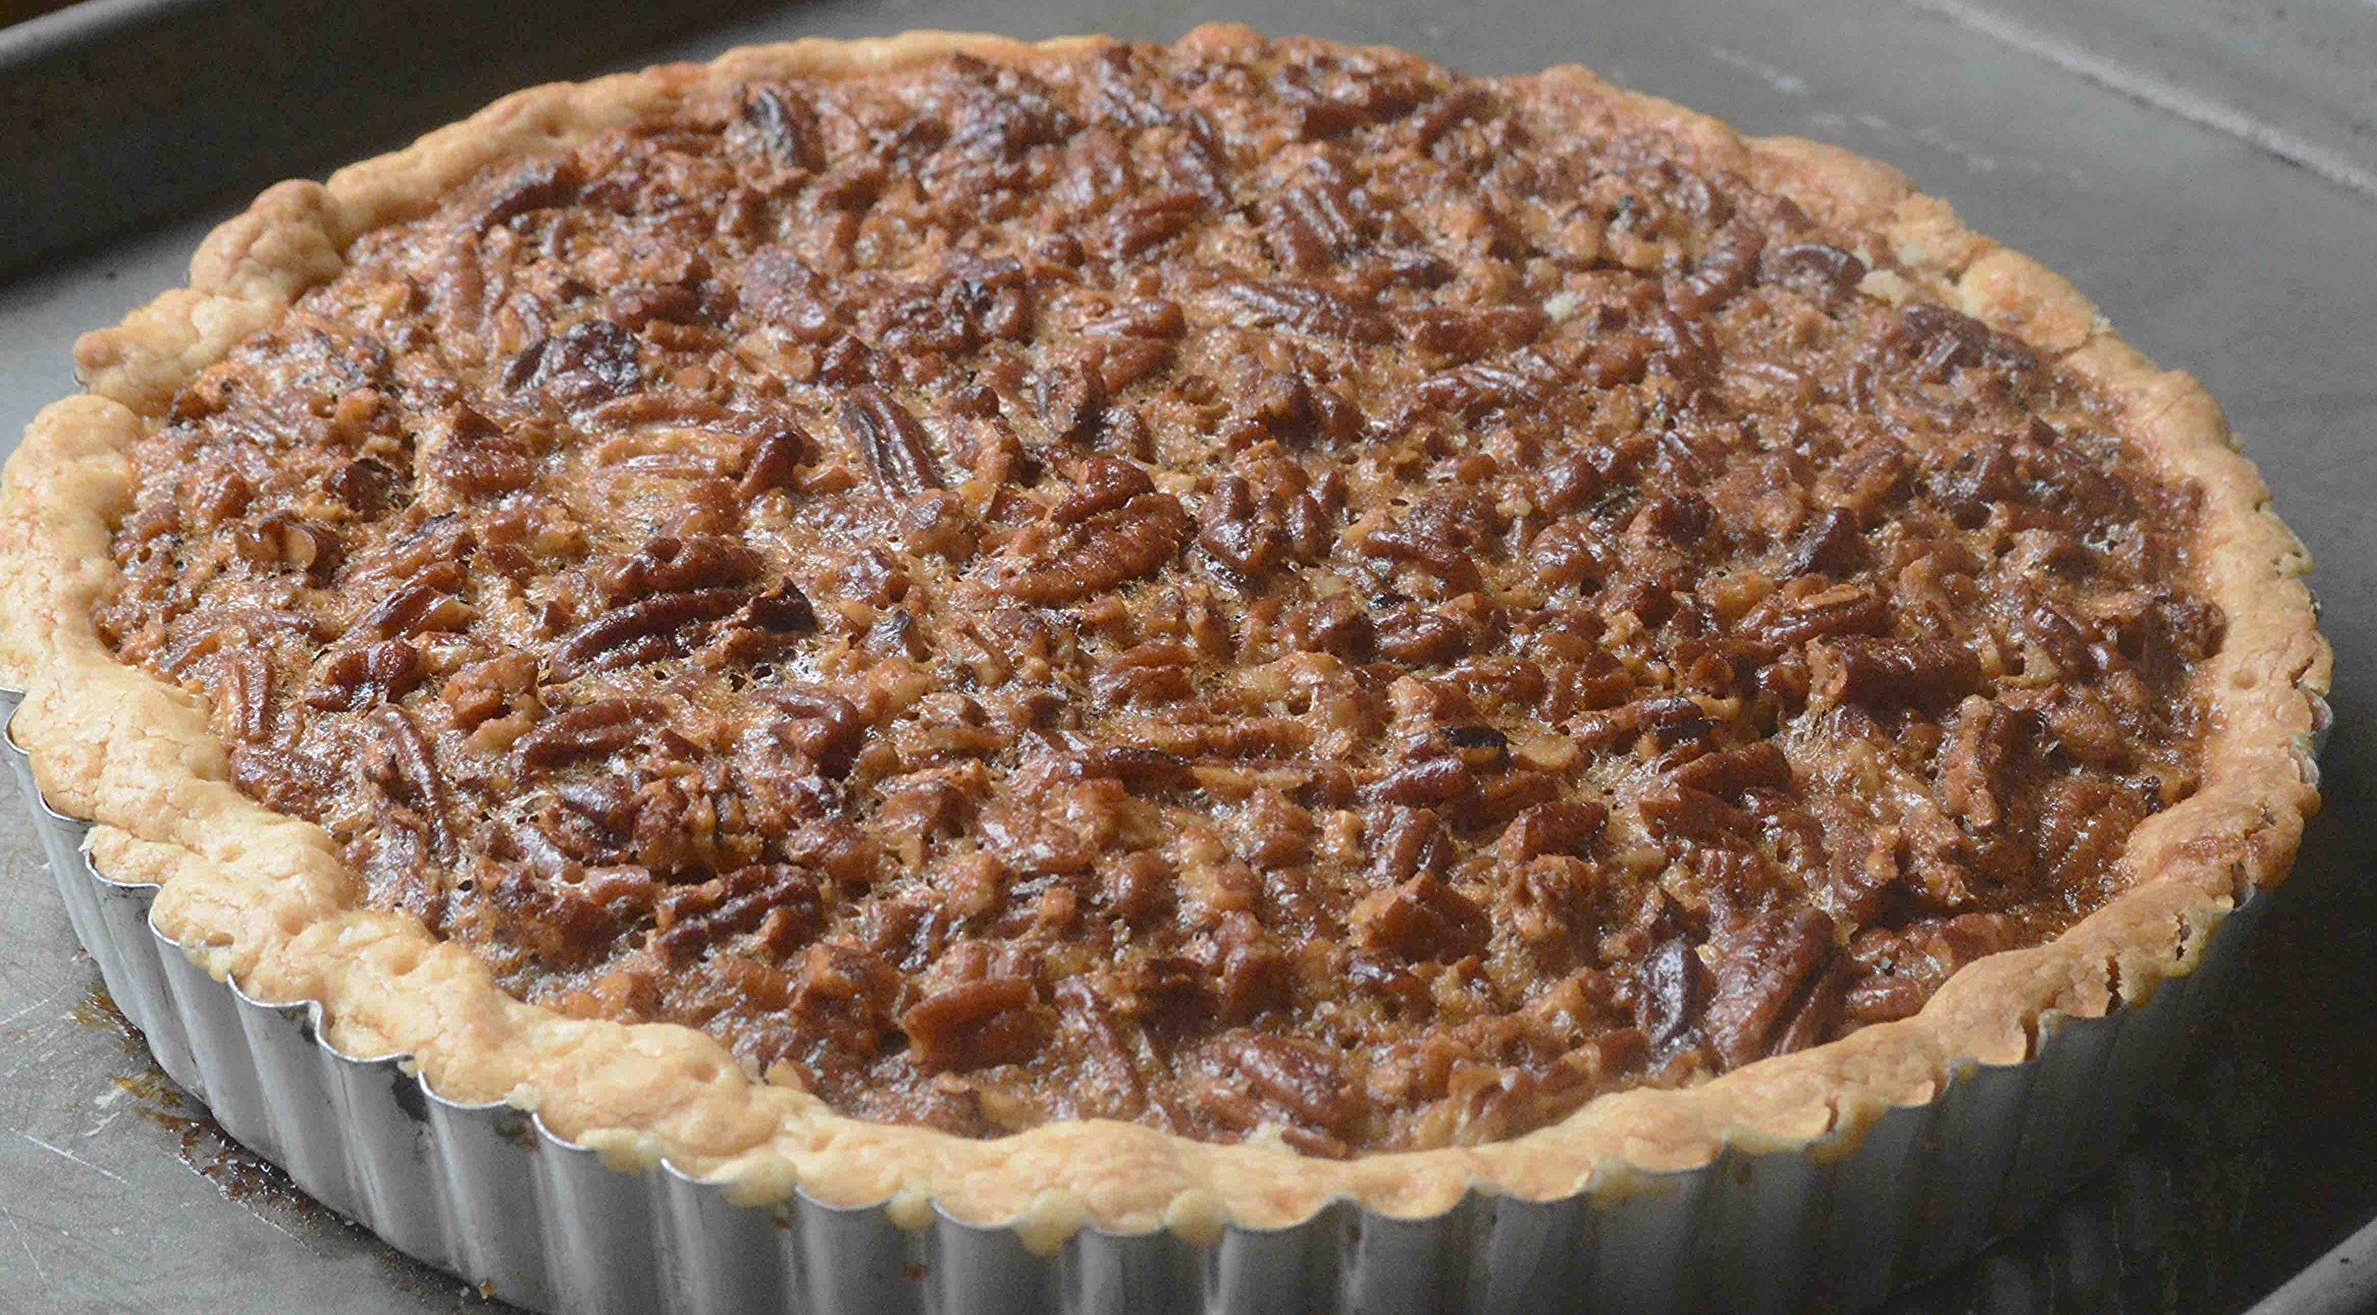
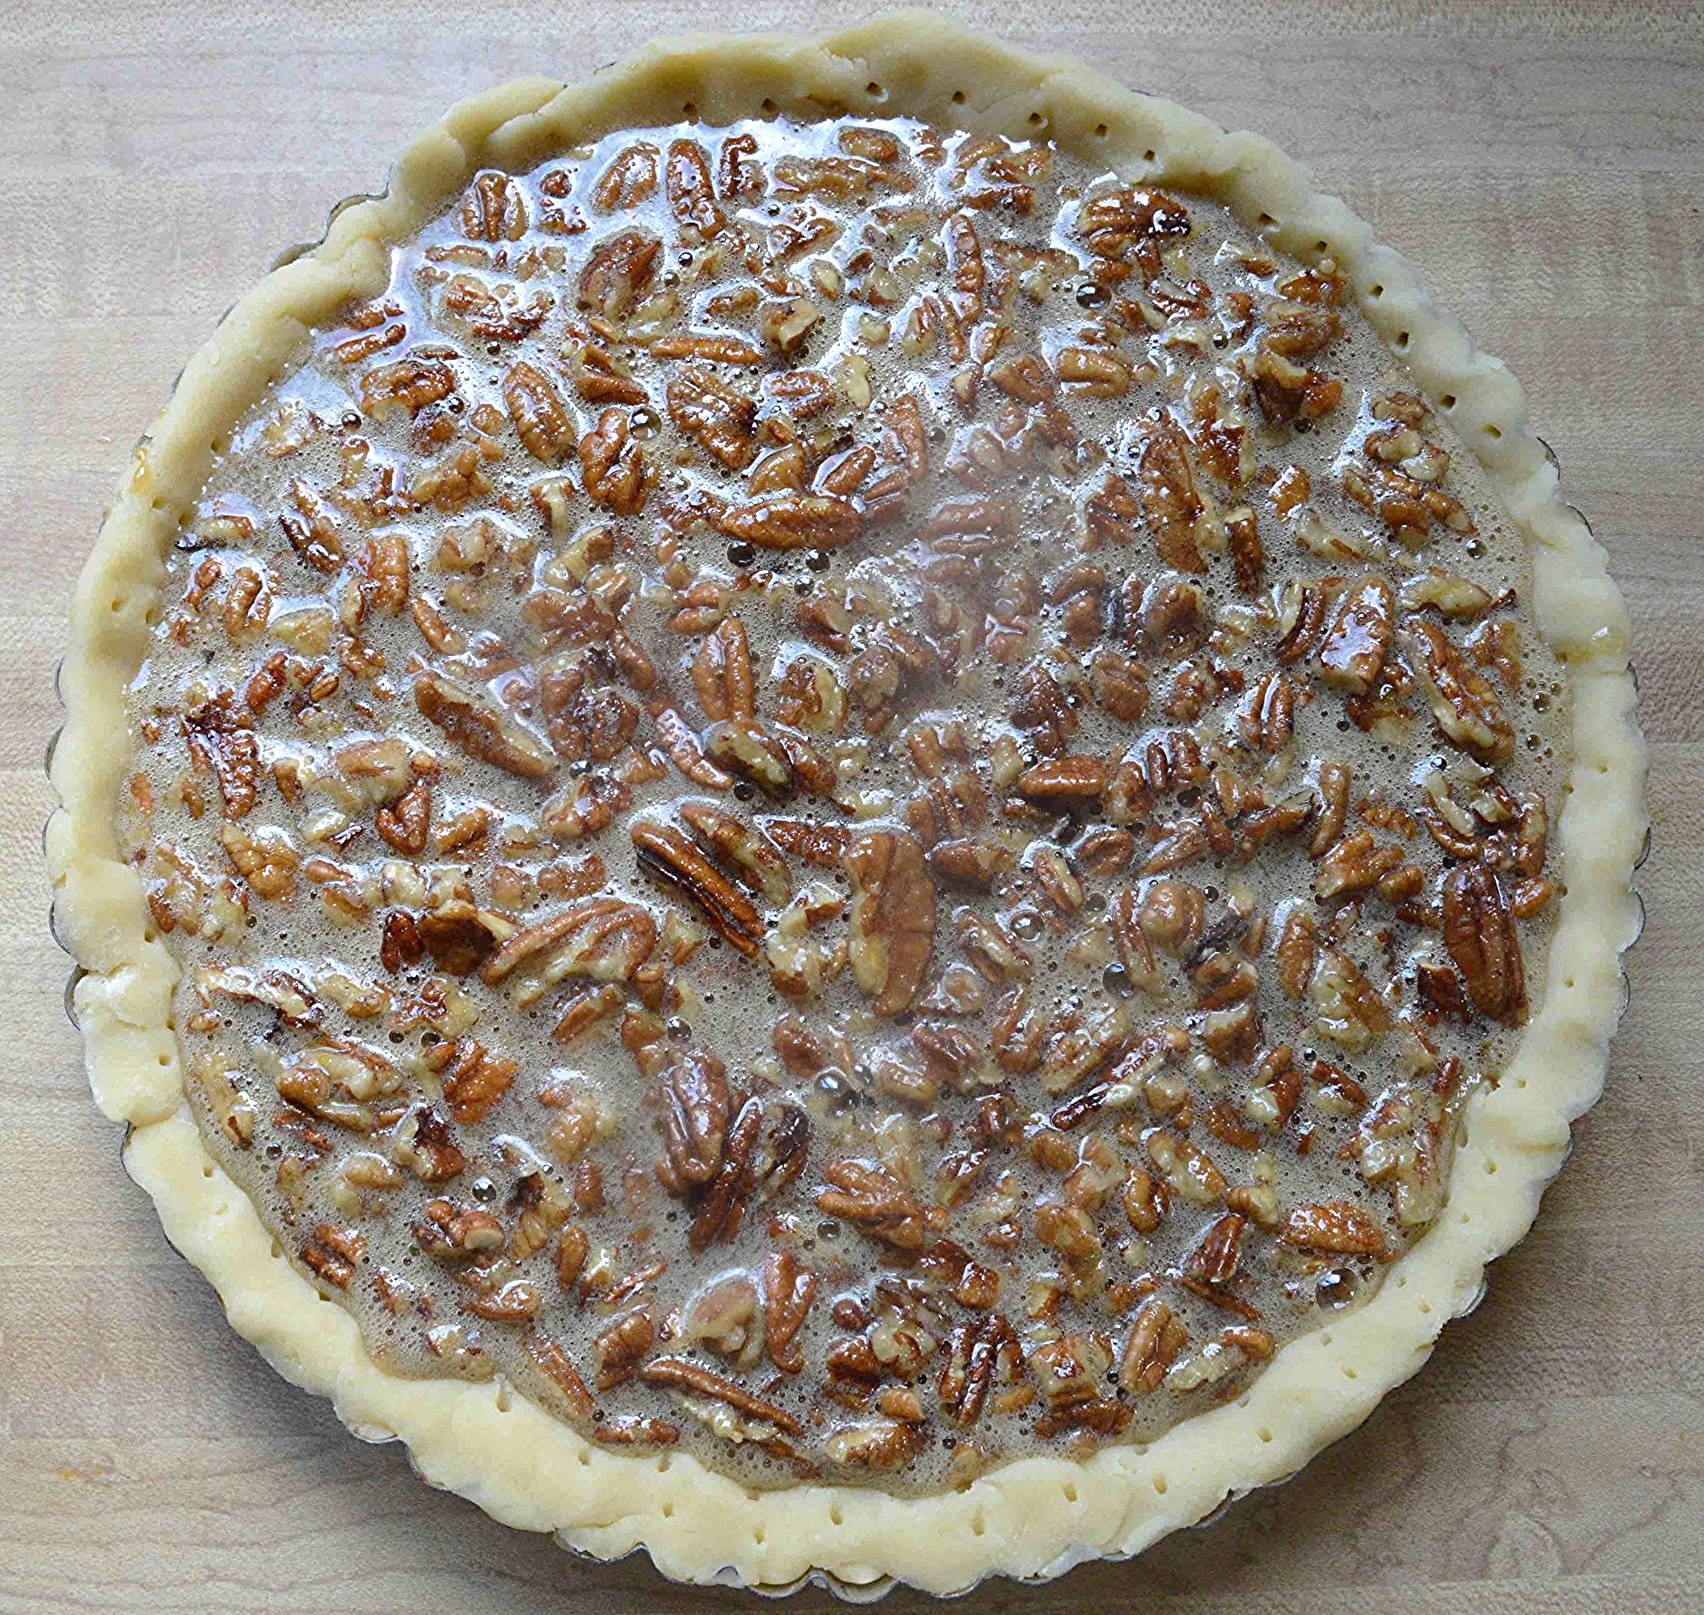
Then you just pour the filling into the tart shell and pop it into the oven.
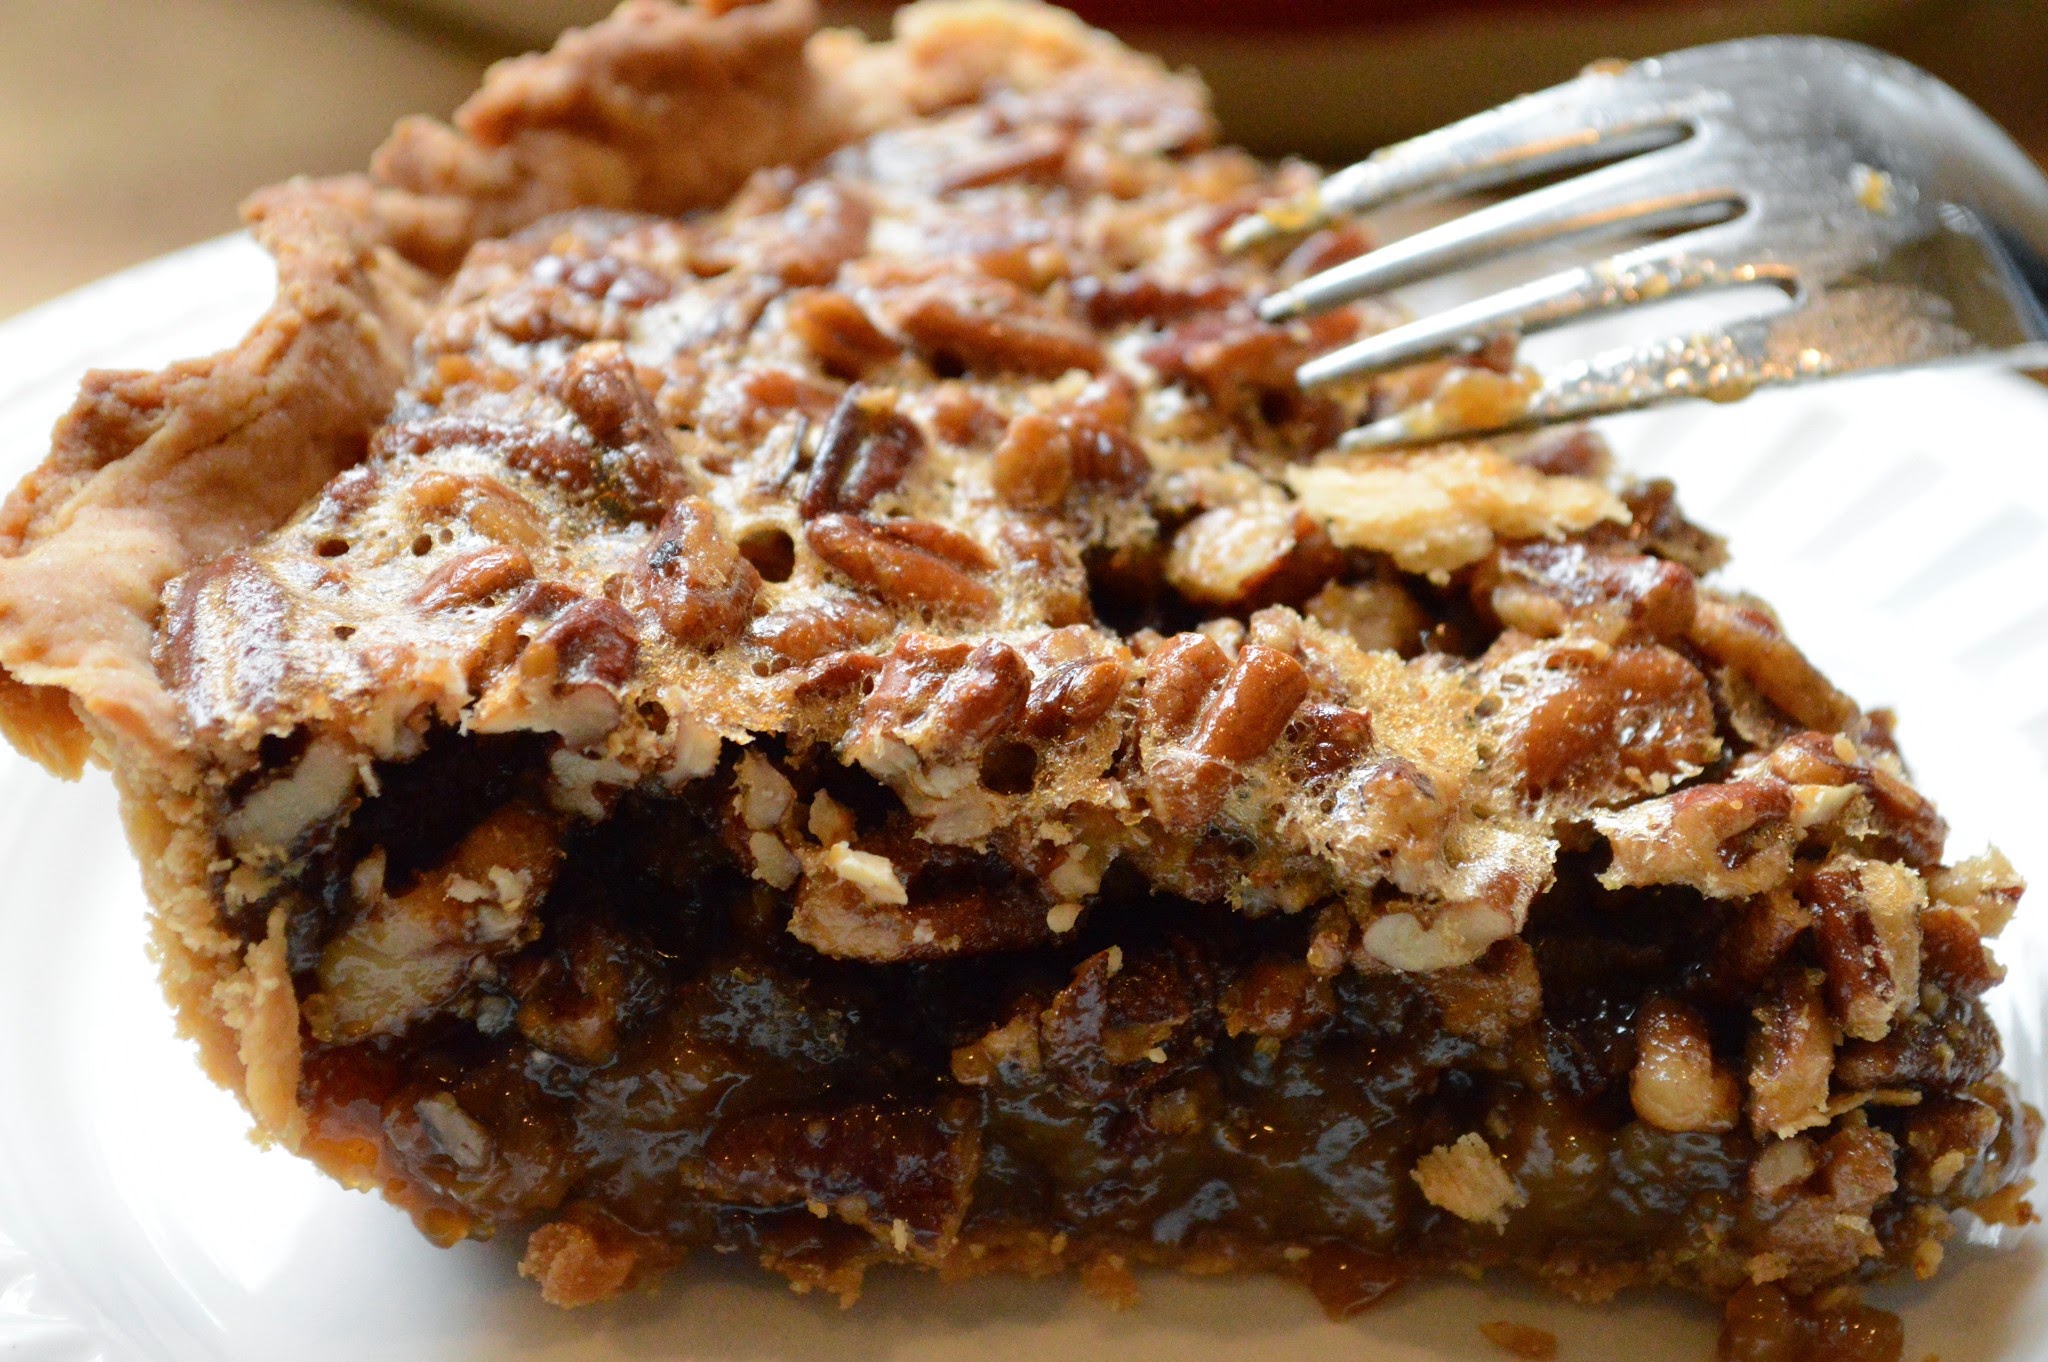
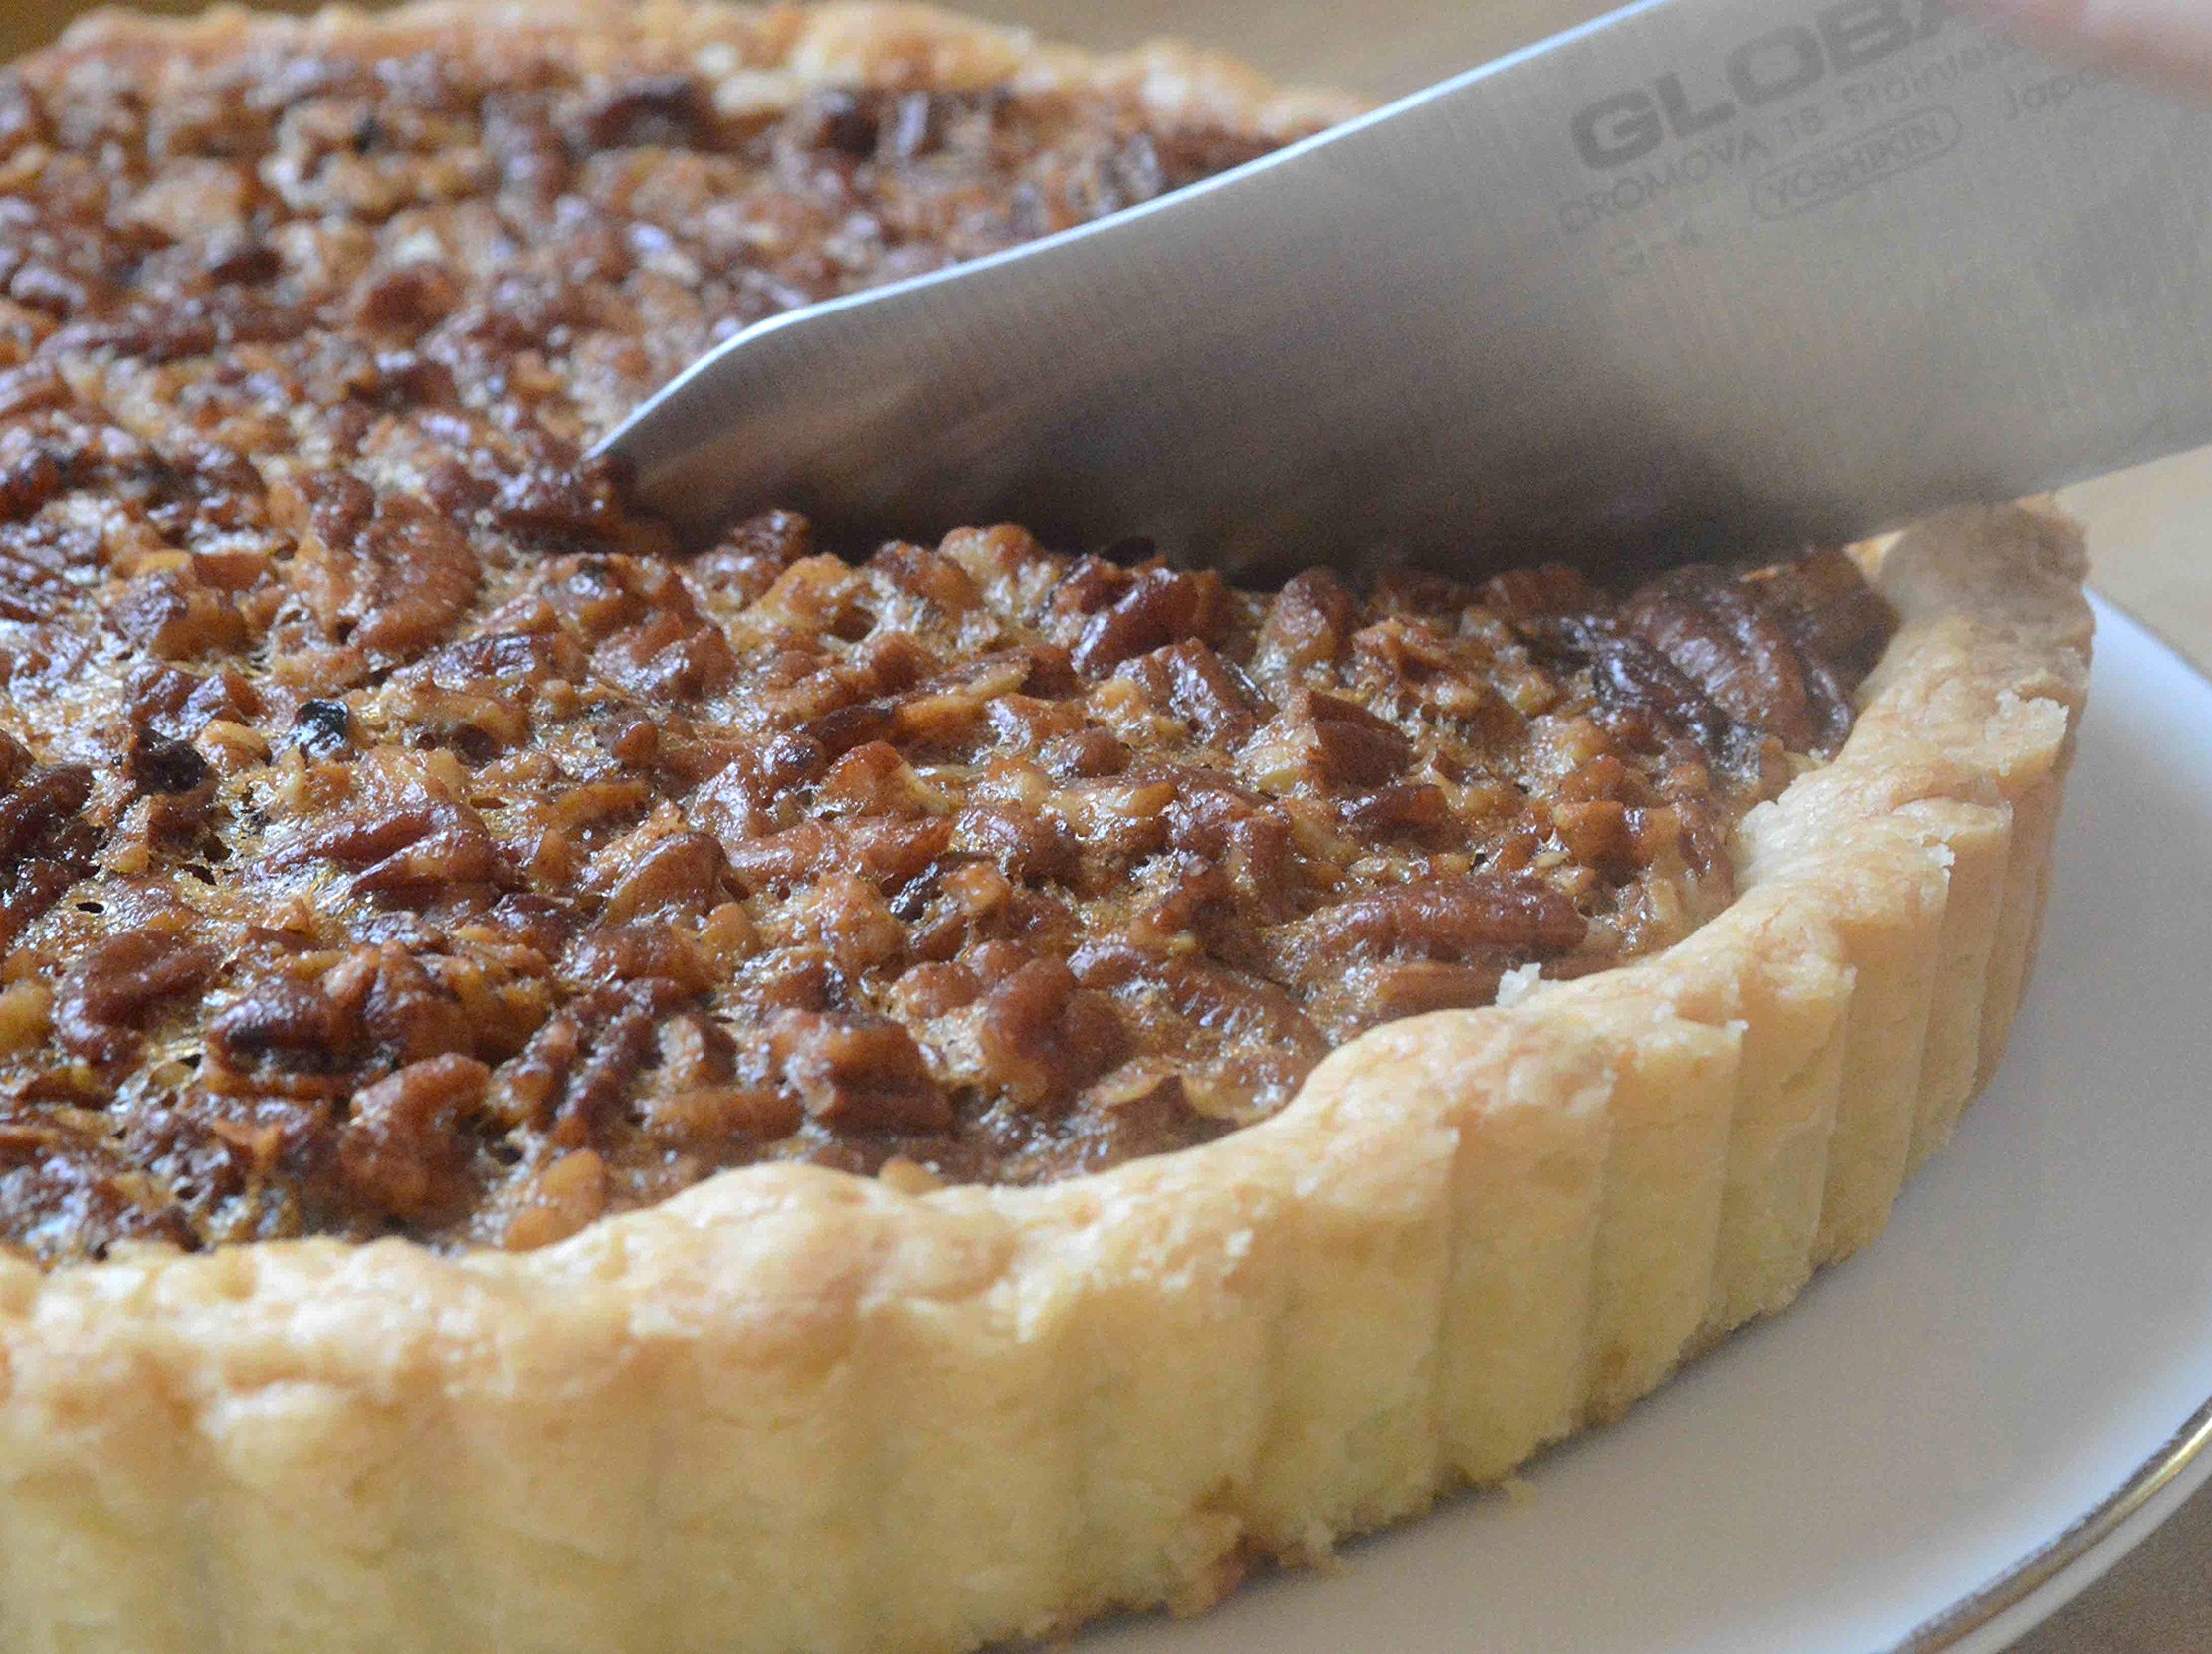
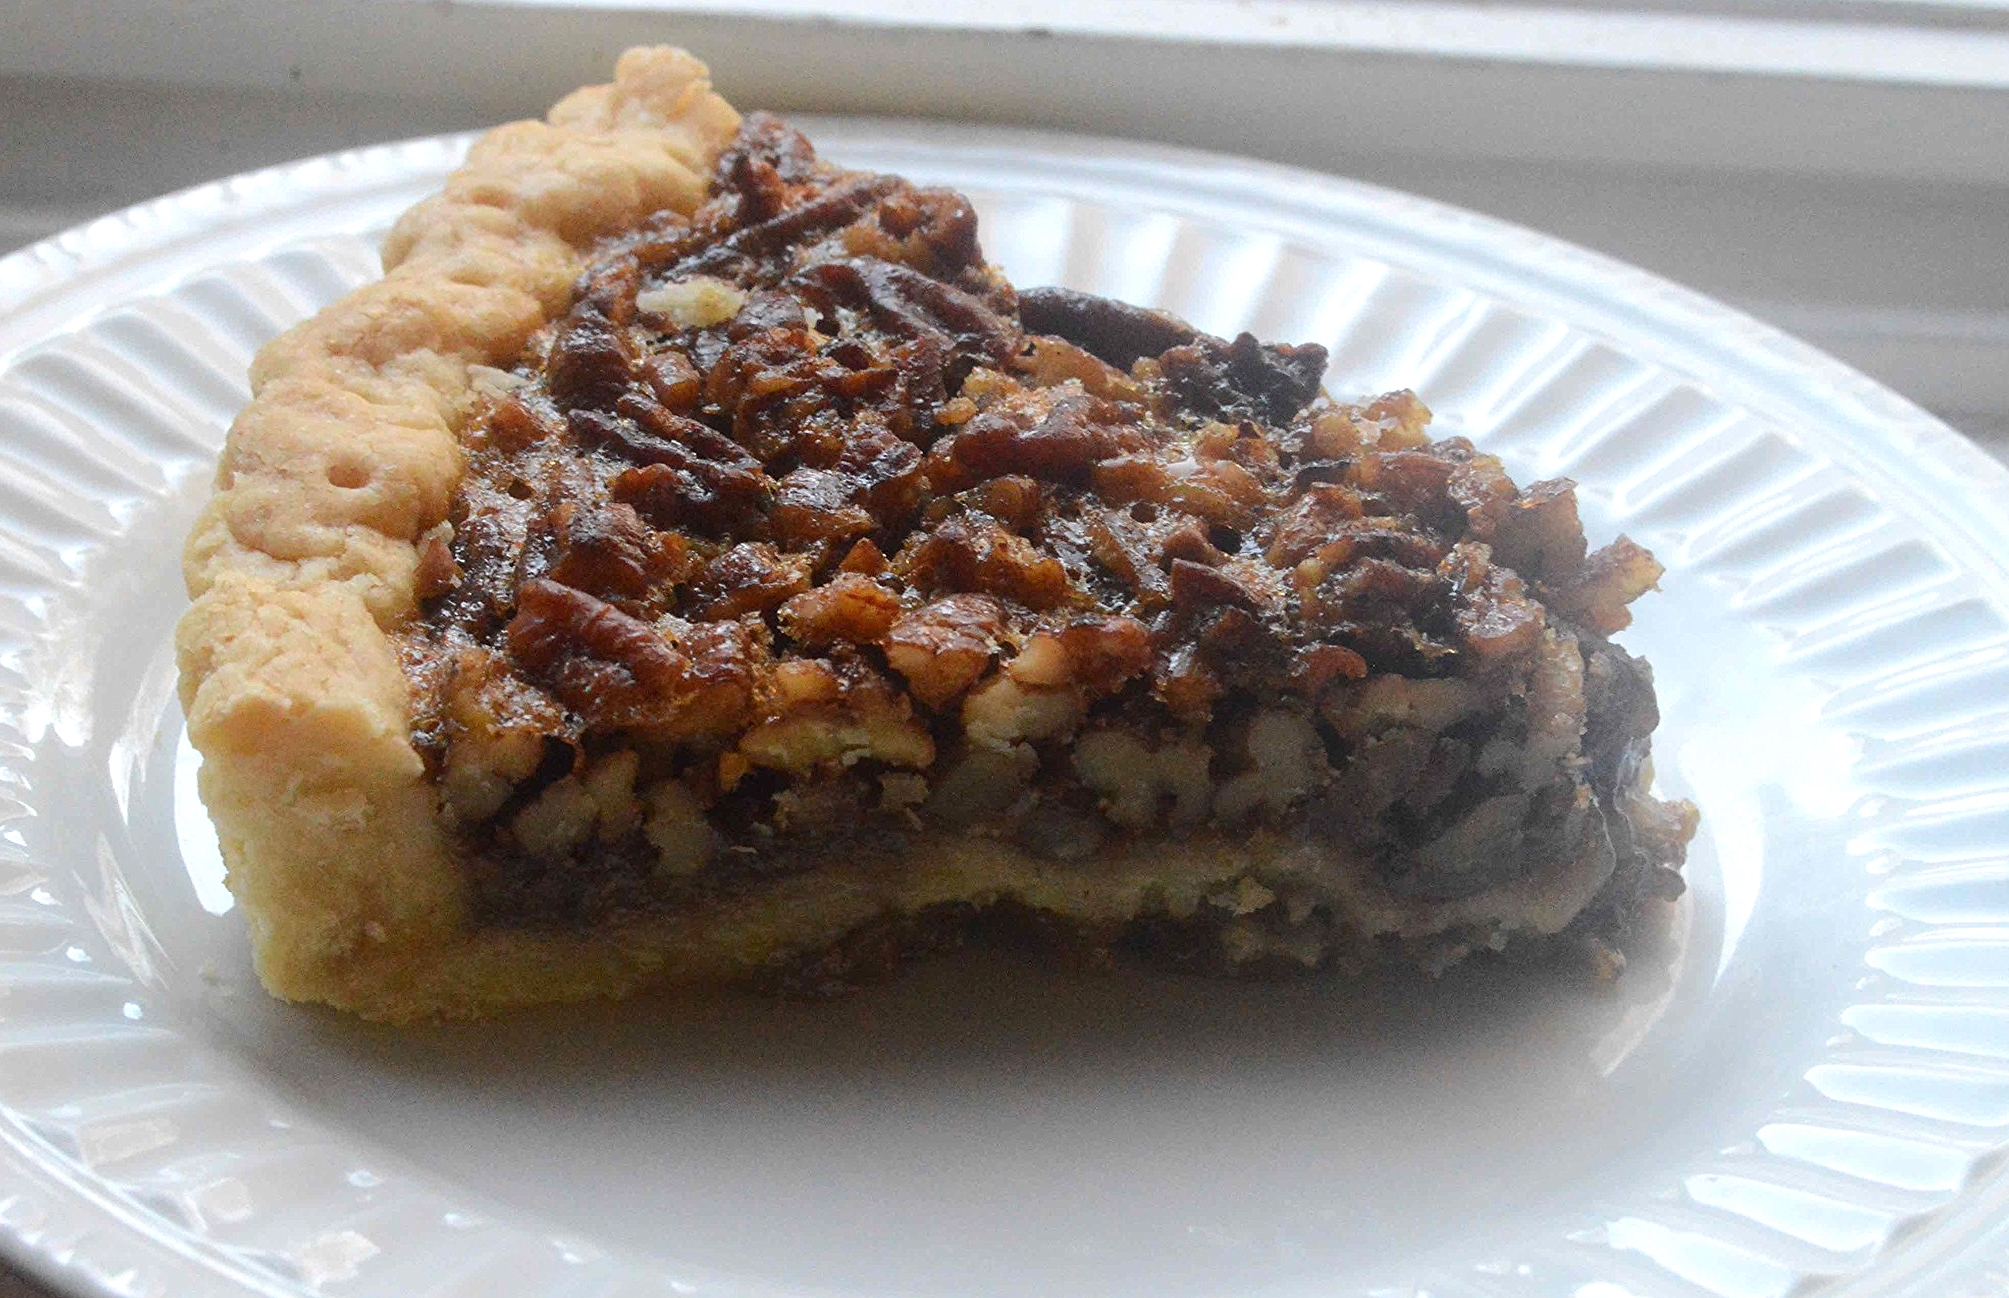
Less than an hour later, you're looking at a beautiful tart!

It's perfection on it's own with all those crunchy nuts and that delightfully sticky/sweet filling all nestled in flaky pastry--
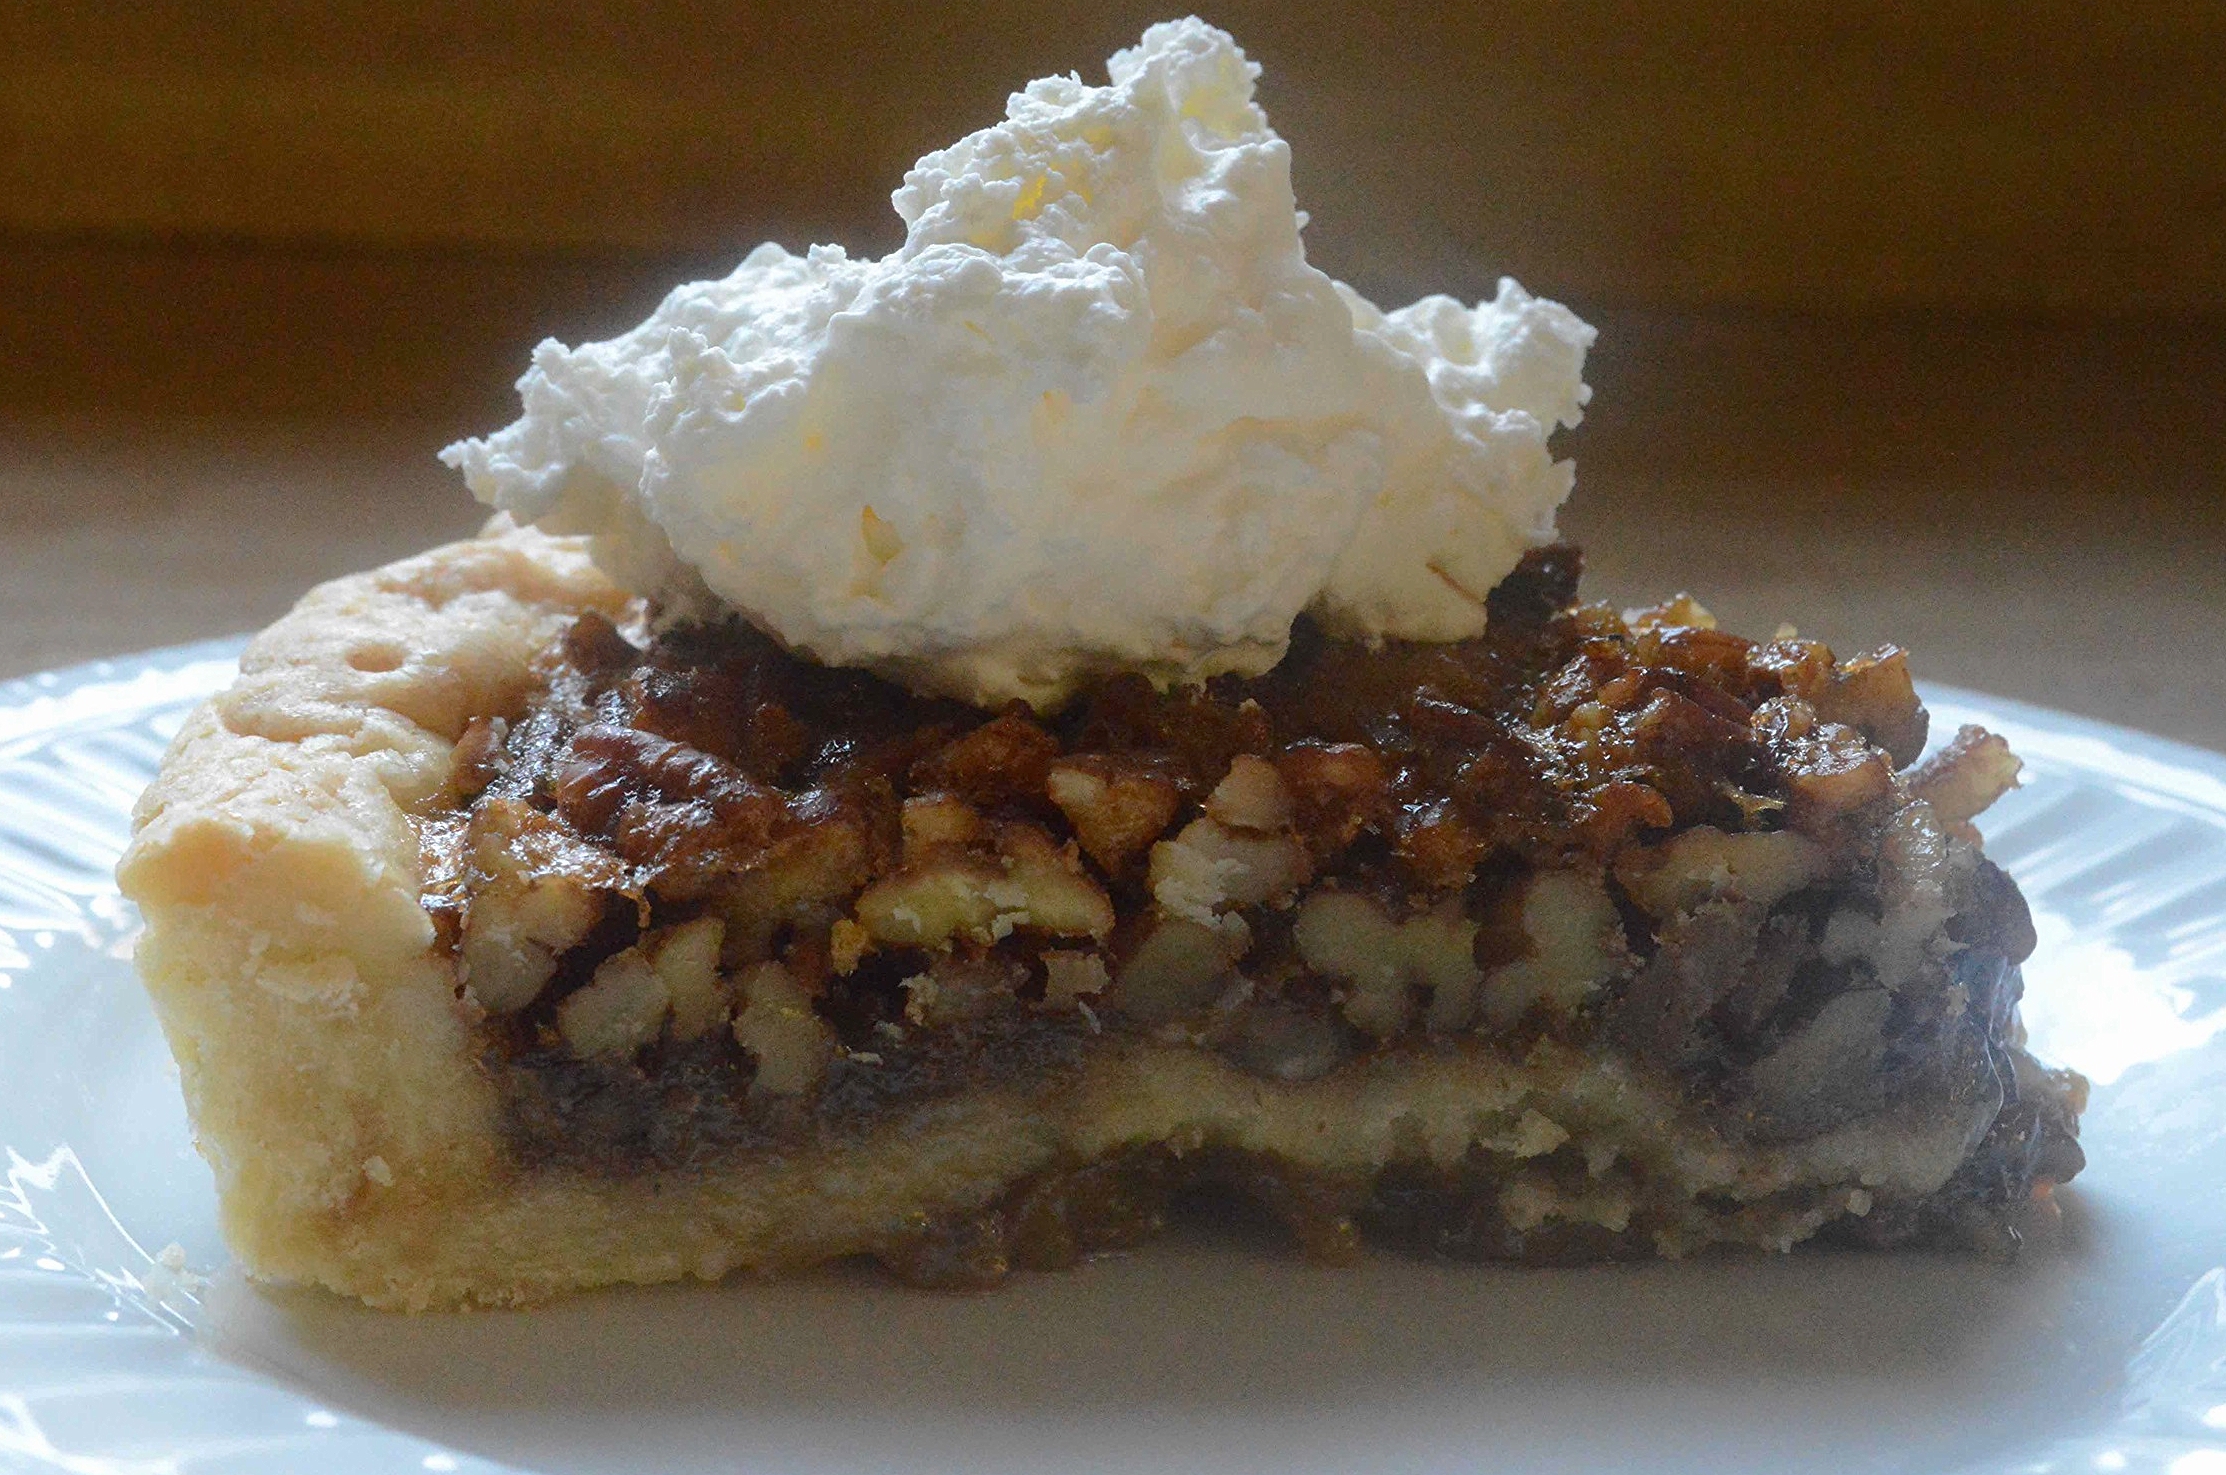
And words cannot properly describe what happens when a dollop of whipped cream is placed on top of a slice!
How long do we have to wait for Thanksgiving?!!

Maple Pecan Tart
Makes about 8 servings
Prep Time for Tart Shell: 20 minutes, plus 30 minutes of chilling time; Prep Time for Filling: 10 minutes; Bake Time: 40 minutes
Ingredients
For the Tart dough
- 1 stick (1/2 cup) unsalted butter, room temperature
- 1/4 cup sugar
- 1 large egg yolk
- 1/8 teaspoon salt
- 1 1/4 cups unbleached, all-purpose flour
For the Filling
- 3 large eggs
- 1/2 cup light brown sugar, packed
- 1/2 cup pure maple syrup
- 1/2 cup dark corn syrup
- 4 tablespoons (1/4 cup) unsalted butter, melted
- 1/8 teaspoon salt
- 1 1/2 cups coarsely chopped pecans
- Whipped cream or vanilla ice cream (optional)
The Recipe
1. To make the tart dough: Use the electric mixer to beat the butter on medium speed in a large bowl, until it's smooth and creamy. Add the sugar, egg yolk and salt and beat until combined. Add the flour and beat on low speed just until the dough begins to come together. Then, gather the dough into a ball and flatten into a disk. Lightly flour a board or work surface and roll the dough out into a 10 1/2-inch round. Transfer the dough to a 9-inch tart pan with a removable bottom and press the dough into the sides and bottom evenly. Prick the shell all over with a fork and place in the freezer for 30 minutes. You can also make the dough 1 day ahead and leave it int the tart pan. Refrigerate until ready to use and then place in the freezer for the chilling time.
2. To make the filling: Preheat the oven to 350ºF. In a large bowl, whisk the eggs with the brown sugar well. Add the maple syrup, corn syrup, melted butter and salt and whisk well to combine. Stir in the pecans. Pour the filling into the chilled tart dough and place the pan on a rimmed baking sheet to catch any drips.
3. Bake for 40 minutes, until filling is slightly puffy looking and set in the middle. Remove and transfer to a cooling rack to cool completely before serving. Serve as is or with a dollop of whipped cream on top or a scoop of vanilla ice cream.
4. Tart can be made 1 day ahead and left at room temperature, covered loosely with foil.
5. Leftovers (if there are any) can be stored in an airtight container or well wrapped in the refrigerator for a few days.
Enjoy!
Note: Recipe adapted from a 2007 issue of Bon Appetit Magazine.