Foolproof Parker House Rolls

So, you’d like to make homemade rolls for the holiday next week but you’re feeling a little intimated. Or maybe you make the same rolls year in, year out and you’re looking to change things up. Or maybe you just love Parker House rolls. Whatever the reason, these classic little mini rolls are sure to please and fun to make!
Before we talk about the virtual foolproofness of these (is that a word?), let’s talk about what a Parker House roll actually is. These first appeared way back in the 1870’s when, as most brilliant things are, they were accidentally “invented” at the Parker House Hotel in Boston. Apparently, an angry chef threw unfinished rolls into the oven and the result are these buttery, delightful, little folded rolls.
And while they look complicated and fancy, they are in fact, incredibly forgiving. Every single time I’ve made these, I’ve done something wrong and the rolls have still turned out just right. The first time I cut the dough pieces wrong, another time I forgot to warm up my vegetable shortening (I keep it in the freezer) another time I forgot to add the last half cup of flour and added it in as I kneaded the dough and the rolls were still perfect. These guys are indestructible! I I promise you can do it. Here’s how:
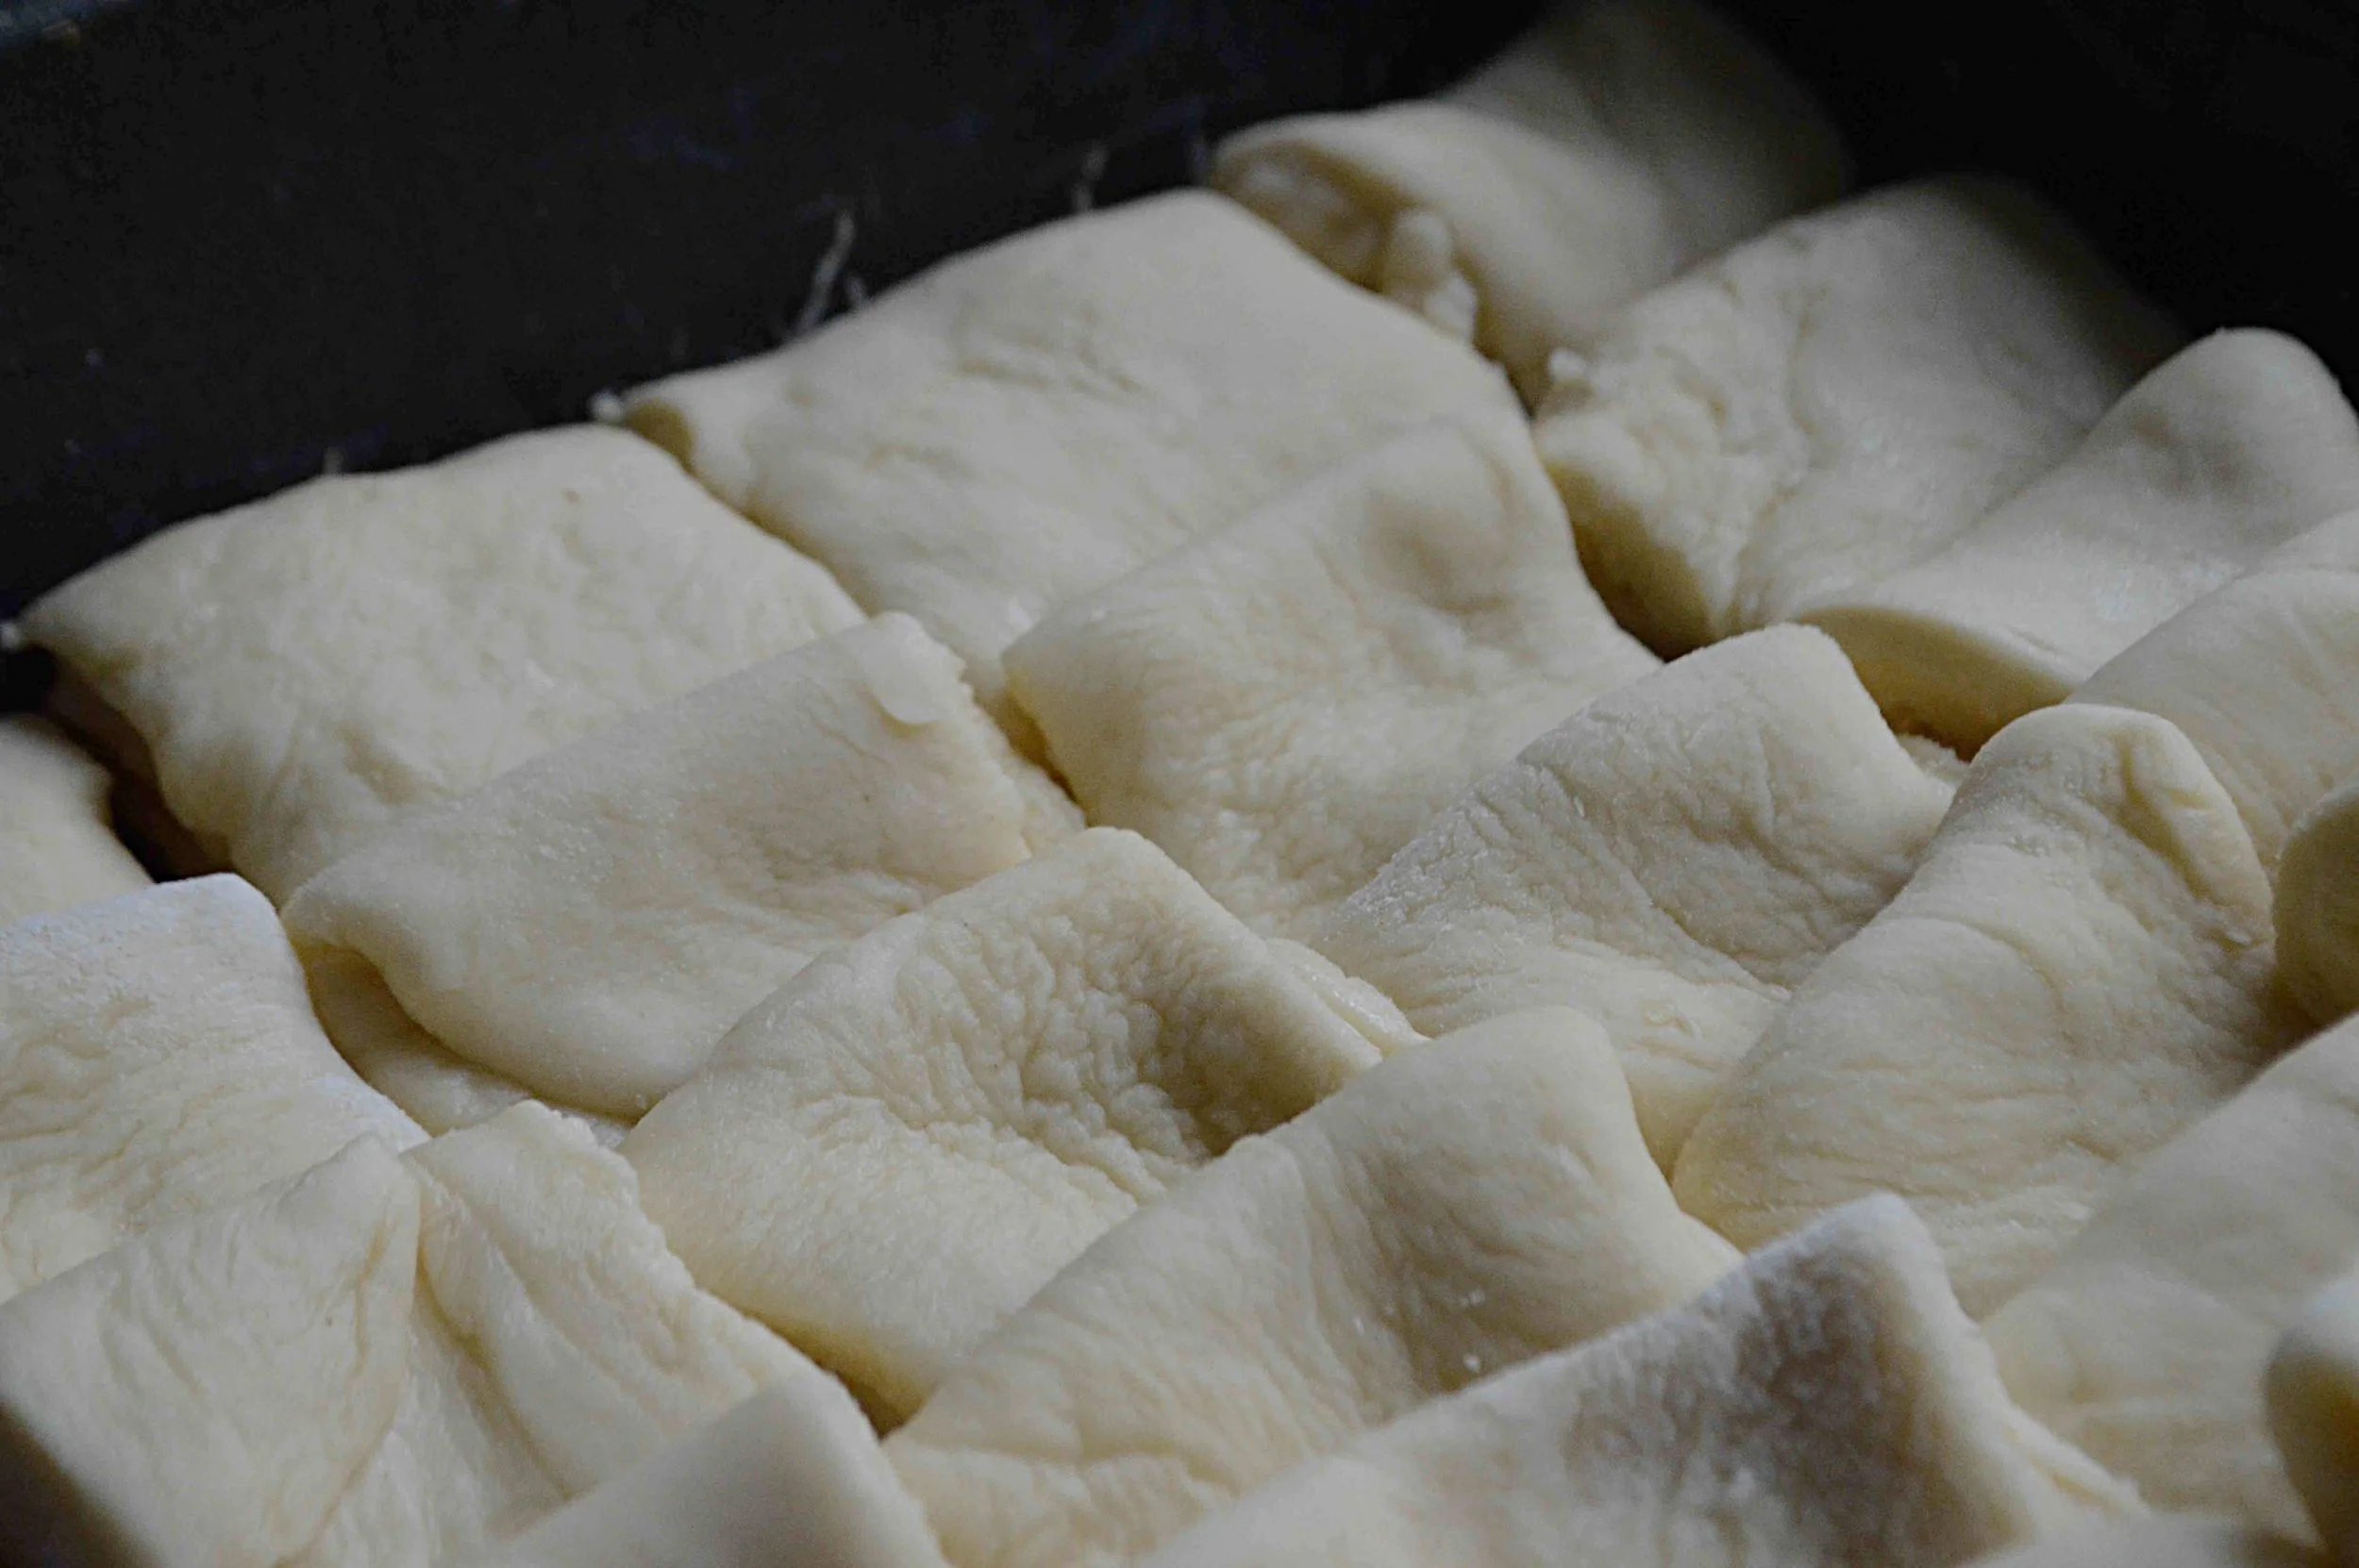
Once the dough has risen and you’ve punched it down, you divide it into four equal pieces and then roll out each piece into a longish rectangle. Then you use a ruler to cut that rectangle into three even strips.

Next you cut each strip into three even pieces and brush half of each piece with a little melted butter,

And fold each piece over in half so that the dough without the butter extends over the edge just a bit.

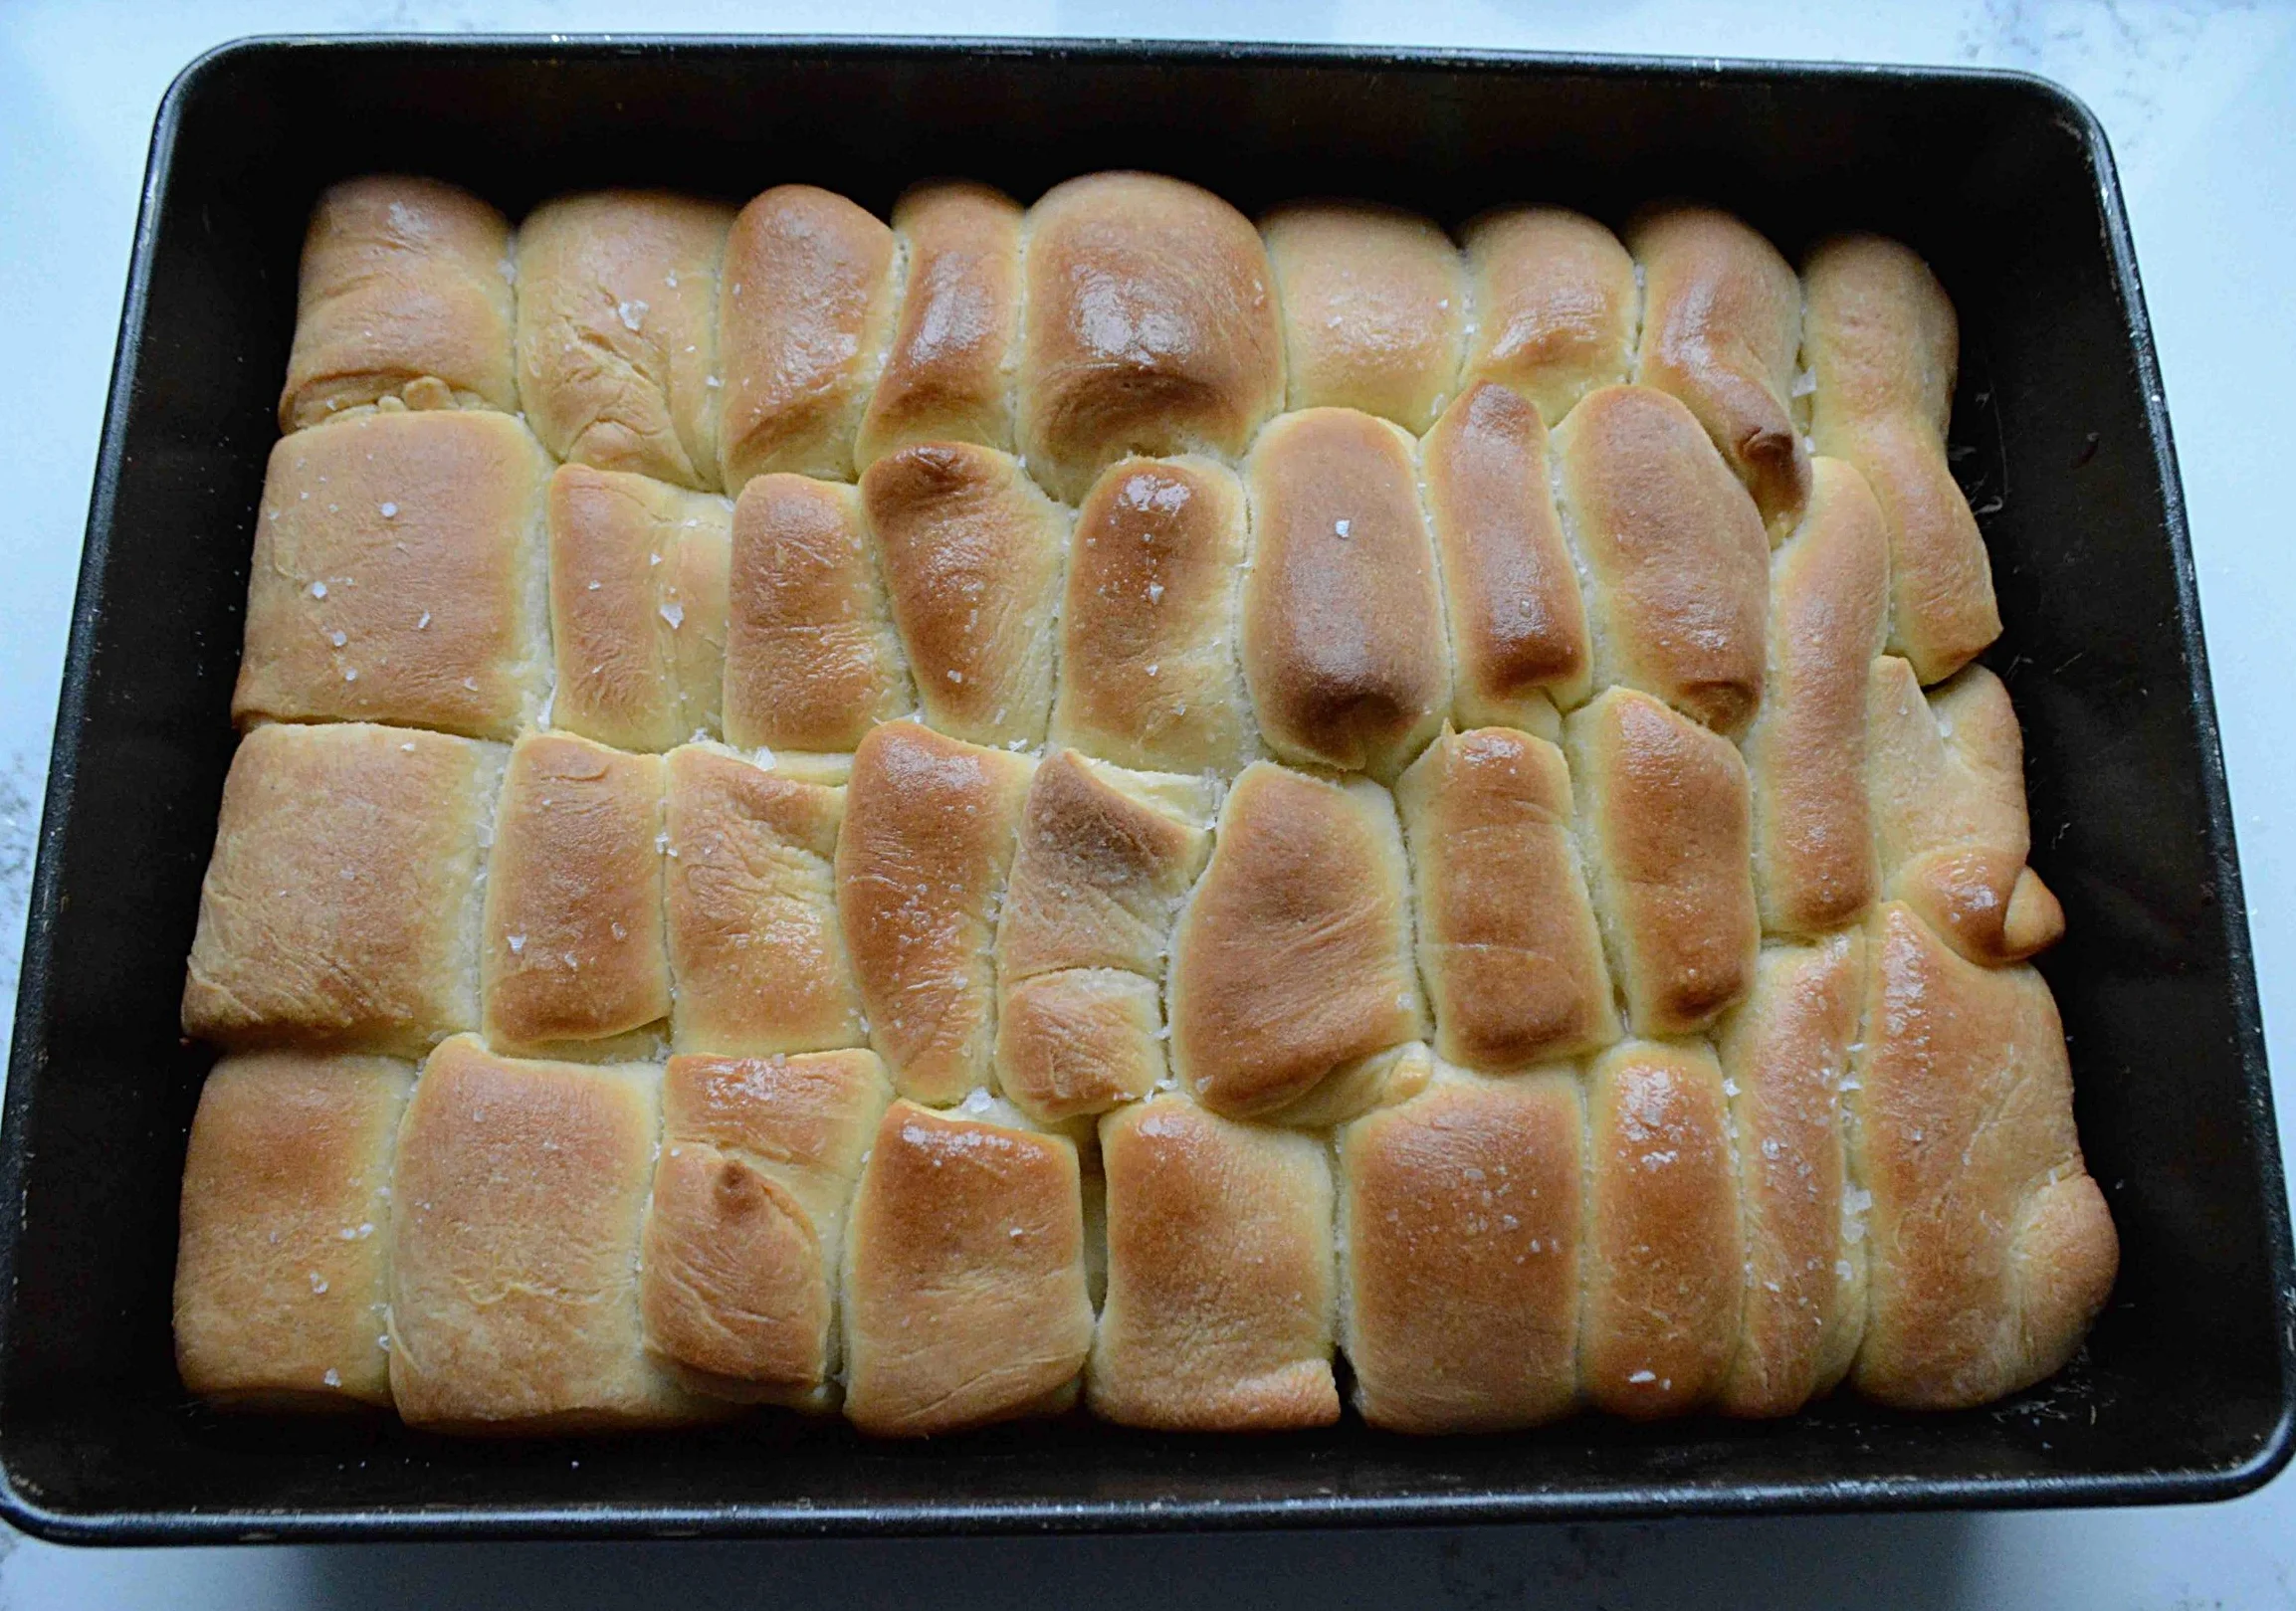
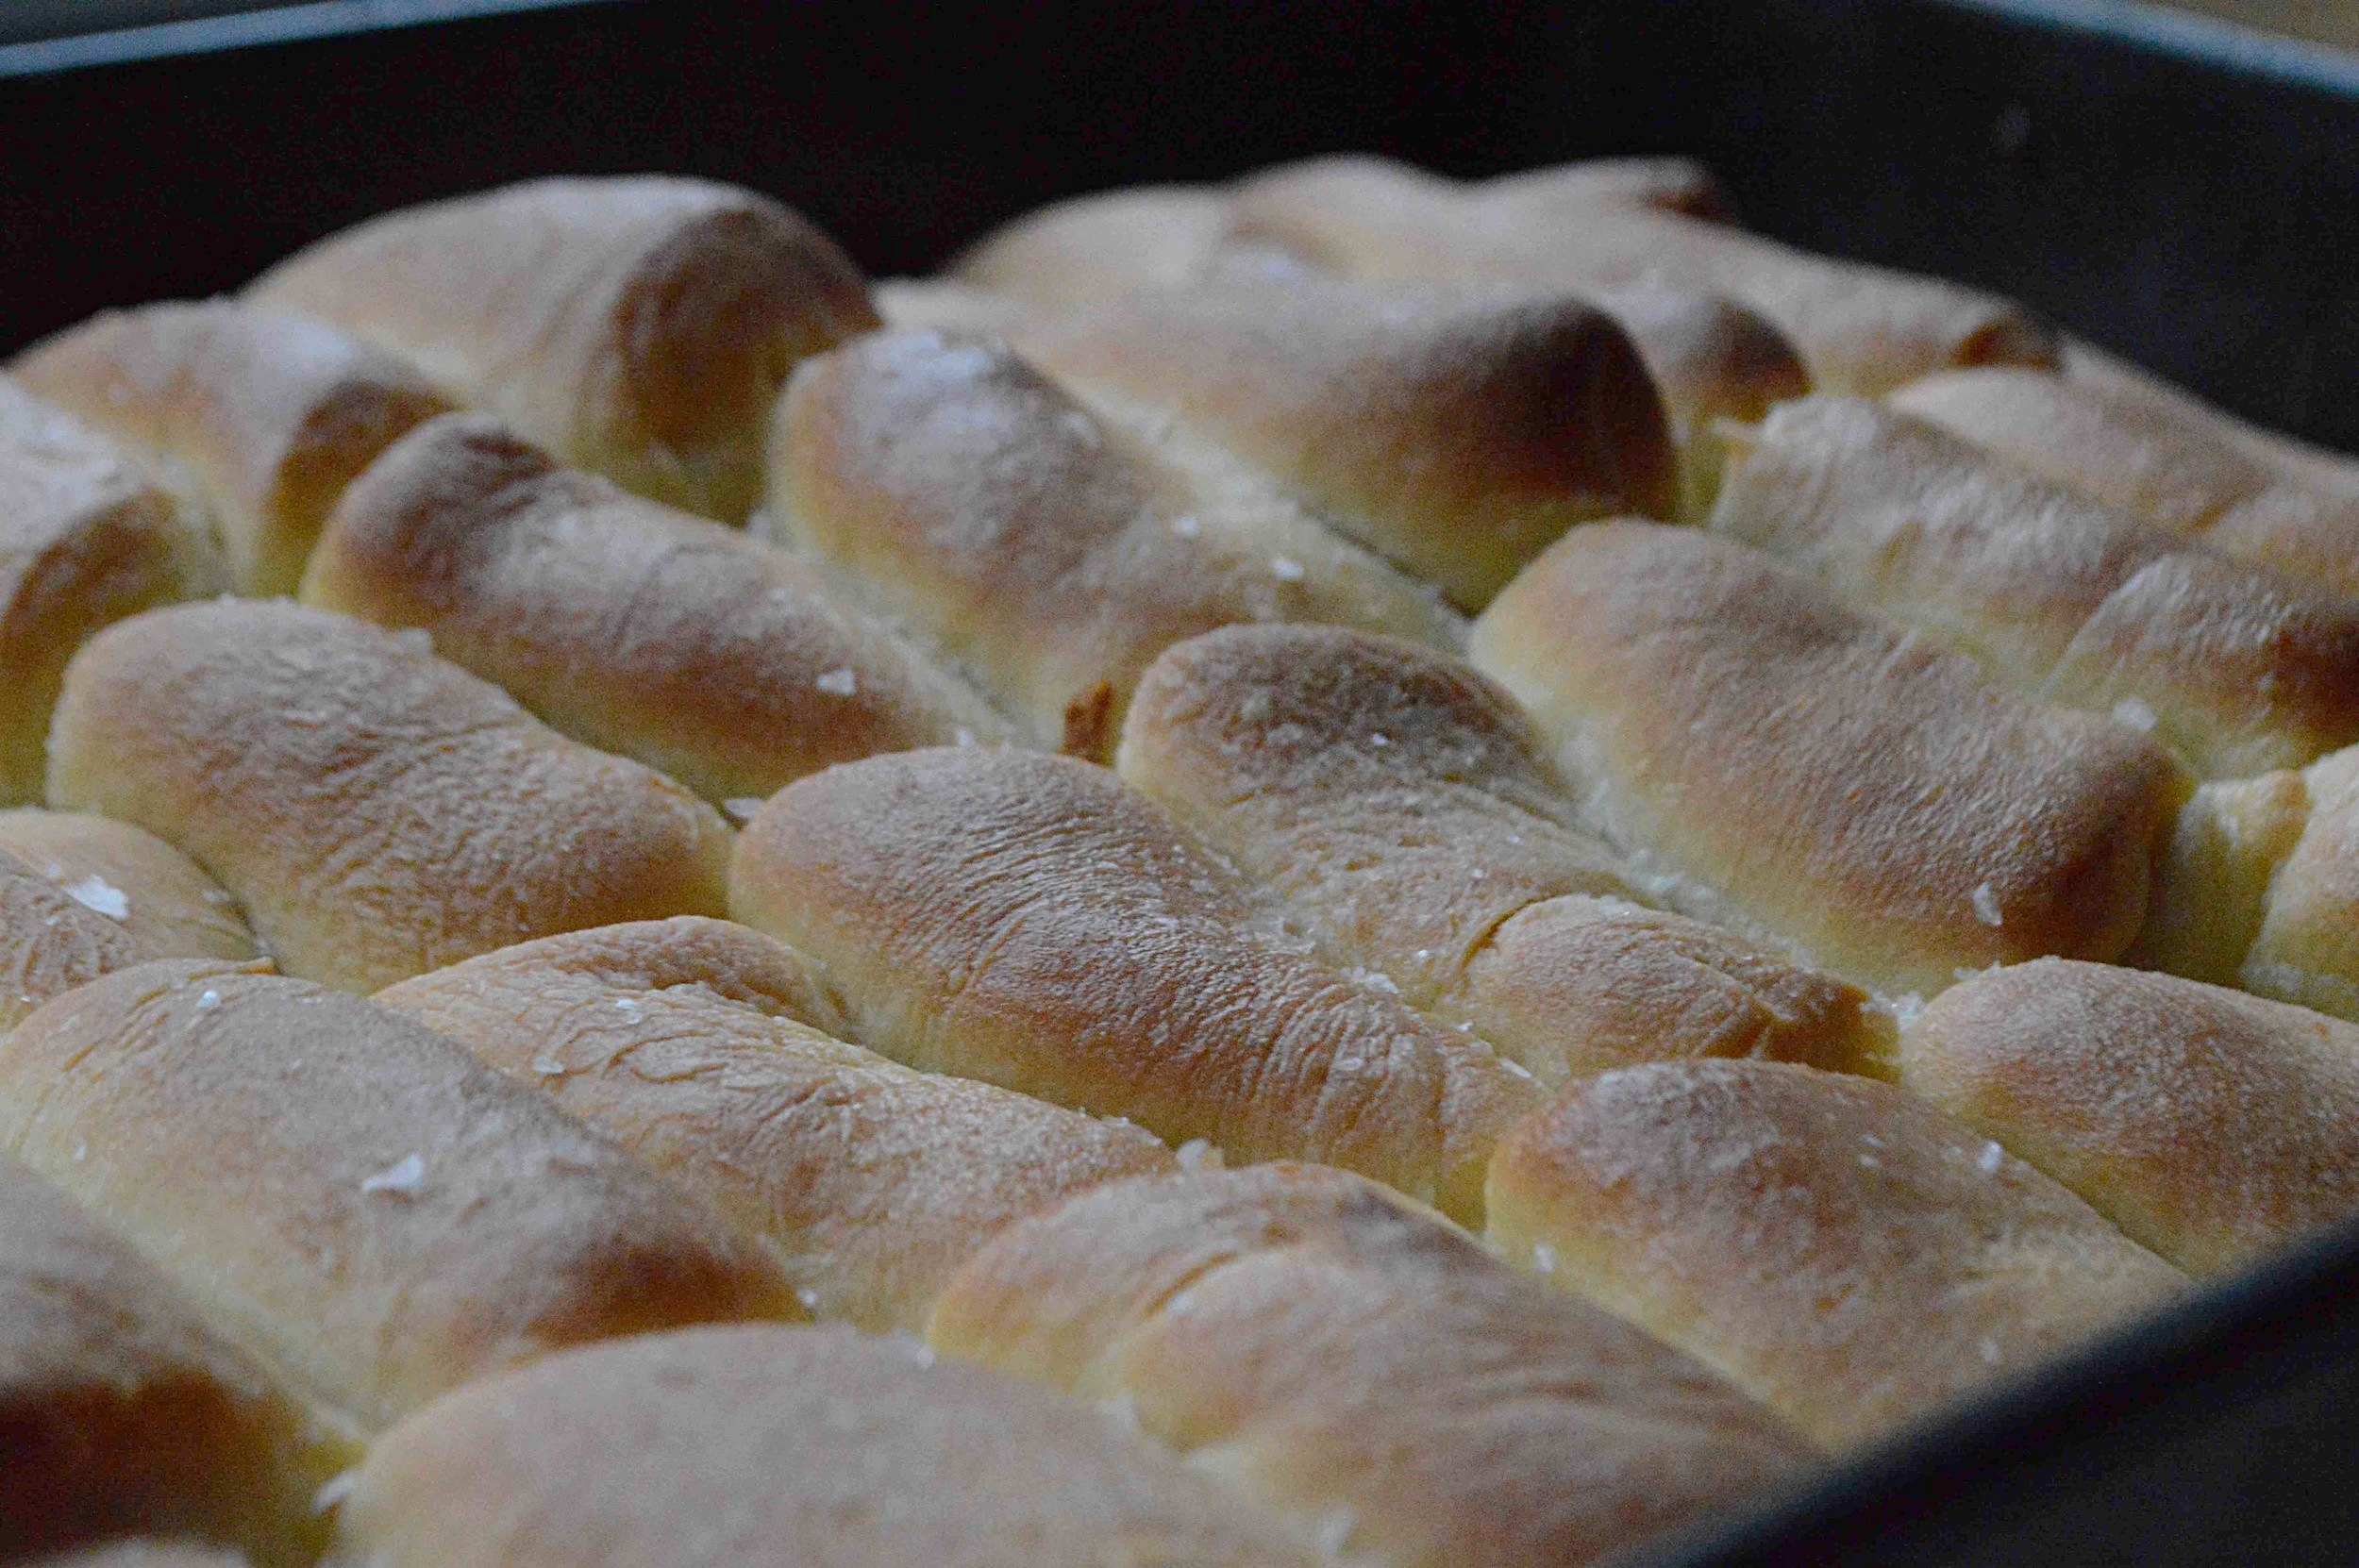
Then you line those pieces in the pan, shingling them as you go and repeat the whole process with the rest of the dough, brushing the whole thing with some more melted butter. The whole thing goes into the fridge for a short chill and then you bake.

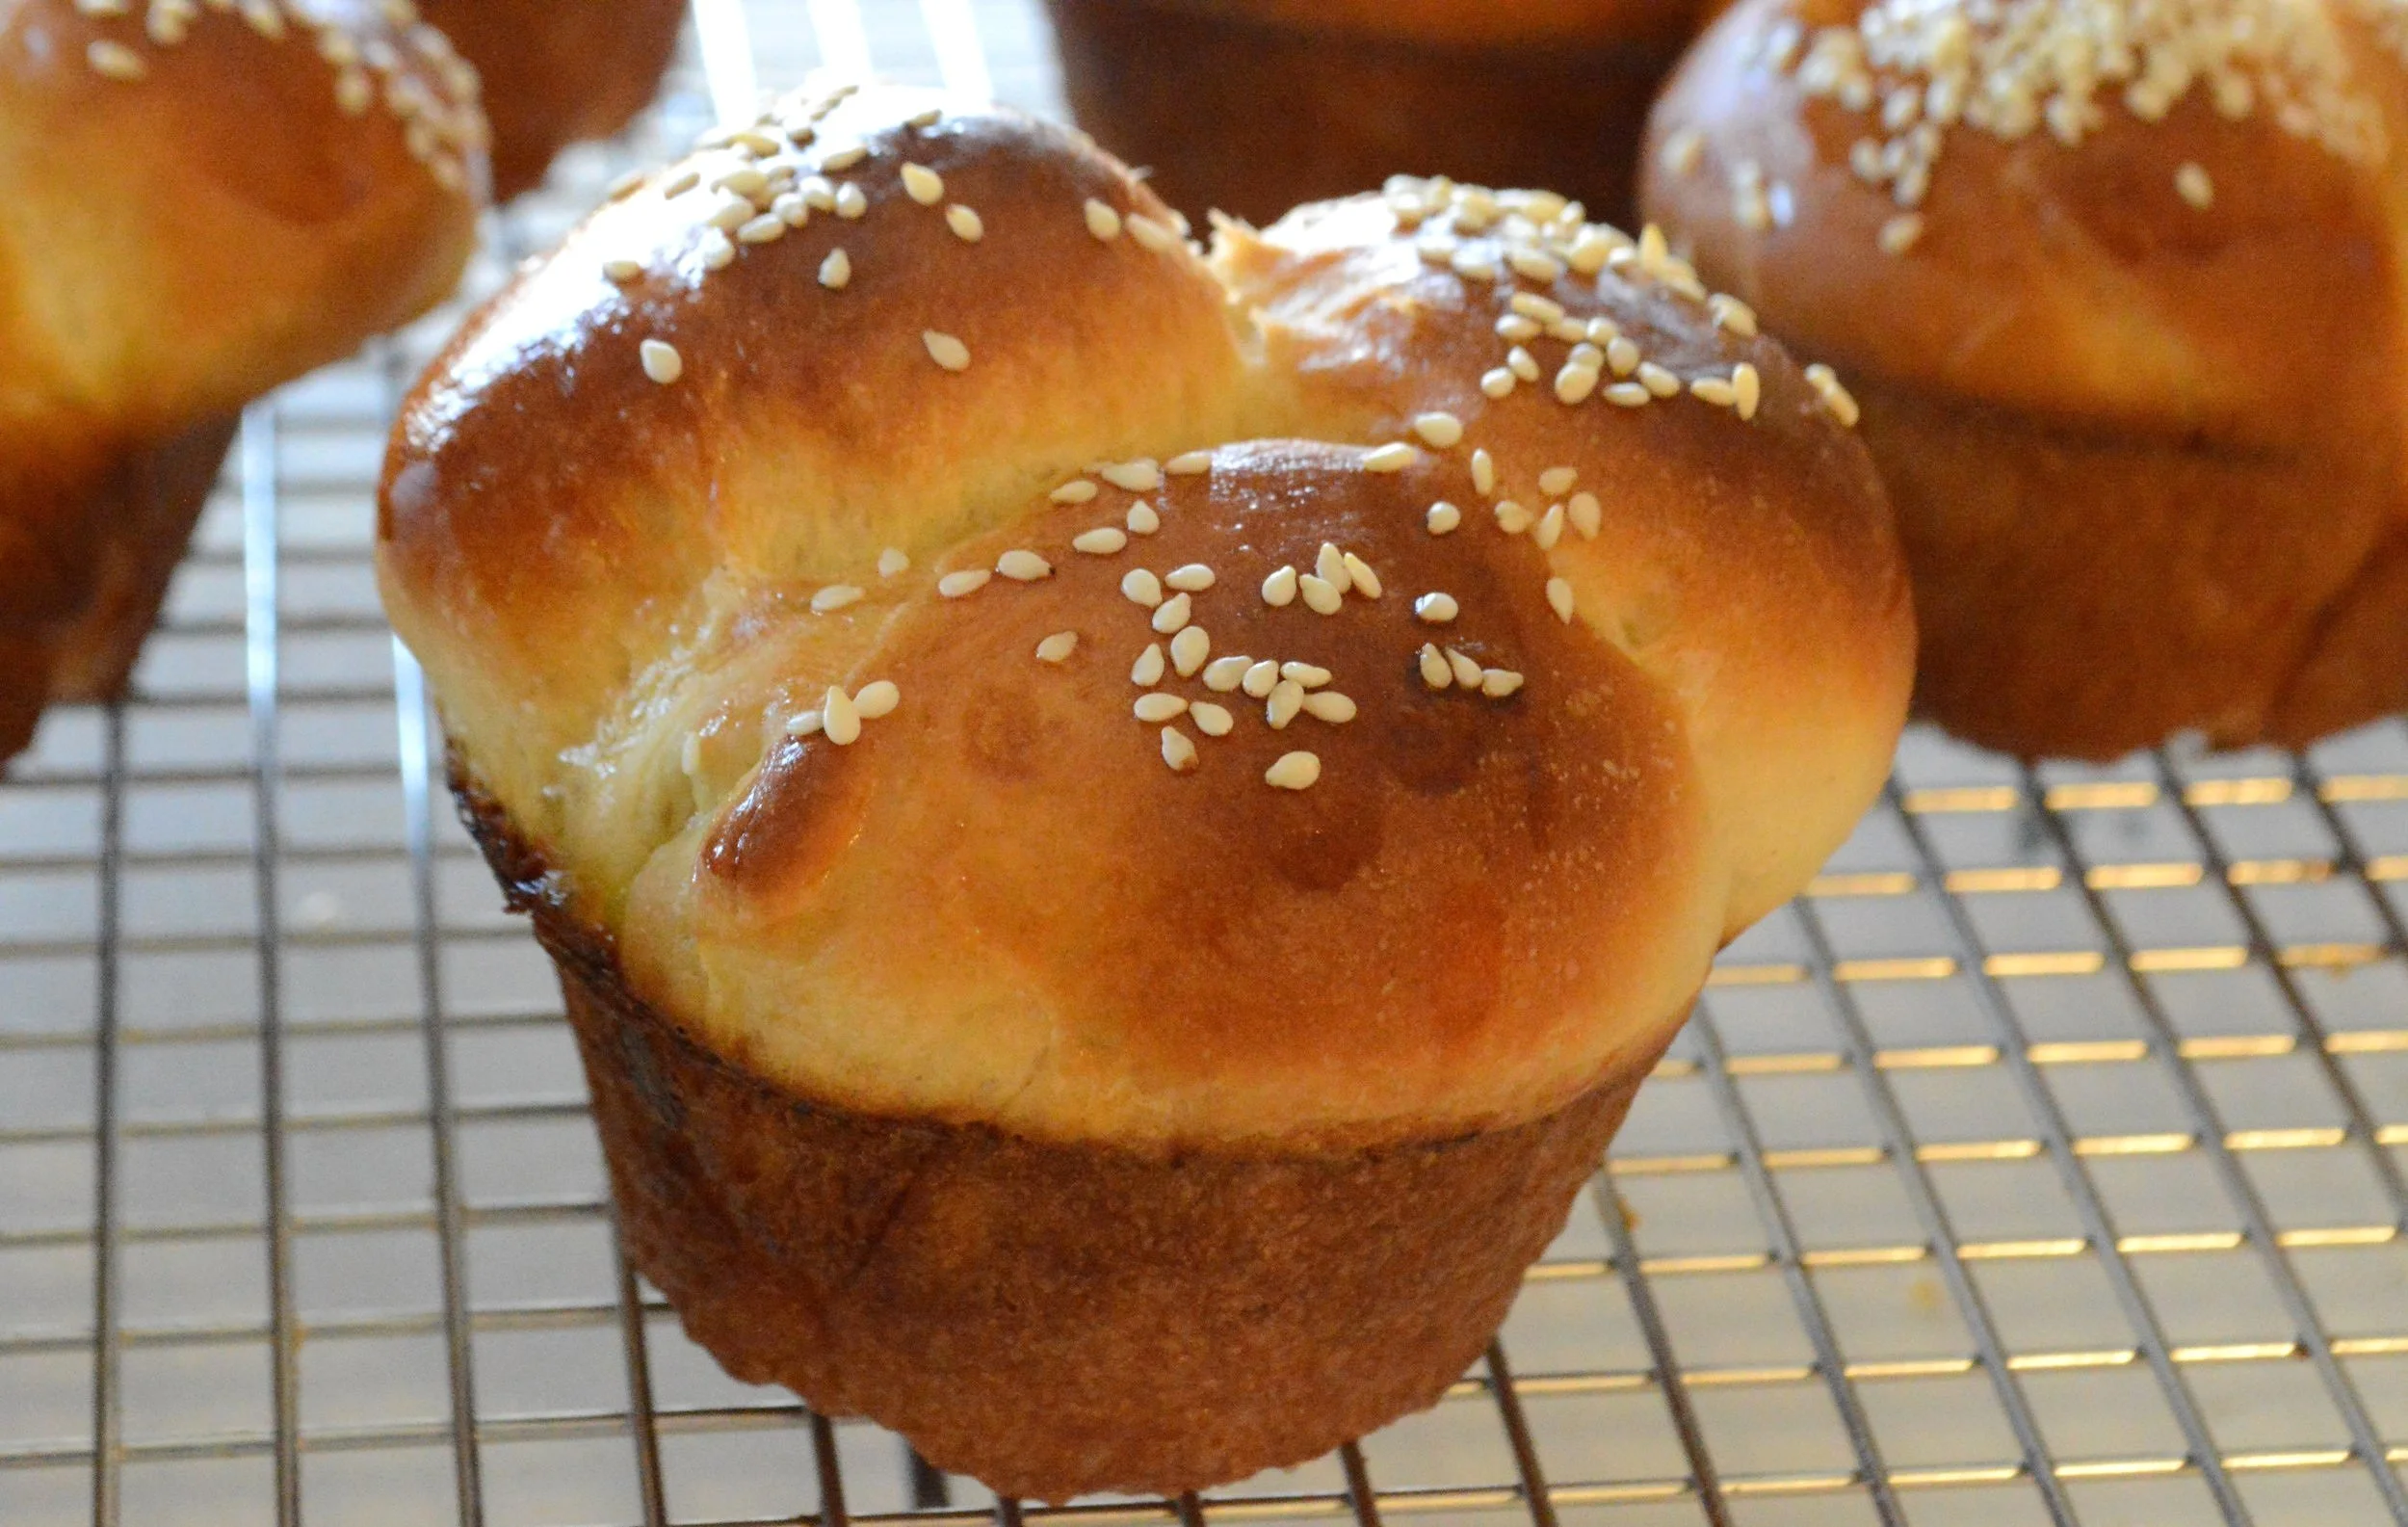
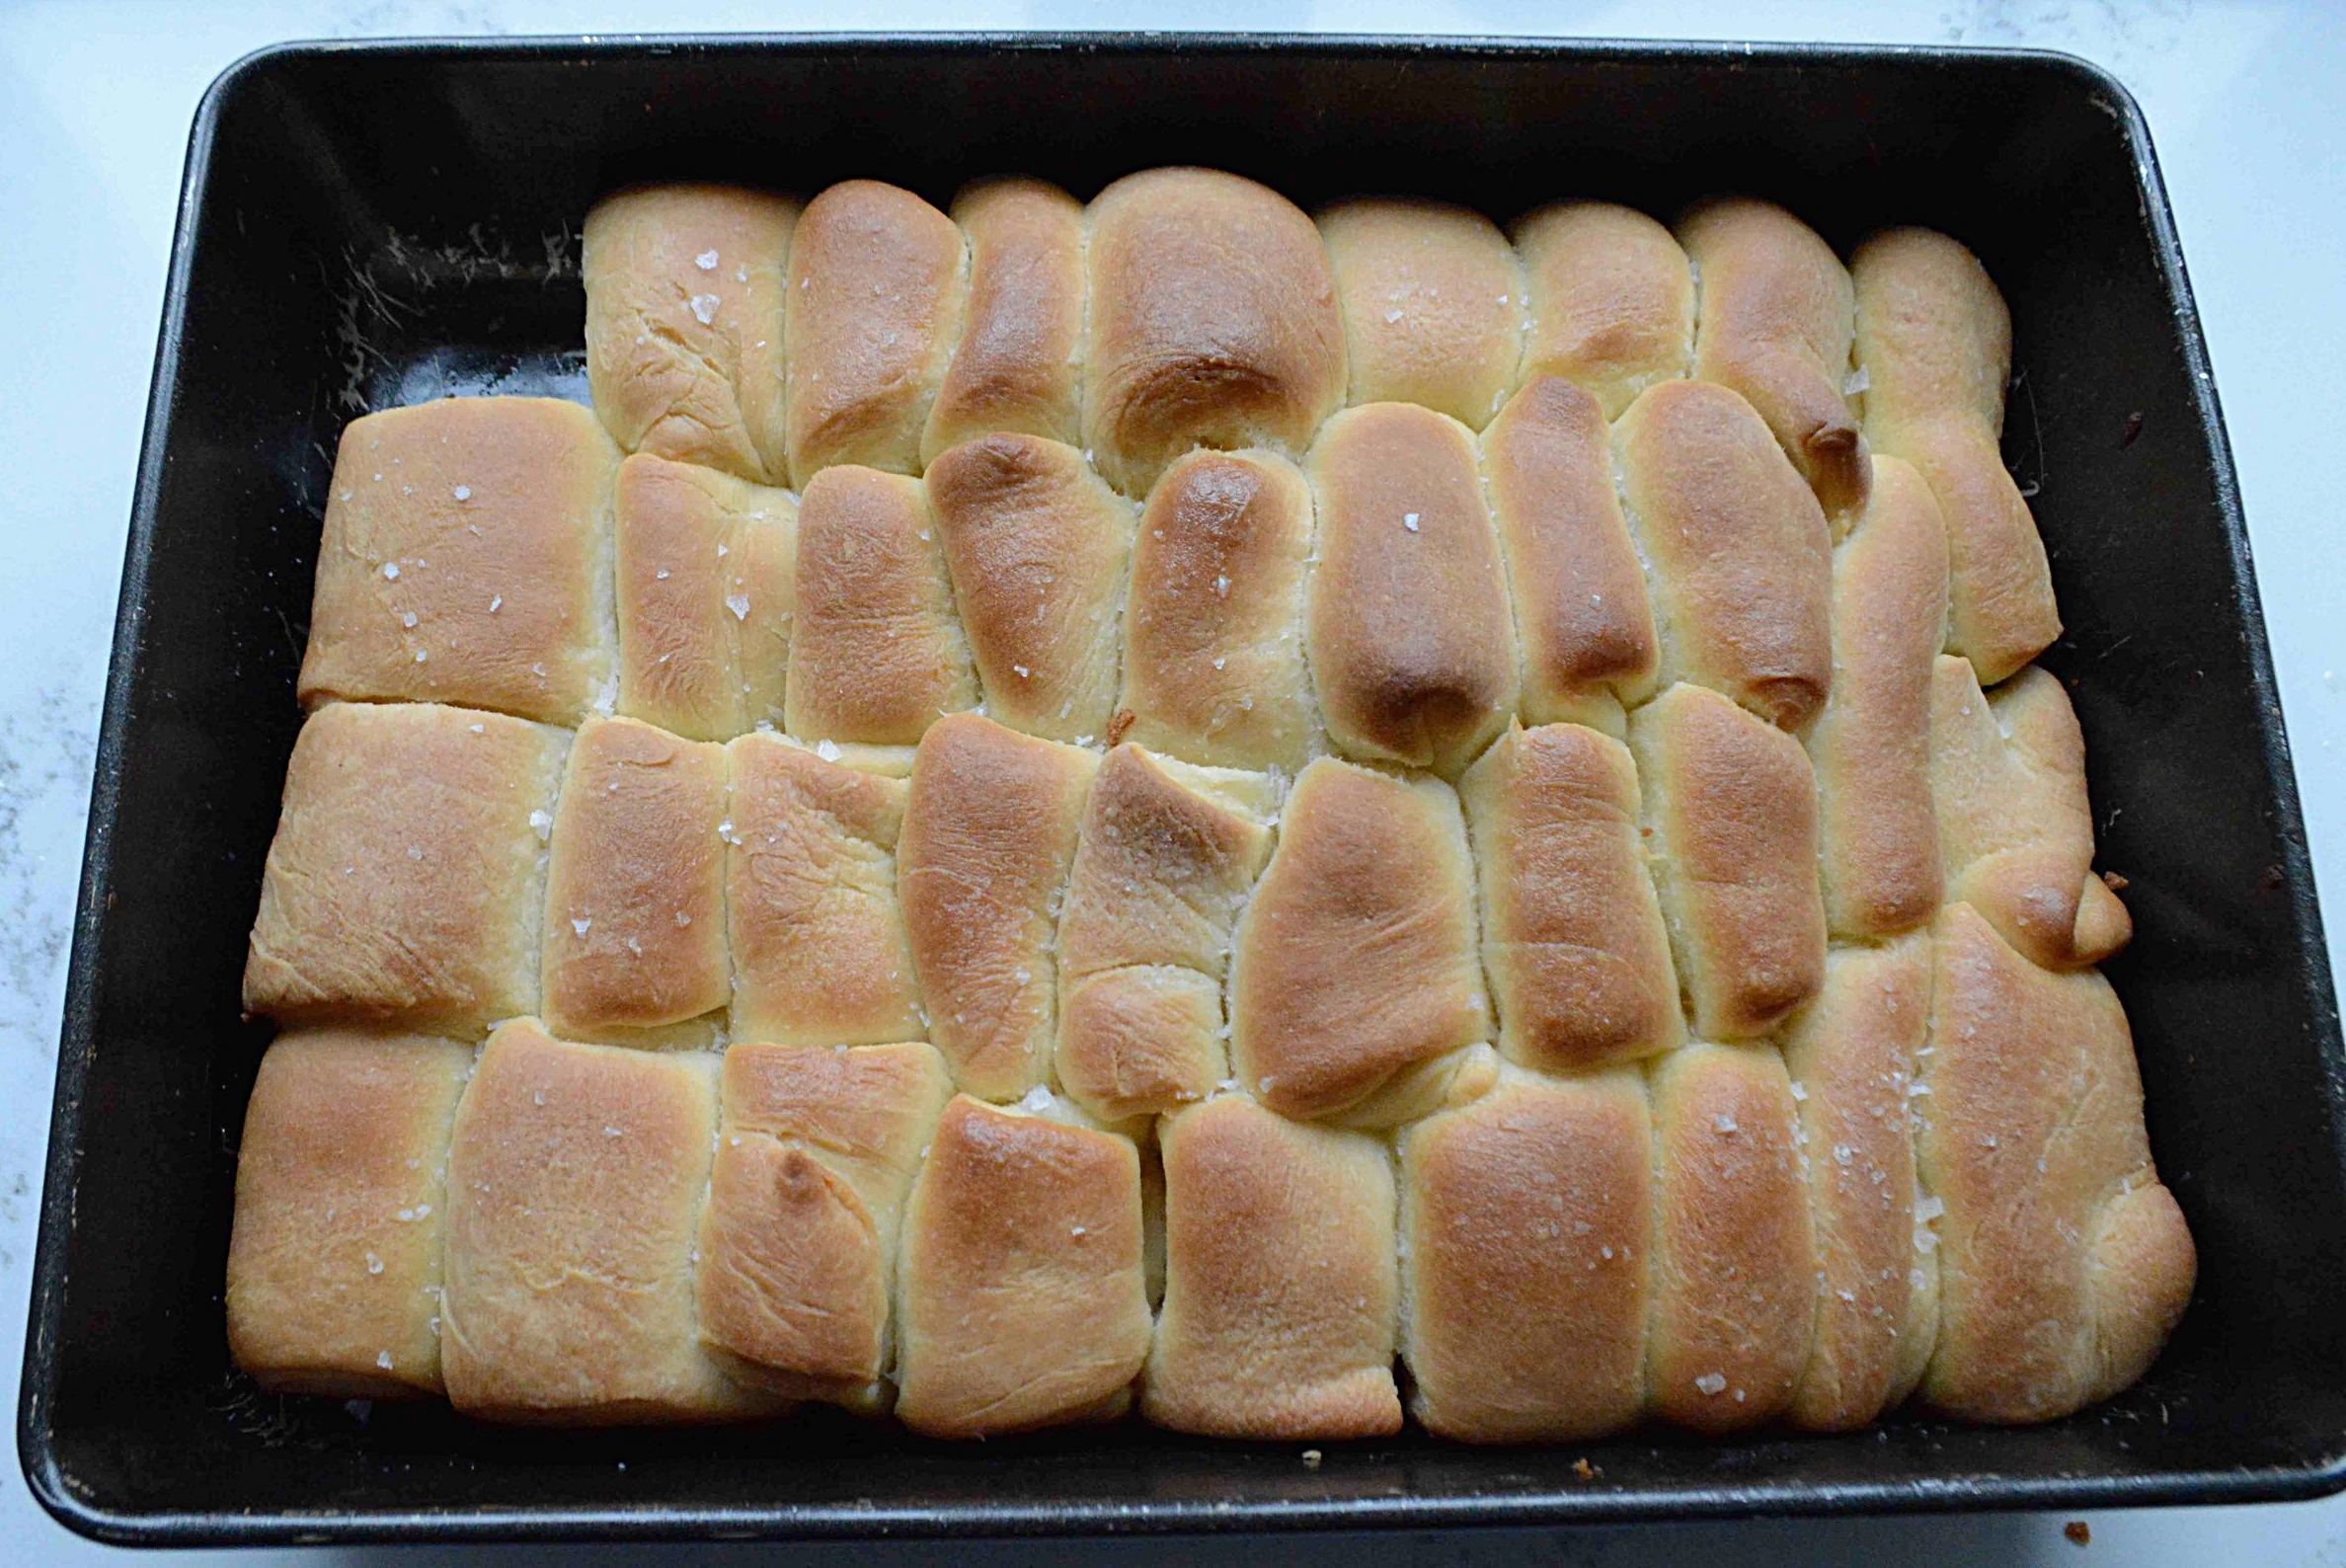
A short while later, with your house smelling like the best bakery in the world, you pull that pan out of the oven, brush on some more melted butter (did I mention these are buttery?) and sprinkle on some flaky sea salt. That’s it!

You can make them early in the day, keep them in the pan and just reheat for a few minutes while you’re setting out all your other dishes, ‘cause these are best when warm. They get sort of fluffy!

Flaky, light and as I think I may have already said, buttery, these are the perfect addition to your Thanksgiving table.
They are also amazing when split open and toasted so you might want to hide a few for breakfast the next day! No matter what you do, you can’t go wrong. In other words, they’re foolproof!!
Foolproof Parker House Rolls
Makes 3 dozen rolls
Prep Time: 20 minutes, plus 2 hours for dough to chill in total and about 15-20 minutes to roll out dough and assemble in pan.
Ingredients
2 1/4 teaspoons active dry yeast (one package)
1/4 cup warm water (110-115ºF)
1 cup whole milk
1/4 cup vegetable shortening (I use Crisco)
3 tablespoons sugar
1 1/2 teaspoons kosher salt
1 large egg, room temperature
3 1/2 cups unbleached, all-purpose flour, plus additional for dusting surface when rolling out
1/4 cup unsalted butter, plus an additional 2-3 tablespoons butter for brushing on rolls at end
Flaky sea salt (like Maldon’s) for sprinkling on baked rolls (optional)
The Recipe
Whisk the yeast with the warm water in a small bowl and let stand 5 minutes. It should look frothy. If it doesn’t, check that your yeast has not expired or that the water was too hot. If so, start again.
While the yeast is sitting, heat the milk in a small saucepan over low heat, until just warm. While milk is heating, mix the shortening, sugar and salt in a large bowl. Pour the warm milk over it and use a whisk to combine—it’s ok if the shortening doesn’t fully melt, but try to break up any big clumps. Now, whisk in the yeast mixture and the egg. Use a wooden spoon to stir in the flour all at once. It will be sticky.
Turn the dough out onto a floured board or counter and flour your hands. Knead for 4-5 minutes, adding a bit more flour as needed if it’s really sticky, until the dough is smooth and forms a ball. Lightly oil a bowl and place the ball of flour into it, turning to coat. Cover the bowl loosely with plastic wrap and let sit in a warm spot for 1 1/2 hours, until doubled in bulk. No need to wash the board as you will be using it again.
When dough has risen, preheat oven to 350º. Melt the 1/4 cup butter. Use a pastry brush to brush some of the melted butter all over a 9x13-inch baking pan and set aside.
Remove the plastic wrap and punch down the dough in the bowl. Transfer the dough to the floured board and use a sharp knife to cut into 4 equal pieces. Working with one piece at a time, use a rolling pin to roll out the dough into a 12x6-inch rectangle. Use a ruler to make three 2-inch wide strips. Now cut each strip into 3 equal pieces, so that you have 9 pieces of dough. Brush half of each piece with a little melted butter and fold the unbuttered side over the buttered side so that about 1/4 of the dough hangs over. Place the pieces in the prepared pan, with the folded edge against the short edge of the dish—you will wind up eventually with 9 rows of 4. Shingle the rows as needed to fit. Repeat with the remaining 3 pieces of dough. Brush the tops of the rolls with some more melted butter, cover loosely with plastic and chill for at least 30 minutes and up to 6 hours.
Bake rolls for 25-35 minutes, until deeply golden. Right before rolls are done, melt the remaining few tablespoons of butter and brush the tops of the rolls immediately upon removing the pan from the oven. Sprinkle a little of the flaky sea salt over the top. Let cool a bit, pull apart and serve. These are best on the day you make them but you can definitely make them the day ahead, leave in the pan, cover well and chill. Then reheat in a low oven before serving. Leftovers are great toasted.
Enjoy!
Note: Recipe adapted from an old issue of Bon Appetit Magazine.